Table of Contents
Advertisement
Advertisement
Table of Contents

Related Manuals for D.C. Athletics Start 2 Run

Summary of Contents for D.C. Athletics Start 2 Run
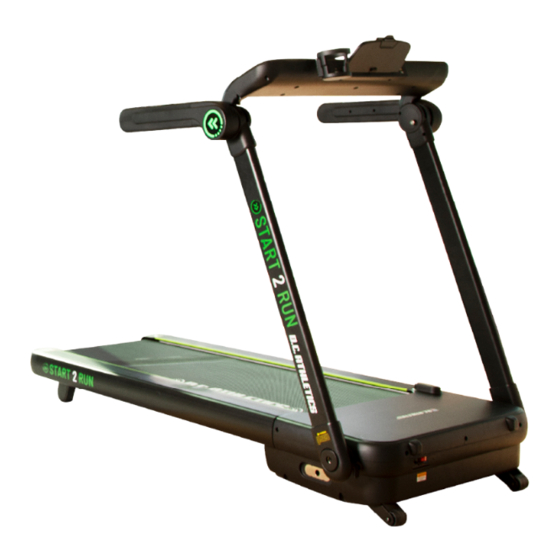
- Page 1 Start 2 Run MANUAL...
- Page 2 WARNING Read all instruction carefully before use this product. Retain this owner’s manual for the future’s reference: ----When using this treadmill, keep attaching the safety pull pin rope to your clothes. ----When you are running, keep your hand swinging natural, stare frontward, never look adown at your feet. ----Add the speed step by step when running.
- Page 3 IMPORTANT SAFETY PRECAUSTION 1. Plug the power cord of the treadmill directly into a dedicated grounded circuit. This product must be grounded. If it has breakdown, grounding provides a path of least resistance for electric current to reduce the risk of electric shock. 2.
-
Page 4: Assembly Steps
replaced immediately by a qualified electrician – do not attempt to change or repair these yourself. 17. If the supply cord is damaged, it must be replaced by the manufacturer, its service agent or similarly qualified persons in order to avoid a hazard. 18. - Page 5 UNFOLDING MACHINE ASSEMBLY STEP TWO: 1. Take out T-Wrench (7) from main frame(2) (Figure 1 show). Then loose Hexagon socket head cap screws (68) with T-Wrench (7) in counter-clockwise until it can't rotate any more. 2. Hold on the B with two hands and lift up the upright tubes (3L/R) in the direction of arrow A. Then lock Hexagon socket head cap screws (68) in clockwise on both sides.
- Page 6 UNFOLDING MACHINE ASSEMBLY STEP THREE: 1. Turn down Handrail (5L/R) in the direction of arrow E until it can’t turn any further. (Figure 3 show) 2. Turn up Computer frame (4) in the direction of arrow D until Positioning pin (12) pop up automatically to fasten Computer frame (4) .
- Page 7 UNFOLDING MACHINE ASSEMBLY STEP FOUR: 1. Press the PUSH button on ipad holder (F), then insert ipad holder (F) to the ipad holder bracket(42). 2. Insert the water bottle holder (40)to the G of the Computer frame (4)
- Page 8 FOLDING MACHINE ASSEMBLY STEP FIVE: 1. Press the PUSH button on ipad holder (F), then pull out ipad holder (F) from ipad holder bracket(44) and keep it well. 2. Take off the water bottle holder(40) from the Computer frame (4)
- Page 9 FOLDING MACHINE ASSEMBLY STEP SIX: 1. Press Positioning pin (12) and then turn Computer frame (4) in the direction of arrow G until it can’t turn any further. (Figure 4 show) 2. Turn up Handrail (5L/R) in the direction of arrow H. (Figure 5 show)
- Page 10 FOLDING MACHINE ASSEMBLY STEP SEVEN: 1. Take out T-Wrench (7) from main frame(2) (Figure 6 show). Then hold your hands on upright tubes and loose Hexagon socket head cap screws (68) with T-Wrench (7) in counter-clockwise until it can't rotate any further. 2.
- Page 11 FOLDING MACHINE ASSEMBLY STEP EIGHT: After folding, machine should store horizontally as shown in the following figure. If there are enough space for storage, you also can push it under a desk or bed. Note: Prohibit vertical storage. WALL...
-
Page 12: Grounding Methods
GROUNDING METHODS This product must be grounded. If it should malfunction or breakdown, grounding provides a path of least resistance for electric current to reduce the risk of electric shock. This product is equipped with a cord having an equipment-grounding conductor and a grounding plug. The plug must be plugged into an appropriate outlet that is properly installed and grounded in accordance with all local codes and ordinances. -
Page 13: Technical Parameter
TECHNICAL PARAMETER ASSEMBLY SIZE(mm) 1715x905x1280 POWER AS ORDER MAX OUTPUT 1715x905x325 AS ORDER FOLDABLE SIZE(mm) POWER RUNNING SURFACE 460X1300 AS ORDER INPUT CURRENT SIZE(mm) 67KG SPEED RANGE 1.0-16 KM/H NET WEIGHT MAX WEIGHT 120KG INCLINE 0-15% OPERATION INSTRUCTIONS... - Page 14 Buttons 1.1. Activation The activation will be initiated after a three seconds count-down 1.2. Programs 14 programs, 3 customization U1-U3, HRC1-HRC3, FAT, 3 countdown models and 1 manual model 1.3. Safe Lock 1. Once the safe lock pulled off, the display will be replaced with “---” and the treadmill will stop instantly, sounding the alarm with constant buzzing.
- Page 15 treadmill starts operating, they only function to increase/decrease incline level at a 1 level interval, but such an interval will enlarge exponentially once the buttons are held for more than 2 sec. ⑦ Express Speed Control: setting speed at 3km/h, 6km/h and 9km/h directly. ⑧...
- Page 16 PULSE: 50 – 200 (BPM) INCLINE:0 – 15% Heart Rate Sensor When the treadmill is powered, users can hold the sensors on both handles to gain a heart rate. To improve the accuracy, please allow at least 30 seconds reaction time and test it when the treadmill is stationary. The value will be between 50-200 and it only serves as a reference Body Fat Press...
- Page 17 proceed to next periods. The setting will be automatically saved, and accidents such as a power outage will not remove the setting. 2、Customization selection and start Pressing “ ”button repeatedly until U1, U2 and U3, then users can set time duration and press“start”. Parameter setting in the countdown models The default time countdown setting starts with 30:00 min, ranging from 5 min to 90 min with a 1 min interval.
- Page 18 Attachment Each program will be divided into 20 periods and each period is comprised of equal amount of time. Below is the 14 program’s work chart Time Set time/20 =specific time for each period Program SPEED INCLINE SPEED INCLINE SPEED INCLINE SPEED INCLINE...
- Page 19 B: target heart rate: (220 minus age)*0.6 C: target heart rate is changeable, ranging from 0.45 to 0.75 (220 minus age) D: maximum heart rate: (220 minus age) 2.Speed A: change sequence, HRC detects heart rate every 30 sec B: If the user’s heart rate is lower than target heart rate by 30 times/min, then speed increases by 2 km/h C: if such a discrepancy is within 1-29 times/min, then speed increases by 1 km/h D: Vice versa, if the user’s heart rate is higher than target heart rate, the speed decreases and the same rule applies 3.
- Page 20 1. Open “sport show” APP, Search for devices Connect to your devices Choose Mode and Scene(or Quick Start) Click Start Music bluetooth: when the machine power on, open the mobile phone bluetooth, search and connect the signal from treadmill, The music from mobile phone can be played through treadmill.
-
Page 21: Exercise Instructions
Hibernate If the treadmill stays in standby model for more than 10 mins, it will hibernate Shut down Users can power off the treadmill with the switch off button at anytime, and such a move won’t damage the treadmill. Error Code Error Code Error Description Solution... -
Page 22: Maintenance Instructions
This stage should last for a minimum of 12 minutes though most people start at about 15-20 minutes 3. The Cool Down Phase This stage is to let your Cardio-vascular System and muscles wind down. This is a repeat of the warm up exercise e.g. -
Page 23: Walking Belt And Deck Lubrication
distance normally. And the gap between the right and left distance should be no more than 5mm. ● If the belts off the track to the left side, please screw the left adjusting bolt clockwise slowly, noticing the change of the deviating distance, until center the belt. -
Page 24: Exploded Drawing
EXPLODED DRAWING... -
Page 26: Parts List
PARTS LIST DESCRIPTION Qty No. DESCRIPTION Incline frame Square end cap Main frame Belt 3L/R Upright tube 1 pr. Plastic mat Computer frame Power cord 5L/R Handrail 1 pr. Cross pan head tapping screws ST4*25 Incline frame fastener 2 Hexagon socket pan head bolt M10*60 T-Wrench Hexagon socket pan head bolt M10*40 Front roller... - Page 27 Computer panel upper cover Nylon nut M6 Water holder Circuit board Computer lower cover Shortcut key ipad holder bracket Computer connecting wire ipad holder upper cover Extension wire ipad holder lower cover Controller wire ipad holder clip DC motor Safety key bracket Incline motor Safety key module Switch...
Need help?
Do you have a question about the Start 2 Run and is the answer not in the manual?
Questions and answers