
Subscribe to Our Youtube Channel
Related Manuals for Gigaset allrounder


Summary of Contents for Gigaset allrounder
- Page 1 / allrounder You can find the most up-to-date user guide at www.gigaset.com/manuals...
-
Page 2: Table Of Contents
Contents Contents Overview ................4 Safety precautions . - Page 3 Contents Extending the functionality of the phone ..........30 Multiple handsets .
-
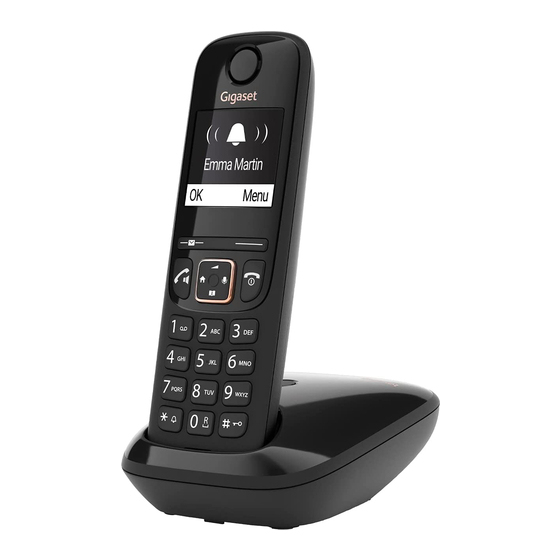
Page 4: Overview
Overview Overview 5 Message key Handset Access to the call and message lists; flashes: new message or new call New messages in the call list / network mailbox list are shown on the display by message New messages. 6 Talk key / Handsfree key Accepting call;... - Page 5 Overview Base without answer machine Registration/paging key Locate a handset (paging): Press briefly Registering handsets: Press and hold Base with answer machine A Volume keys (– = quieter; + = louder) During message playback: adjust the speech volume While the phone is ringing: adjust the ringtone volume B Registration/paging key Locate a handset (paging):...
- Page 6 Overview Symbols used in the user guide Icons Warnings, the non-adherence to which can result in damage to devices or personal injury. Important information regarding function and appropriate handling or functions that could generate costs. Prerequisite for carrying out the following action. Additional helpful information.
-
Page 7: Safety Precautions
If you use a medical device (e.g., a pacemaker), please contact the device manufacturer. They will be able to advise you regarding the susceptibility of the device to external sources of high frequency energy (for the specifications of your Gigaset product see "Technical data"). -
Page 8: Getting Started
Getting started Getting started Package contents • One base, one power adapter, one phone cable • One handset, two batteries, one battery cover • One user guide Models with multiple handsets, per handset: • One handset, one charging cradle with power adapter, two batteries and one battery cover The base and charging cradle are designed for use in closed, dry rooms within a temperature range of +5°C to +45°C. -
Page 9: Handset
Getting started Connecting the base to the router You can also operate the telephone on the analogue connection of a router. Connect the phone jack and connect it to the analogue port of a router Device without answer machine Device with answer machine Any echoes can be reduced by enabling XES Mode ( p. - Page 10 Getting started Setting up the handset for use The display is protected by a plastic film. Please remove the protective film. Inserting the batteries Only use rechargeable batteries, as this could otherwise result in significant health risks and personal injury. For example, the outer casing of the batteries could be damaged beyond repair or the batteries could explode.
- Page 11 Getting started Setting date and time Set the date/time so that the correct date and time can be assigned to incoming calls and to enable the alarm to be used. Menu Settings Date/Time Enter the date (day, month and year) in 6-digit format Enter the time (hours and minutes) in 4-digit format (Display: Saved)
-
Page 12: Using The Phone
Using the phone Using the phone Switch the handset on and off Switching on: When the handset is switched off, press and hold the End call key Switching off: When the handset is in idle mode, press and hold the End call key If you place a deactivated handset into the charging slot, it will automatically activate itself. -
Page 13: Display
Using the phone Display Display keys The display keys perform a range of functions depending on the operating situation. Menu Current display key functions Display keys Press the display key . . . Function shown in display above. Open the main menu / submenu Menu Confirm menu function / save entry Menu... -
Page 14: Menu Navigation
Using the phone Battery charge level 0 - 10% 11 - 33% 34 - 66% > 66% symbol is shown at the front during the charge process. Flashing Battery almost flat (less than 10 minutes of talk time) Menu navigation The functions of your phone are displayed in a menu comprising several levels. -
Page 15: Making Calls
Making calls Making calls Making a call Enter the number Press the Talk key . . . The number is dialled Press and hold the Talk key . . . The dial tone can be heard Enter the number Ending a call / cancelling dialling: Press the End call key You can automatically prefix every number with a network provider prefix (Preselection). -
Page 16: Accepting A Call
Making calls Accepting a call The handset indicates an incoming call by ringing and by a display on the screen. Press the Talk key Function Auto Answer enabled: Simply take the handset out of the charging slot Enabling function Auto Answer: Menu Settings Handset... - Page 17 Making calls Calling all HS OK or . . . All registered handsets are called. You speak to the first internal subscriber to pick up. Ending the internal call: Press the End call key Making an internal consultation call / Forwarding a call Call an external subscriber and transfer the call to an internal subscriber or hold a consultation call with him or her.
-
Page 18: Calling Line Identification
Making calls Calling Line Identification During a call, the caller's number is transferred (CLI = Calling Line Identification) and can be displayed on the recipient's display (CLIP = CLI Presentation). When the caller's number is with- held, it is not show on the called party’s display. The call is made anonymously (CLIR = CLI Restric- tion). -
Page 19: Call/Message Lists
Call/message lists Create list of prefix numbers with preselection Menu Settings Base Preselection With Preselect Select the list entry (1 – 11) Enter (the initial digits of) the prefix number for which the preselection number is to be used Select different list entry as required and enter more numbers Create list of prefix numbers without preselection Menu... -
Page 20: Call List
Call/message lists A change to the setting only becomes effective once the next new message is received. If calls are stored in the network mailbox, you receive a message when the setting is configured (dependent on the network provider). Call list Prerequisite: CLIP Depending on the type of list set, all numbers for the last 25 incoming calls are saved, or only the missed calls are saved. -
Page 21: Directory
Directory Directory The local directory is unique to a handset. Entries can be sent to other handsets however p. 22). Up to 100 phone numbers (max. 22 digits) with associated names (max. 16 characters) can be stored. Open the directory: Press down the control key Creating a directory entry First entry:... - Page 22 Directory Deleting a directory (entry) Deleting a directory entry Select entry Menu Delete Entry Deleting a directory Menu Delete List Confirm deletion with OK Transferring a directory (entry) to another handset The sending and receiving handsets must both be registered with the same base. The other handset and the base are able to send and receive directory entries.
-
Page 23: Local Answer Machine (If Available)
Local answer machine (if available) Local answer machine (if available) Either the handset or the keys on the base are used to personalise settings on and operate the answering machine. The following sections describe operation from the handset. Operation from the keys on the base Overview –... -
Page 24: Operation Using The Handset
Local answer machine (if available) Listening in during recording: Call Screening Handset / Base OK ( = enabled) Disable listening in for the current recording: Press the End call key Setting a different language (if available) You can change the voice prompt language and language of the standard announcement. Menu Answer Machine Language... - Page 25 Local answer machine (if available) Actions during playback Stop playback: Continue playback: Press again Menu Continue Go to the next message: During playback of the info block Go to the start of the previous message: Skip the information block: During playback of the content Go to the start of the current message: Go to the content of the next message: Call back a caller:...
-
Page 26: Operation When On The Move (Remote Operation)
Local answer machine (if available) Operation when on the move (remote operation) You can check and enable your answer machine from any other phone (hotel, pay phone, etc.). The system PIN is not 0000. The other phone has tone dialling (DTMF). Enabling the answer machine Call the telephone connection and let it ring until the announcement Please enter your PIN (approx. -
Page 27: Network Mailbox
Network mailbox Network mailbox The network mailbox is registered with the network provider. Entering a number Menu Answer Machine Net Mailbox Enter the number OK . . . The network mailbox is enabled To enable and disable the network mailbox, use the number and a function code from your network provider. -
Page 28: Additional Functions
Additional functions Additional functions Alarm clock Date and time have been set. Turning the alarm clock on and off Menu Alarm Clock Activation OK ( = turned on) Enter the wake-up time in minutes and second Alarm clock turned on: Instead of the date, the display shows the wake-up time and left of it the alarm clock symbol. -
Page 29: Protection From Undesired Calls
Additional functions Disabling radiation in idle mode The wireless signals of the base are also disabled with the No Radiation setting. Menu Settings Base ECO DECT No Radiation OK ( = Radiation disabled) All handsets registered must support this feature. For speedy set-up of connections for incoming calls, the handset keeps switching to “ready to receive”... -
Page 30: Extending The Functionality Of The Phone
(1 to 4). If internal numbers 1 to 4 are already assigned to other devices, number 4 is overwritten. De-registering a handset You can de-register any other registered handset from any registered Gigaset handset. Menu Settings Handset De-register HS Select the internal user to be de-registered. -
Page 31: Repeater Support
Exit: Briefly press the Register/Paging key on the base Press on a handset Repeater support A repeater increases the receiving range between the Gigaset handset and base. Enabling Repeater mode for the base: Menu Settings Base Additional... - Page 32 Extending the functionality of the phone Operation with a PABX The following settings are only necessary when your PABX requires them ( refer to the PABX user guide). Enter the digits slowly one after the other. Changing the dialling mode Menu The digit for the dialling mode set flashes: 0 = Tone dialling (DTMF);...
-
Page 33: Phone Settings
Phone settings Phone settings Date and time Setting Set the date/time so that the correct date and time can be assigned to incoming calls and to ena- ble the alarm to be used. Menu Settings Date/Time Enter the date (day, month and year) in 6-digit format Enter the time (hours and minutes) in 4-digit format Using the network time... -
Page 34: Audio
Phone settings Contrast Adjust the display contrast on 9 levels. Menu Settings Handset Contrast Select the level OK ( = selected) Audio Call volume Adjust the receiver volume or handsfree function on 5 levels. Menu Audio Settings Handset Volume Earpiece / Speaker . - Page 35 Phone settings Disabling/re-enabling the ringtone permanently When the phone is idle, press and hold the Star key. When the ringtone is disabled, symbol is shown on the display. Deactivating the ring tone for the current call Menu Silent Enabling/disabling advisory and warning tones The handset provides acoustic notification of different activities and statuses.
-
Page 36: Off For Anonymous Calls
Phone settings Setting the time period For the handset: Menu Settings Handset Time Control Settings Off from: Enter the 4-digit time Off until: Enter the 4- digit time For the base (with answer machine): Menu Settings Base Audio Settings Time Control Settings Off from: Enter the 4-digit time... - Page 37 Phone settings Resetting the base A reset disables mode No Radiation, resets individual settings and deletes all lists. The system PIN is reset to the original code 0000. The time and date are not affected. The answer machine (if available) is not ready until after about 15 seconds after the base is reset.
-
Page 38: Service (Customer Care)
Please have your proof of purchase ready when calling. Please note that if the Gigaset product is not sold by authorised dealers in the national territory the product may not be fully compatible with the national telephone network. It is clearly specified on the box near the CE mark for which country/countries the equipment has been developed. -
Page 39: Questions And Answers
Service (Customer Care) Questions and answers If you have any questions about the use of your telephone, please go to www.gigaset.com/service where help is available at any time. The table below contains a list of common problems and possible solutions. -
Page 40: Manufacturer's Advice
Data protection We at Gigaset take the protection of our customers’ data very seriously. It is precisely for this reason that we are ensuring all our products feature "Privacy by Design" as standard. All information we collect is used to make our products as good as possible. -
Page 41: Environment
Our environmental statement We at Gigaset Communications GmbH are aware of our social responsibility. That is why we actively take steps to create a better world. In all areas of our business – from product planning and production to sales and waste of disposal –... -
Page 42: Contact With Liquid
Capacity: 400 - 1000 mAh Handset operating times/charging times The operating time of your Gigaset depends on the capacity of the battery, its age and the way it is used. (All times are maximums). Standby time (hours) 180 / 110* Talktime (hours) Operating time for 1.5 h of calls per day (hours) - Page 43 Technical data General technical specifications DECT standard supported GAP standard supported Radio frequency range 1880 - 1900 MHz Range up to 300 m outdoors, up to 50 m indoors Power supply for base 230 V ~/50 Hz Transmission power 10 mW average power per channel, 250 mW pulse power Ambient conditions for operation +5°C to +45°C, 20% to 75% relative humidity Pin connections on the telephone jack...
- Page 44 Technical data Power adapter for the base Manufacturer Salom Electric (Xiamen) Co. Ltd. Commercial registration number: 91350200612003878C 31 Building, Huli Industrial District, Xiamen, Fujian 361006, P.R. China Salcomp (Shenzen) Co. Ltd. Commercial registration number: 91440300618932635P Salcomp Road, Furond Industrial Area, Xinqiao, Shajing, Baoan District, Shenzen 518125 China Model identifier C707/C769 / C771/C785...
-
Page 45: Menu Tree
Menu tree Menu tree Not all functions described in the user guide are available in all countries or from all network providers. Opening the main menu: Press the display key Menu when the handset is in the idle mode. Alarm Clock Activation p. -
Page 46: Answ. Mach
Menu tree Settings Date/Time p. 33 Handset Language p. 33 Big Dial Font p. 33 Contrast p. 34 Time Control Activation / Settings p. 36 An.Call Silent p. 36 Auto Answer p. 16 Register HS p. 30 De-register HS p. 30 Reset Handset p. -
Page 47: Index
Index Index Calls ....15 making an external call ......16 . - Page 48 Index ..... .5 ......4, 19 Display, answer machine messages .
- Page 49 Index Ringtone ....35 enable/disable time control .......4 On/Off button Ringtone (handset) .
- Page 50 Index ....4 ....... . . 31 Upper/lower case and digits XES mode .
- Page 51 Issued by Gigaset Communications GmbH Frankenstr. 2a, D-46395 Bocholt © Gigaset Communications GmbH 2021 Subject to availability. All rights reserved. Rights of modification reserved. www.gigaset.com...
Need help?
Do you have a question about the allrounder and is the answer not in the manual?
Questions and answers