Advertisement
Quick Links
Advertisement

Related Manuals for Saris MTR 4031


Summary of Contents for Saris MTR 4031
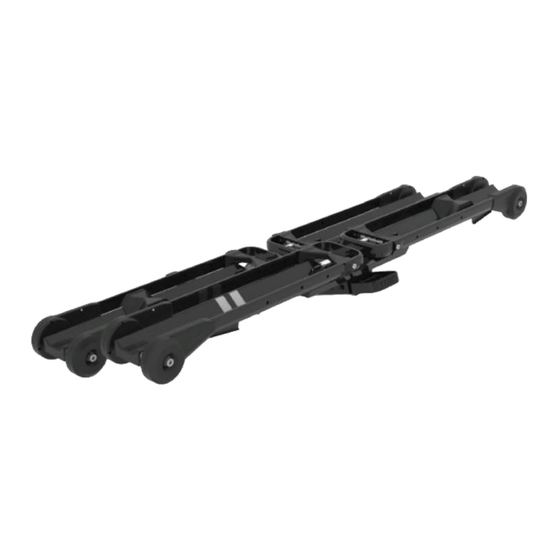
- Page 1 4031/4032...
-
Page 2: Tell Us What You Think
TELL US WHAT YOU THINK REGISTER YOUR PRODUCT FOR UPDATES... - Page 3 LONG FOR THE RIDE Just as no garage is complete without a bicycle, at Saris, we believe no car is complete without a bike rack. Since setting off on this journey nearly 30 years ago, Saris racks have freed millions of bike-lovers to explore new territory and terrain, take part in group rides, bike pool to races, and commute to and from work.
-
Page 4: Specifications
Specifications: Items Included: 4031/4032 4031 x 1 4032 x 2 Class II or higher receiver required when carrying more than two bikes. Guide BIKE BIKE Max = 60 lbs/27kg Max = 120 lbs/54kg (Max = 60 lbs/27kg per bike) - Page 5 FOLD DOWN AND OPEN RACK | DOBLAR HACIA ABAJO Y ABRIR LA REJILLA | PLIER ET OUVRIR LE RACK Pull lever at end of rack to unfold from storage position.
- Page 6 1-1/4” Insert receiver tube into hitch as shown. For 1.25” receiver, remove (3) - 5mm bolts to disconnect 2” adapter (1-bike model only). Line up hole in receiver tube with holes in hitch. Install lock washer on hitch pin. Insert hitch pin on right passenger side of receiver.
- Page 7 Pull lever at end of rack to lower rack to transport position.
- Page 8 OPEN TRAYS / Copy here... Pull up on silver pin on inner side of trays and pivot trays toward vehicle. Trays closest to vehicle must be pivoted first (if opening a 2 or more bike configuration).
- Page 9 COPY HERE OPEN RACK ARMS Pull and hold silver trigger to open arms.
- Page 10 WHEEL BLOCK POSITIONING Copy here...Use hex key located at the backside of the center beam to >26” adjust wheel block position. The four holes have been optimized for fitting the front wheel. The chart reflects position of upper wheel holder on front wheel.
- Page 11 WHEEL BLOCK POSITIONING >26” 26” 24” 20” & Rear Fender...
- Page 12 LOAD BIKES Place front wheel over front wheel block on tray. Secure rear wheel FRONT WHEEL PLACEMENT arm against rear wheel. Secure front wheel arm to front wheel. Push front wheel arm until front wheel contacts lower wheel block. Note: Load the heaviest bike on tray closest Install rear wheel strap.
- Page 13 LOCK BIKES Turn lock head 90 degrees and pull cable out of tray. Turn lock fork 90 degrees and pull cable out of tray. Connect lock fork to lock as shown. Turn key to lock.
- Page 14 HATCH ACCESS Pull lever handle at end of rack and fold rack down. Bring rack back to transport position by lifting up on outer handle until an audible click is Note: Be sure to support the weight of the racks and bike when heard.
- Page 15 UNLOADING BIKES Push arm into front wheel while pulling the lever as shown. Hold lever and fold arm away from bike. Repeat steps for rear wheel and remove bike.
- Page 16 STORAGE Pull pin and pivot trays outward. Pull handle at end of rack and fold up. Note: Trays furthest from vehicle must be pivoted first.
- Page 17 CAUTIONS: • All requirements for compatability/fit as stated in the current Saris vehicle/carrier compatability guide must be followed (available at any Saris dealer). If your vehicle is not listed or you have any questions, please call our customer service. •...
- Page 18 Warning and Disclaimer: This carrier has been designed to carry bicycles on specific vehicles. Before installation, user must read and follow current Saris Fit Guide (available through Saris dealer) recommen- dations and enclosed instructions. Fit recommendations are based on vehicle’s standard features; optional features may affect the fit recommendations. User must attach carrier correctly to the vehicle, check its attachment before each use, and inspect carrier parts for wear.
- Page 19 EXCLUSIONS · If consumer does not heed cautions listed in Instruction Manual, damage is not covered under warranty · Impact/collision damage is not covered under warranty · Cradles and strap damage due to improper arm placement are not covered under warranty ·...
Need help?
Do you have a question about the MTR 4031 and is the answer not in the manual?
Questions and answers