Table of Contents
Advertisement
Quick Links
Advertisement
Table of Contents

Subscribe to Our Youtube Channel
Related Manuals for OHAUS SF-110B


Summary of Contents for OHAUS SF-110B
- Page 1 SF-110B Printer Instruction Manual...
-
Page 3: Table Of Contents
SF-110B EN -1 Table of Contents INTRODUCTION...................... 4 Features ..................... 4 Safety Precautions ..................5 Intended Use ....................7 INSTALLATION ......................8 Unpacking ....................8 Check/Install the Ink Ribbon Cartridge ............8 Install the Printing Paper................10 OPERATION ......................13 Overview.................... - Page 4 Authority Management ..............56 6.4.4 Password ..................57 6.4.5 User Login ................... 59 Interface Settings ..................59 6.5.1 Interface Definition ............... 62 6.5.2 Automatic Detection ..............65 6.5.3 Data Filtering ................67 6.5.4 Data Matching ................70 SF-110B EDITOR SOFTWARE ................72...
- Page 5 SF-110B EN -3 Introduction ....................72 Custom Header and Trailer ............... 75 Sample Name Code ................. 78 User Login ....................82 MAINTENANCE ..................... 86 Troubleshooting ..................87 Service Information ................... 89 Software Updates ..................89 ACCESSORIES ..................... 90 10 TECHNICAL DATA ....................91 10.1...
-
Page 6: Introduction
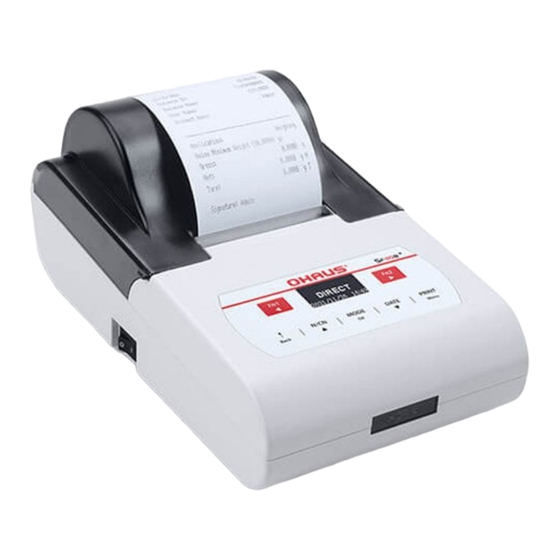
The SF-110B is an advanced dot matrix printer from OHAUS instruments. The printer supports password protection that prevents unauthorized changes to the printer settings such as date/time. The SF-110B also provides full functionality from the most basic printing needs to the advanced applications, including satistics, totalization, formulation, loss weight and interval printing. -
Page 7: Safety Precautions
SF-110B EN -5 deviation. Editable header and trailer: including custom string, manufacturer, model, S/N, device ID, sample name/lot number, data/time, signature, etc. Each item can be enabled / disabled separately. Easy setup with the software provided with the printer (please scan the QR code to obtain the software). - Page 8 EN-6 SF-110B Safety Precautions CAUTION: Read all safety warnings before installing, making connections, or servicing this equipment. Failure to comply with these warnings could result in personal injury and/or property damage. Retain all instructions for future reference. Before connecting power, verify that the AC adapter’s input voltage range and plug type are compatible with the local AC mains power supply.
-
Page 9: Intended Use
Any other type of use and operation beyond the limits of technical specifications, without written consent from OHAUS, is considered as not intended. This instrument complies with current industry standards and the recognized safety regulations; however, it can constitute a hazard in use. -
Page 10: Installation
SF-110B 2 INSTALLATION 2.1 Unpacking Carefully remove your SF-110B printer and each of its components from the package. Save the packaging to ensure safe storage and transport. Please read the manual completely before installing and using the printer to avoid incorrect operation. - Page 11 SF-110B EN -9 ribbon cartridge does not reach the bottom, press the knob of the ink ribbon cartridge and rotate it slowly towards the direction shown by the arrow. Once the left side reaches the bottom then press the right side hard to reach the bottom too.
-
Page 12: Install The Printing Paper
EN-10 SF-110B cartridge first before installing the printing paper. If belt core of ribbon with wrinkles, please pull the ribbon out, and then rotate the pinion to tighten ribbon, ensure the belt core is flat. Replace ink ribbon cartridge when the print becomes unclear and faint. Open paper cover then take out the ink ribbon cartridge by pressing at the right end marked with “Push”... - Page 13 SF-110B EN -11 Put the paper into the paper slot in correct position. (a) Correct direction (b) Wrong direction Keep pressing [Back] key while inserting the printer paper end into the slot of the printer mechanism as shown bellow, feed the paper until its end comes out.
- Page 14 EN-12 SF-110B Note: The old paper roll should be removed before installing the new paper roll. The paper left can be removed by pressing [Back] key, if it is short enough or been cut to short enough. CAUTION: Thermal paper is not allowed for use, nor is unspecified paper, to...
-
Page 15: Operation
SF-110B EN -13 3 OPERATION 3.1 Overview Parts and Features 3.1.1 Paper cover: Open the paper cover to replace the ribbon and printing paper. Paper Cutter: There are many small denticles in the front of the paper cutter, when the printing paper tear down from the cutter direction, the small denticles of paper cutter will pierce the paper in order to achieve tearing action. - Page 16 EN-14 SF-110B Power jack:Connect the included 12V AC adapter to power for the printer. USB device interface:Connect to the computer for software update and SF-110B Editor. RS232 interface:Connect to the scale.
-
Page 17: Control Panel
SF-110B EN -15 Control Panel 3.1.2 Buttons Functions ‒ Short press: Enter the sample name and lot number. ◄ ‒ Press (in settings menu): Move the input position to the left. ‒ Short press: Open the related function menu of the current operation mode. - Page 18 EN-16 SF-110B Buttons Functions ↑ ‒ Short press: Feed the printer by one line. ‒ Long press: Continuously feed until released. Back ‒ Short press (in settings menu): Back to previous menu or cancel current parameter modification. ‒ Long press (in settings menu): Delete all inputs.
- Page 19 SF-110B EN -17 Buttons Functions DATE ‒ Short press: Print the current date and time. ‒ Long press: Enter the Date/Time Settings menu. ▼ ‒ Short press (in settings menu): Switch to the next setting item or decrease the parameters setting value.
-
Page 20: Display
EN-18 SF-110B Display 3.1.3 Status Mode Time Status The content of the status bar vary depending on the operation mode. Sample name / lot number printout. Enable Auto-tare. Mode: Indicates the currently selected mode of operation. Time: Displays the current date and time. The current time is always displayed in most of... -
Page 21: Connecting And Printing
SF-110B EN -19 3.2 Connecting and Printing Before connecting, make sure the instrument and printer have the same RS232 parameter setting. For instrument Baud rate settings, please see the related manual. Choose and install the proper power adapter converter according to the located country/region. -
Page 22: Operation Modes
In the standby interface, press the [MODE] key, the display shows the available operating modes, as shown below: Press ▲or ▼key to select the desired mode, and press [OK] key to confirm. The SF-110B printer incorporates the following operation modes. Direct ... -
Page 23: Direct Mode
SF-110B EN -21 4.1 Direct Mode Use this application to print the data from scale directly. In the standby interface, press the [MODE] key, select DIRECT and press PRINT key on the scale. This mode is usually used in the following scenarios: ... - Page 24 EN-22 SF-110B Manually print the header and trailer: In the "Direct mode”, press the [Fn2] key, the following list appears: 1. Print header: Select once, print header once manually. 2. Print trailer: Select once, print trailer once manually. Automatic print header and trailer: In the “Direct mode”, the printer can automatically add a header at the beginning of the...
- Page 25 SF-110B EN -23 Press [OK] key: Disable Disable the auto header and trailer function. Delay Select this option and the printer will ask for a delay time. When the printer receives the first data of the scale, it will automatically add a header. When the scale stops outputting data beyond the delay time set by this item, the printer automatically adds a trailer;...
-
Page 26: Edit Sample Name And Lot Number
EN-24 SF-110B Edit Sample Name and Lot Number 4.1.2 The sample name / lot number can be printed in the header or data, or both, as shown below: The sample name can be up to 40 characters and the sample batch number can be up to 24 characters. - Page 27 SF-110B EN -25 The printer supports standard ASCII (American Standard Code for Information Interchange) character input, including numbers, symbols, and upper and lower case characters. The following figure shows the character input dialog style: Press [PRINT] key to input the highlighted character.
- Page 28 EN-26 SF-110B 5. Code in data: Enter the code and output the name corresponding to the code in front of the weighing data. (see Section 7.3 to create the correspondence between the digital code and the name). It will only be printed once, if necessary, please enter the sample name before each weighing.
-
Page 29: Weighing Mode
SF-110B EN -27 once, if necessary, please enter it before each weighing. 4.2 Weighing Mode Use this mode to output a weighing report that meets GLP requirements. The header is added before the weighing data, and the trailer is added after the weighing data. -
Page 30: Multi Weighing Mode
EN-28 SF-110B 4.3 Multi Weighing Mode This mode differs from the "weighing mode" in that it can output multiple data in one report. The report style is as follows: Operation: Press [MODE] key and select "MULTI WEIGHING". Put the sample into the scale, and after the data is stable, press the [PRINT] key on the printer. -
Page 31: Statistic
SF-110B EN -29 statistical report and end. This operation is equivalent to Section 4.6 "Statistic Mode". If you press the print key on the scale, it may output three data including tare, gross and net weight at the same time. To avoid this problem, please press the [PRINT] key on the printer to perform the printing operation. - Page 32 EN-30 SF-110B Operation: Press [MODE] key and select "Statistic". Put the sample into the scale, and after the data is stable, press the [PRINT] key, the printer will print sample weight, and add it into statistical queue. ...
-
Page 33: Mode Setup
SF-110B EN -31 Mode Setup 4.4.1 Press the [Fn2] key to enter the statistical mode setting menu. The user can decide which statistical items need to be output. The following is a list of each setting item: Item Default Options... -
Page 34: Sum Mode
EN-32 SF-110B Item Default Options Memo Print minimum in Output minimum value, which is √ √, × STAT.report indicated by “min”. Print minimum Output minimum deviation value, √, × × deviations.. which is indicated by “min DR”. Print maximum in Output maximum value, which is √... -
Page 35: Mean Mode
SF-110B EN -33 4.6 Mean Mode Calculate the mean value of several samples (up to 999). Only mean value is printed under this mode, with the same format and operation as in statistic mode, please refer to Section 4.6. 4.7 Formulation Mode Use this mode to print out a report containing multiple components and output the total net weight of each component. -
Page 36: Loss Weight
EN-34 SF-110B Operation: Press [MODE] key and select "Formulation" mode. Weigh the first component, press the [PRINT] key, the printer outputs the weight of a component. After weighing all components, press the [OK] key, the printer outputs the total weight and ends. - Page 37 SF-110B EN -35 Operation: Press [MODE] key and select "Loss Weight" mode. Zero the scale and add the weighing paper. If you need to print the weight of the weighing paper (printout as "tare"), please press the [Fn2] key on the printer, the printer will output the tare weight and tare the scale automatically.
-
Page 38: Automatic Tare/Zero
EN-36 SF-110B 4.9 Automatic Tare/Zero With this feature, the printer will automatically control the scale to perform the tare/zero operation after receiving valid weighing data. In the standby interface, long press [Fn2] key to turn on/off the automatic tare/zero. The corresponding status is displayed in the upper right corner of the screen, as shown... -
Page 39: Clock Settings
SF-110B EN -37 5 CLOCK SETTINGS Date & Time 5.1.1 When the printer is used for the first time, or the power is turned off for a long time, the time setting may be incorrect. Please set the time before use. -
Page 40: Time Format
EN-38 SF-110B After setting, press [BACK] key to return. Time Format 5.1.2 In the standby state, long press the [DATE] key to enter the time and date setting menu, as shown below: Select "Set Time Format" and press [OK] key to enter, press the ▲ or ▼ key to select... -
Page 41: Automatic Timing Print
SF-110B EN -39 Automatic Timing Print 5.1.3 Using this function, the printer can automatically acquire data at specified intervals and repetitions. This function is especially useful when you want to continuously observe changes in the weighing value. This function can be used in any mode. -
Page 42: Start/Stop Timing Printing
EN-40 SF-110B Start/Stop Timing Printing 5.1.4 In standby status, long press [DATE] key, select “Start Timing PRN”, then press [OK] to start interval printing: The display of the printer is shown below: The bottom of the display shows the remaining times and the countdown time for the next... - Page 43 SF-110B EN -41 When the number of repetitions is set to 0, the remaining number of times will be set to infinity, as shown in the following figure: When the countdown becomes "00:00:00", the printer will automatically print once, and the remaining number “N”...
-
Page 44: Menu Settings
EN-42 SF-110B 6 MENU SETTINGS 6.1 Menu Navigation Enter the Menu From any Mode screen, Long press [Menu]. The Main Menu List appears on the display. If an administrator password is set, the printer will ask for the correct password (see Section 6.4.4). -
Page 45: Menu Structure
SF-110B EN -43 6.2 Menu Structure Printout Normal Set Interface Set Header Language Auto baud Trailer Key press beep Baud Others Screen save time Data bits Screen brightness Parity Password Stop bits Require login Handshake Time Synchronization Terminate char Hold run mode... -
Page 46: Printout Settings
EN-44 SF-110B 6.3 Printout Settings The printer allows the user to set the style of the printer output report as required. The following is a report style that conforms to the GLP specification: The printer allows the user to set the header, data, and trailer styles in the report, allows... - Page 47 SF-110B EN -45 Long press the [MENU] key to enter the setting menu, as shown below: *If an administrator password is set, you need to enter the correct password before entering the menu. Select "1. Printout" and press the [OK] key to confirm, as shown below:...
- Page 48 Whether to print the user- defined label immediately √,× after power on, the label Print label at starts × needs to be imported using SF-110B Editor software. Whether print user-defined √,× Print label in report header × label in header. Whether print manufacturer Print MFGR in report header √...
- Page 49 SF-110B EN -47 Item Default Options Memo Up to 16 Device ID Enter the device ID here. characters Whether print date in report √ √,× Print date in report header header. Whether print time in report √ √,× Print time in report header header.
- Page 50 Decide whether to print the user-defined label in Prn user-defined in the trailer. The label √,× × REP.trailer needs to be imported using SF-110B Editor software. Whether to print time in Print time at weighing √,× the trailer under weighing × Mode mode.
- Page 51 SF-110B EN -49 “3. Others” setting menu list: Item Default Options Memo Whether the lot number value is automatically Batch Auto INCR √,× × increased by 1 after printing. English Decide the language of the Printout Language English Chinese printout.
- Page 52 EN-50 SF-110B Item Default Options Memo Set the time format added before weighing data. None Weight data time format None hh:mm This feature is only valid in hh:mm:ss multiple weighing, statistic, sum and mean mode. 8: Decimal places are determined by the scale Weighing Data Decimal output.
-
Page 53: Normal Settings
SF-110B EN -51 6.4 Normal Settings Item Default Options Memo English Language English Select operating language. Chinese ON, OFF Key press beep Enable or disable the key beep. When the printer is not operated for more than the set time, the... - Page 54 EN-52 SF-110B Item Default Options Memo X: After one mode ends, the printer automatically returns to ON, OFF Hold run mode Direct mode. √: Keep current mode. 24/Line: 24 characters are output in one line, and the font is large.
- Page 55 SF-110B EN -53 Each bit corresponds to a mode of enable or disable, 0: disable 1: enable DIRECT…Highest bit (left) Each bit can RunMode 11111111111 WEIGHING Config individually MULTI WEIGHING set to 0 or 1 Statistic Mean Formulation Loss Weight...
-
Page 56: Operating Language
EN-54 SF-110B Operating Language 6.4.1 The printer provides two methods for setting the operating language: Long press [Menu] , then press ▼ key to enter the Normal set menu. Quick setting when booting. This method allows to select the desired language simply and quickly even if the operator cannot understand the current printer display language. -
Page 57: Screen Brightness
SF-110B EN -55 Screen Brightness 6.4.2 Operations Long press [Menu] , then press ▼ key and press [OK] to enter the Normal set menu. Keep pressing▼ key to select the “Screen brightne.” Press the [OK] key, then the value is highlighted, as shown in figure below: ... -
Page 58: Authority Management
EN-56 SF-110B Authority Management 6.4.3 The printer supports two levels of user rights management: administrator rights and user rights. The administrator has the highest authority and can not only operate the printer, but also set the printer completely, including adjusting the time. The printer only allows one administrator. -
Page 59: Password
SF-110B EN -57 Password 6.4.4 To prevent unauthorized changes to time and other important settings, a 6-digit password can be set. Long press the [MENU] key to enter the setup menu. If the password is currently set, the correct password must be entered first. Select "Normal set"... - Page 60 EN-58 SF-110B After entering the correct password, the printer asks for a new password, as shown below: Press any key, and then enter the new password, the maximum length is 6 digits, in order to confirm the entered password, after the input is completed, the printer requests to enter...
-
Page 61: User Login
Item Default Options Memo It is used to automatically match the baud rate of the scale. This feature supports most OHAUS weighing √ Auto Baud instruments. If you cannot x,√ communicate with the scale normally, you can refer to Section 6.5.2 to solve the problem. - Page 62 EN-60 SF-110B Item Default Options Memo The number of data bits contained Data bits 8Bits 7Bits / 8Bits in a frame of data, must be consistent with the scale setting. None/ODD/EV The bit used for verification, must Parity None be consistent with the scale setting.
- Page 63 SF-110B EN -61 Item Default Options Memo Set the command used when the printer sends tare/zero operation to Use Zero or None, Tare, the scale. Tare Tare Zero None: Do not send instructions Tare: send a Tare command Zero: send a Zero command Please refer to Section "6.5.3 Data...
-
Page 64: Interface Definition
EN-62 SF-110B Interface Definition 6.5.1 The printer interface is a standard RS232C communication interface with the following characteristics: D-Sub 9pin, male Asynchronous, bi-directional, half duplex Baud rate: 300, 600, 1200, 2400, 4800, 9600, 19200, 38400, 57600, 115200 ... - Page 65 SF-110B EN -63 Pin No. Signal Direction Description No connection Input Receive data Output Transmit data Data terminal ready (Connect to pin7 Output internal) Signal ground Input Data set ready Output Request to send (Connect to pin4 internal) Input Clear to send...
- Page 66 EN-64 SF-110B Connection method: Handshake Protocol = None, XON/XOFF: Handshake Protocol = DTR/CTS, nDTR/CTS:...
-
Page 67: Automatic Detection
SF-110B EN -65 Automatic Detection 6.5.2 The communication parameters of printer and scale need to be completely compatible to allow normal operation. This function can automatically recognize the communication parameters and set the parameters in the printer to be compatible with a scale, thereby eliminating common issues caused by incorrect communication parameter settings. - Page 68 EN-66 SF-110B connecting cable is correct and make sure that data is transferred after print key on balance is pressed. If the printed content is correct, press [OK] to accept the parameters analyzed by printer, then the printer can return to normal working status.
-
Page 69: Data Filtering
SF-110B EN -67 Data Filtering 6.5.3 Except the DIRECT mode, the printer only processes weighing data. The printer recognizes the weighing data according to the following rules: The right-most character string is recognized as a unit, and there is only one. For example, the following are valid weighing data: N + 100.000 kg... - Page 70 EN-68 SF-110B This parameter is used to filter specific content in the data transmitted by the scale. For example, suppose the scale outputs the following data: + 100.00 kg S This data does not comply with the No.1 rule above, which will cause the printer not to recognize this data as weighing data, and it will not work in modes other than the Direct mode.
- Page 71 SF-110B EN -69 If you want to print out the filtered data, but do not process the data, such as adding statistical calculations, please set up the printer as follows: -> -> Note: Please use this function with caution. Improper setting will cause the printer to not work properly.
-
Page 72: Data Matching
EN-70 SF-110B Data Matching 6.5.4 In modes other than the Direct mode, if the scale outputs multiple weighing data at the same time, but only wants to print one or part of the data, you can use this parameter to match the specified weighing data. - Page 73 SF-110B EN -71 The printer always executes "Data Matching" before performing "Data Filtering". If you want to match multiple strings, you can separate them with commas. For example, if you want to process the data containing "N" and "Gross" as weighing data,...
-
Page 74: Sf-110B Editor Software
7 SF-110B EDITOR SOFTWARE 7.1 Introduction SF-110B Editor is a software specially designed for this printer. It is easy to operate and compact, it does not need to install any driver, and can be used in almost all windows operating systems to achieve the following functions: ... - Page 75 SF-110B EN -73 Do not connect the power adapter to the printer, as shown in the following: Note: The USBA/M - USBB/M cable is not included in printer’s package, please prepare by yourself.
- Page 76 EN-74 SF-110B Execute the SF-110B Editor software. If the connection is normal, the buttons on the software should be available, as shown below: After the operation is completed, unplug the USB cable.
-
Page 77: Custom Header And Trailer
SF-110B EN -75 7.2 Custom Header and Trailer Using SF-110B Editor software, users can customize two strings(labels) and output them at the beginning of the header and at the end of the trailer respectively. - Page 78 EN-76 SF-110B Please refer to Section 7.1 and use SF-110B Editor software to write custom header and trailer strings to the printer, as shown below:...
- Page 79 SF-110B EN -77 After completion, remove the printer from the computer, connect the power adapter to printer, enter the setup menu, refer to the following settings. Enable header printing of user-defined string. -> -> Enable trailer printing of user-defined string.
-
Page 80: Sample Name Code
With EXCEL, create a table containing the correspondence between the digital code and the name, and then import this table into the printer through SF-110B Editor. When you need to print the name, just Enter the corresponding code. - Page 81 SF-110B EN -79 If the most significant digit of the code contains "0", such as "001", the column where the code is located must use text format, not numeric format, otherwise, EXCEL will automatically remove the zero in front of the code, resulting in incorrect coding.
- Page 82 SF-110B Import the table Please refer to Section 7.1 and use SF-110B Editor software to import the prepared table into the printer, as shown in the figure below: Note: When a new table is imported, the original table will be overwritten. After the table...
- Page 83 SF-110B EN -81 Use code input method: When you need to use the code input method, press the [Fn1] key at the standby interface, the following list is displayed: ▲or ▼ “2.Sample Code” Enter the code, and the header outputs the sample name corresponding to the code.
-
Page 84: User Login
EN-82 SF-110B 7.4 User Login In order to prevent unauthorized operation of the printer, you can set a login password for each user. Before using the printer, you must enter the login password, otherwise you cannot use the printer. Preparation: Please refer to Section 6.4.4 to set the administrator password first. - Page 85 SF-110B EN -83 After completion, run the SF-110B Editor software, click "Import User List", select the prepared CSV file, as shown below: If an administrator password is set, the software will ask for a password when importing. For the operation method of SF-110B Editor software, please refer to Section 7.1.
- Page 86 EN-84 SF-110B After importing the user list, make the following settings on the printer: [OK] ▲ or ▼-> Login operation: After the above operations are completed, the printer displays the following in the standby interface: The login status of the display is "Login Please".
- Page 87 SF-110B EN -85 At this time, the printer's operations except the following will be prohibited: Press [BACK] key to feed paper. Press [OK] key to enter the login password. Press and hold the [MENU] key to enter setting menu (administrator password required).
-
Page 88: Maintenance
EN-86 SF-110B 8 MAINTENANCE Under normal conditions the printer requires practically no maintenance. The OHAUS service department is available if servicing is required. Please ask your responsible OHAUS dealer for details. When cleaning the printer, make sure no liquid flows into the printer. -
Page 89: Troubleshooting
SF-110B EN -87 8.1 Troubleshooting When the printer encounters the following problems, please try to solve it according to the instructions in this manual, if it can not be solved, please contact the service representative. The printer does not print after pressing the [PRINT] key. - Page 90 EN-88 SF-110B The printed content presents a mirror. The ribbon is installed incorrectly, please remove the printing paper first, then reinstall the ribbon, and then install the printing paper after installing the ribbon. Uneven print content. The ribbon is not installed properly, please reinstall the ribbon.
-
Page 91: Service Information
If the troubleshooting section does not resolve or describe your problem, contact your authorized OHAUS service agent. For service assistance or technical support, please visit our web site, www.ohaus.com to locate the OHAUS office nearest you. An OHAUS product service specialist will be available to provide assistance Monday through Friday. -
Page 92: Accessories
EN-90 SF-110B 9 ACCESSORIES Part Number Description 12120799 Paper roll 30529322 Ink ribbon, black... -
Page 93: Technical Data
SF-110B EN -91 10 TECHNICAL DATA Equipment Ratings 10.1 Indoor use only Altitude: 2000m Operating temperature: 0 to 40° C Relative humidity: 10% - 80% Electrical supply: 12VDC, 2.0A. (For use with certified or approved power supply, which must have a SELV and limited energy output.) Voltage fluctuations: Mains supply voltage fluctuations up to ±... -
Page 94: Specifications
EN-92 SF-110B Specifications 10.2 Model SF-110B Printing method 8 print solenoids impact dot matrix. Printing unit Dot matrix printer 5x7, 40-character line length Printing speed 1.7 lines per second Lifetime 1 million lines Operation modes Direct, Weighing, Multi Weighing, Statistic, Sum, Mean, Formulation, Loss Weight Paper roll (W x Dia.) -
Page 95: Drawings And Dimensions
SF-110B EN -93 Model SF-110B Net weight 580g (paper roll included) Shipping Weight 1.5kg Drawings and Dimensions 10.3... -
Page 96: Compliance
This product complies with the EU Directive 2012/19/EU (WEEE). Please dispose of this product in accordance with local regulations at the collecting point specified for electrical and electronic equipment. For disposal instructions in Europe, refer to www.ohaus.com/weee. EN 61326-1 ISO 9001 Registration... - Page 97 OHAUS. In lieu of a properly returned warranty registration card, the warranty period shall begin on the date of shipment to the authorized dealer.
- Page 100 OHAUS Corporation 7 Campus Drive Suite 310 Parsippany, NJ 07054 USA Tel: +1 973 377 9000 Fax: +1 973 944 7177 With offices worldwide www.ohaus.com * 30719421* P/N 30719421B © 2022 OHAUS Corporation, all rights reserved Printed in China...
Need help?
Do you have a question about the SF-110B and is the answer not in the manual?
Questions and answers