Table of Contents
Advertisement
Quick Links
Advertisement
Table of Contents

Related Manuals for Caroma Livewell 300070W


Summary of Contents for Caroma Livewell 300070W
- Page 1 Installation and Operating Instructions 300070W Livewell Electronic Bidet Seat...
- Page 2 NOTE: LOCAL AUTHORITIES MAY HAVE VARYING REQUIREMENTS. CHECK TO CONFIRM IF A RPZ VAULVE IS REQUIRED. Caroma will not be liable for any loss arising from failure to comply with the following: This product is an “I”type electrical appliance and must be safely connected to the grounding system.
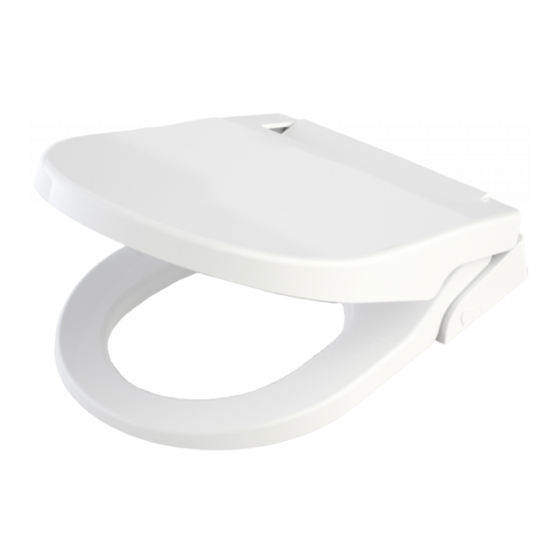
- Page 3 Bill of material Bill of Material Remote control (batteries not included; requires 2 x Type 3V CR2032) Remote control holder Installation and Operating Instructions Livewell Bidet Seat Remote Control 300070W Livewell Electronic Bidet Seat Bidet seat Part Number: 300075 Bidet Seat Filter Ball Valve Installation Template Part Number: 300077...
-
Page 4: Technical Specification
Overall dimension Approx. 505 x 369 x 107 mm Caroma pursues a policy of continual improvement in design and performance of its products. The right is therefore reserved to vary specifications without notice. Always refer to the latest instructions for this product. - Page 5 Bidet Dimensions Bidet Dimensions Unit : mm...
- Page 6 Toilet Sizing Guide Toilet Sizing Guide...
-
Page 7: Installation Steps
Installation Steps... - Page 8 Installation Steps Dual check valve must be installed in this location.
- Page 9 Installation Steps Not supplied Dual check valve must be installed in this location. For bottom inlet installations only.
-
Page 10: Install The Remote Control
Install the remote control Install the Remote Control Recommended Installation Area Recommended i stallation area Recommended instaarea This side up... - Page 11 Overview Overview Cover Seat Proximity sensor Program upgrade Power switch Quick-release Air dry button Rear wash Air dry Female wash Power light Female wash Night light Night detector Rear wash...
- Page 12 Remote Control Remote Control Female wash Rear wash Stop / Dryer Fan Steps Increase flow / Decrease flow Massage Decrease position / Increase position / Night light Deodoriser Decrease temperature / Increase temperature / Shift Shift...
- Page 13 Rear Wash / Female Wash Rear Wash / Female Wash While seated, press Rear Wash or Female Wash button on the remote control, the bidet will then start to wash and stop after 2 minutes (at Constant Temperature mode) and after 1 minute (at Gradual Cooling mode).
- Page 14 Adjusting the Nozzle Position Adjusting the Nozzle Position During Rear Wash or Female Wash, press the Position button on the remote control then press Increase (+) or Decrease (-) to adjust the position of the nozzle. The lights on the remote control will change to indicate the setting. Adjusting the Temperature During Rear Wash or Female Wash or Drying, press the Temperature Increase (+) or Decrease (-) on the remote control to adjust the...
- Page 15 Resetting the Thermostat Resetting the Thermostat Resetting the Thermostat If the Electronic Bidet is used in a high temperature environment (e.g. room temperature exceeds 45 degrees Celcius) it is necessary to If the Electronic Bidet is used in a high temperature environment perform the below step otherwise the washing water may not heat up properly.
- Page 16 If multiple electronic bidets are installed in the same area, If multiple electronic bidets are installed in the same area, you can change each rem control to operate a specific bidet seat. control to operate a specific bidet seat. Remote Control Pairing Setting Remote Control Pairing Setting 1.
-
Page 17: Care And Maintenance
Care and Maintenance Care and Maintenance Care and Maintenance Maintenance Interval Action Maintenance Interval Action Weekly Clean all surfaces and corners. Clean the spray nozzle if required Weekly Clean all surfaces and corners. Clean the spray nozzle if required Every 6 months Replace the filter if required Every 6 months Replace the filter if required... - Page 18 Draining the Water Tank Draining the Water Tank Draining the Water Tank 1. The water and power must be turned off before you 1. The water and power must be turned off before you disassemble the Electronic Bidet. disassemble the Electronic Bidet. 2.
- Page 19 Quick-Release Seat & Cover Quick-Release Seat & Cover Follow similar steps to remove the seat as shown above.
- Page 20 Re-fitting Seat & Cover Re-fitting Seat & Cover Follow similar steps to re-fit the seat as shown above.
-
Page 21: Nozzle Cleaning
Nozzle Cleaning Nozzle Cleaning Perform manual nozzle cleaning operation as follows: Open both cover and seat. Press and hold the temperature - button and then press the decrease flow button once. The nozzle will then extend and water will flow to clean. The nozzle will retract after 5 minutes or when the Stop button is pressed on the remote control. -
Page 22: Replacing The Batteries
Replacing the Batteries Replacing the Batteries 1. Do not attempt to recharge non-rechargeable batteries 2. Rechargeable batteries are to be removed from the appliance before being charged 3. Different brand of batteries or new and used batteries should not be mixed 4. -
Page 23: Troubleshooting
Troubleshooting Troubleshooting Problem Potential cause Suggested action The power supply may not be ON. Turn ON the power. The water supply may not be opened. Open the water inlet valve to ensure there is a water supply. The filter (if used) may be blocked. Replace with a new filter. - Page 24 CONFIRM IF A RPZ VAULVE IS REQUIRED. CONFIRM IF A RPZ VAULVE IS REQUIRED. Caroma will not be liable for any loss arising from failure to comply with the following: Caroma will not be liable for any loss arising from failure to comply with the following: This product is an “I”type electrical appliance and must be safely connected to the...
Need help?
Do you have a question about the Livewell 300070W and is the answer not in the manual?
Questions and answers