Table of Contents
Advertisement
Quick Links
Advertisement
Table of Contents

Related Manuals for MBH Fitness MT-015


Summary of Contents for MBH Fitness MT-015
- Page 1 LEG PRESS MT-015 USER MANUAL CONTENTS...
-
Page 2: Table Of Contents
1.INTRODUCTION..........................1 2. FEATURE.............................1 3. WARNING..........................1, 2 4. GUIDANCE..........................2, 3 5. NOTICE............................3 6. MAINTENANCE..........................3 7 . ASSEMBLY..........................4 8. CABLE............................5 9. EXPLODED VIEW........................6 10. TOOLS FOR ASSEMBLY......................7 11. STEPS OF ASSEMBLY....................7,8,9,10... -
Page 3: Introduction
1. INTRODUCTION Thank you for purchasing this unit. For your health and safety, please make a reasonable training program with suitable weight stack and correct postures under the coach’s guidance before starting the workout. Kindly please read this manual carefully before using the unit. -
Page 4: Guidance
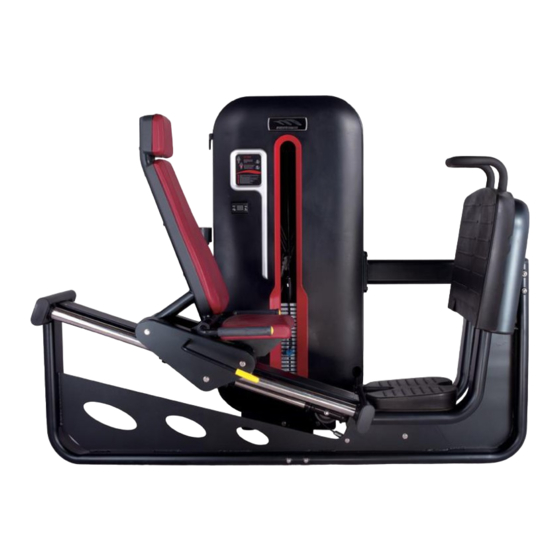
24. Inspect if the equipment is fastness before using 25. Any of the adjustment devices that could interfere with the user movement should not be left projecting 4. GUIDANCE MT-015 Leg Press Exercise Part: Brachial Quadricep Dimension: 2020mm(L)* 1130mm(W)* 1625mm(H) N.W.: 337kg Usage Guidance: 1 Read all caution Warning Labels before using this equipment. -
Page 5: Notice
2 Adjust the seat then put your back firmly against back pad. 3 Insert pin into weight stack at desired resistance level. 4 Arm natural contraction, both hands holding the whip handle. 5 Arm extension forward, slowly forward push movable arm. Until completely stretched arm. -
Page 6: Cable
installed more easily Reading the details and instructions before installing: 1. Because the size and weight of equipment is so large, Please choose the installed place near the desired station and assured there is enough space to exercise 2. All parts can be put on the clear area, then backout the wrapper. And the wrapper can’t be through away before installation finished. -
Page 7: Exploded View
9. EXPLODED VIEW... -
Page 8: Tools For Assembly
10. TOOLS FOR ASSEMBLY... -
Page 9: Steps Of Assembly
1. M6 Inner Hex Wrench (1 piece) 2. M8 Inner Hex Wrench (1 piece) 3. M10 Inner Hex Wrench (1 piece) 4. 17-19 Wrench (1 piece) 11. STEPS OF ASSEMBLY...
Need help?
Do you have a question about the MT-015 and is the answer not in the manual?
Questions and answers