Advertisement
Quick Links
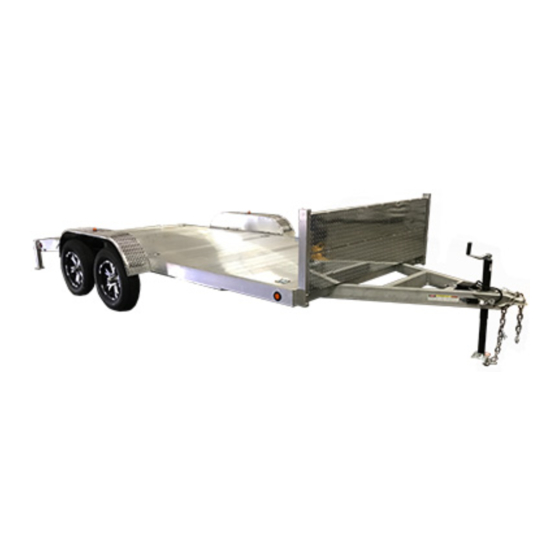
AMERICA'S HIGHEST BEST REVIEWED ALUMINUM TRAILER MANUFACTURER
HDCAR82x16-TA
HDCAR82x18-TA
HDCAR82x20-TA
AS S E MB LY I N ST RUCTION S
HDCAR82x16-TA-10K
HDCAR82x18-TA-10K
HDCAR82x20-TA-10K
WARNING
Read this INSTRUCTIONS before using this product.
Failure to follow the safety rules and other basic safety
precautions may result in serious personal injury.
SAVE these instructions for future reference.
W W W . P R I M O T R A I L E R . C O M
Advertisement

Related Manuals for Primo Water HDCAR82x16-TA


Summary of Contents for Primo Water HDCAR82x16-TA
- Page 1 AMERICA’S HIGHEST BEST REVIEWED ALUMINUM TRAILER MANUFACTURER AS S E MB LY I N ST RUCTION S HDCAR82x16-TA HDCAR82x16-TA-10K HDCAR82x18-TA HDCAR82x18-TA-10K HDCAR82x20-TA HDCAR82x20-TA-10K WARNING Read this INSTRUCTIONS before using this product. Failure to follow the safety rules and other basic safety precautions may result in serious personal injury.
- Page 2 SAFETY & PRECAUTIONS DANGER Serious injury and/or property damage can result if this vehicle iys towed before familiarizing yourself with the instructions in the owners manual and cautions listed to the right. CAUTON BEFORE TOWING THIS TRAILER CHECK THAT: • Coupler hitch and trailer ball are the same size •...
-
Page 3: Safety And Precautions
SAFETY & PRECAUTIONS WARNING Uncoupling will cause trailer to come loose from tow vehicle. You must: 1. CHECK that ball LOAD HATING is same as or greater than coupler LOAD RATING. 2. CHECK that ball SIZE is same as coupler. 3. -
Page 4: Hardware List
PARTS, HARDWARE & TOOLS PART LIST PART NO. Main Ramp Loading Stabilizer Fender Fender Tire ITHEM frame holders ramp jack support HARDWARE LIST LABEL HW-8 HW-12 HW-13 Fender Front Wall Fender Support NAME M8-130 x8 M10-150 x4 M8-150 x4 BOLT M8 x8 M8 x4 M8 x4... - Page 5 PREPARATION STEP 1 Cut all zip ties and banding. Gather the hardware packages. HW-8 HW-12 HW-13 Gather both driver and passenger side fenders and 2 fender supports. Gather 2 stabilizer jacks. Gather 2 loading ramps and 2 ramp holders. HDCAR-TA, HDCAR-TA-10K Assembly Instructions V:04/22...
- Page 6 ASSEMBLYNG STEP 1 Add drop bolts through all support legs of each front ramp holder. HW-12 HW-12 STEP 2 With bolts sticking through the ramp holder, hang and attach ramp holders to the main frame of the trailer. PRO TIP- Make sure to not force bolts through the main frame.
- Page 7 ASSEMBLYNG STEP 4 Place car hauler ramps in front ramp holders. STEP 5 Go through and tighten all nuts and bolts. HDCAR-TA, HDCAR-TA-10K Assembly Instructions V:04/22...
- Page 8 ASSEMBLYNG STEP 6 Remove the hardware attachecd to the rear stack packets and place rear load stabilizers in them. Fix the stabilizer jacks with their hardware. STEP 7 Bolt both driver and passenger side fenders onto the main frame of trailer. HW-8 HW-8 HW-8...
- Page 9 ASSEMBLYNG STEP 8 Add the fender support. Once all 4 bolts are through the fender and the fender support is added, tighten. HW-13 STEP 9 Using shrink wrap butt connectors, attach loose wire from fender to mainframe of trailer. Heat shrink. Test all lights and brakes on trailer.
- Page 10 ASSEMBLYNG STEP 10 Mount the tires on the axle. HDCAR-TA, HDCAR-TA-10K Assembly Instructions V:04/22...
-
Page 11: Warranty
WARRANTY Primo Trailer MFG. Corp. Warranty Information 5-Year Limited Axle Warranty 3-Year Limited Frame Warranty 1-Year Bumper to Bumper Limited Warranty ****IMPORTANT**** Warranty registration Form MUST be filled out within 7 days of Trailer purchase! Please find under the resources tab at www.Primotrailer.com. Thank you! If, however, you encounter a breakdown somewhere on your journey, Primo also offers a limited one-year warranty. - Page 12 480- 378 -0800 2401 SOUTH 7 TH STREET, PHOENIX, ARIZONA 85034 Sales@primotrailer.com WWW.PRIMOTRAILER.COM...
Need help?
Do you have a question about the HDCAR82x16-TA and is the answer not in the manual?
Questions and answers