
Related Manuals for Shuman MC-250BT


Summary of Contents for Shuman MC-250BT
- Page 1 User Manual Benutzerhandbuch Manuel d'instructions Manual de instrucciones MC-250BT Manuale di istruzioni support@shuman-rcm.com After Sale s S uppo r t...
- Page 2 Sehr geehrter Kunde, zunächst möchten wir Ihnen zum Erwerb Ihres Gerätes gratulieren. Bitte lesen Sie die folgenden Anschluss- und Anwendungshinweise sorgfältig durch und befolgen Sie diese um möglichen technischen Schäden vorzubeugen. Warnung ・ Diese Bedienungsanleitung dient dazu, Sie mit der Funktionsweise dieses Produktes vertraut zu ma - chen.
-
Page 3: Technische Daten
Technische Daten Stromversorgung AC 220-240V, 50-60Hz Radio UKW: 87.5-108MHz Schallplattengeschwindigkeit USB-Anschluss Kassettendeck C60 - C90 Ausgangsleistung 2 x 2,5W Stromverbrauch W max. Maße / Gewicht 50 x 22 x 33cm, 8kg Lieferumfang Gerät, Fernbedienung, Bedienungsanleitung Erst e Inbetriebnahme ・ terial. ・... - Page 4 ・ ・ ・ Lösen Sie den Verschlusshebel des Arms. ・ Verschlusshebel Tonarm Nadelabdeckung...
- Page 5 Bedienelemente Deckel Deckel-Haltestange Wahlschalter: CD/USB Wahlschalter: Kassette USB-Anschluss Ein-/Ausschalter PLAY/PAUSE Lautstärkeregler UO/F-F Wiedergabemodus FM-Bandanzeige UKW-Stereo-Anzeige CD-Fach Betriebs-LED Kassetten-Einschub...
- Page 6 Fernbedienung UP /...
- Page 7 nutzt. Die Fernbedienung benötigt eine rechts wie auf dem Bild zu sehen und entnehmen Sie die Batterie mit dem Fach, indem Sie oben. Schieben Sie den Batteriehalter wieder zurück in die Fernbedienung. Bei richtigem Sitz hören Sie ein Klicken. Cue-Hebel Plattenteller...
-
Page 8: Bedienung
Bedienung Einschalten ・ BT,FM,CD/USB,TAPE,PHONO/AUX ・ rufen. ・ ・ ・ ・ ・ ・ USB-Wiedergabe zu wechseln. ・ ・ ・ ・ Drücken Sie zum Schließen des Fachs ein weiteres Mal OP/CL. Die CD beginnt sich zu drehen und wird ・ MP3 wird eingeblendet, falls MP3-Dateien gefunden wurden. ・... - Page 9 Speicherfunktion im CD/MP3-Modus ・ ・ ・ ・ ・ hierbei gelöscht. USB-Aufnahme ・ ・...
- Page 10 drücken. Durch Drücken und Halten von Radio (1)Schalten Sie das System ein und regeln Sie die Lautstärke auf einen niedrigen Pegel. Drücken Sie die FM-Taste. Schließen Sie das FM-Antennenkabel an die 75-Ohm-Buchse an der Rückseite des Geräts an. Bewegen Sie den Draht, um den besten Empfang zu erzielen...
- Page 11 ・ tion auszuwählen. ・ diesem. Tape Deck ・ ein. Die Betriebsanzeige schaltet sich ein. ・ rufen. ・ Legen Sie die Kassette ein. Ö ffnen Ende ・ stärke. Drücken Sie EJ/FF zum Auswerfen der Kassetten Band Kassette, halten SIe gedrückt für schnellen Vorlauf.
- Page 12 Tauschen der Nadel ・ ・ und schwarzem Kassettengehäuse an und drücken, wie auf dem Bild zu sehen, dieses nach unten. ・ ・...
-
Page 13: Hinweise Zur Entsorgung
Hinweise zur Entsorgung Elektroaltgeräte Befindet sich die diese Abbildung (durchgestrichene Mülltonne auf Rädern)auf dem Pro dukt, gilt die Europäische Richtlinie 2012/19/EU. Diese Produkte dürfen nicht mit dem normalen Hausmüll entsorgt werden. Informieren Sie sich über die örtlichen Regelungen zur getrennten Sammlung elektrischer und elektronischer Gerätschaften. Richten Sie sich nach den örtlichen Regelungen und entsorgen Sie Altgeräte nicht über den Hausmüll. -
Page 14: Important Safety Advice
Dear Customer, Important Safety Advice ・ ・ in water or other liquids. ・ mates. ・ ・ ・ ・ ・ ・ Save these instructions. Small objects Transporting the device Cleaning the surface... -
Page 15: Technical Data
Technical Data Power supply AC 220-240V, 50-60Hz Radio FM: 87.5-108MHz Turntable Tape deck suitable C60 - C90 Output power 2 x 2.5W Power consumption W max. Dimensions / w eight 50 x 22 x 33cm, 8kg Scope of delivery Device, remote control, instruction manual Initial Use UNPACKING AND SET UP ・... - Page 16 ・ of the arrow. ・ ・ ・ ・...
- Page 17 Overview Phono lid FM button Function switch: CD/USB USB socket Function switch: Phono PLAY/PAUSE VOL+/- UO/F-F PLAY MODE FM tuner band FM stereo LED Power LED Cassette slot...
-
Page 18: Remote Control
Remote control UP /... - Page 19 All of the buttons on the remote control have the same function as these buttons in Phono deck Cue lever...
-
Page 20: Operation
Operation Power On ・ ・ BT,FM,CD/USB,TAPE,PHONO/AUX ・ ・ ・ icon will be shown. ・ is detected. ・ ・ ・ CD/USB ・ ・ ・ ・ the disc. ・ ・ ・... - Page 21 ・ ・ ・ ・ sequence saved. ・ sequence cancelled. Recording to USB...
- Page 22 Radio ・ ・...
- Page 23 ・ ・ ・ device. Tape Deck ・ ・ TAPE ・ the right side of the cabinet, as shown in the ・ Open End is inserted. Adjust the VOLUME control to the desired level. Cassette Tape ・ hold for fast forward. ・...
- Page 24 Playing Records PHONO/AUX button ・ ・ that secured the tone arm to the tone arm rest. ・ ・ ・ ・ Adjust the VOLUME control to the desired level. ・ ・ Changing the stylus cause damage to the records themselves. ・ ・...
-
Page 25: Environment Concerns
Environment Concerns According to the European waste regulation 2012/19/EU this symbol on the product or on its packaging indicates that this product may not be treated as household waste. Instead it should be taken to the appropriate collection point for the recycling of electrical and electronic equipment. - Page 26 Chère cliente, cher client, Avertissement ・ ・ ・ ・ aux risques de blessure ! ・ ・ ・ ・ ・ ・ ・ ・ ・ ・ ・ Transport de l’appareil Nettoyage en surface de l’appareil...
-
Page 27: Fiche Technique
Fiche t echnique Alimentation électrique AC 220-240V, 50-60Hz Radio FM: 87.5-108MHz Vitesse de lecture des vinyles Connecteur USB Compartiment à cassettes C60 - C90 Puissance de sortie 2 x 2,5W Consommation énergétique W max. Dimensions / poids 50 x 22 x 33 cm, 8 kg Contenu de l’emballage Première utilisation Déb aller et installer... - Page 28 ・ ・ ・ ・...
- Page 29 Couvercle Bras de soutien du couvercle Fonction : CD/USB Fonction : cassette Prise USB PLAY/PAUSE Bouton de volume UO/F-F Mode lecture...
- Page 30 Télécommande UP /...
- Page 31 Platine vinyle Bras de lecture avec diamant Levier du bras de lecture Platine...
- Page 32 Utilisation Mise en marche ・ ・ BT,FM,CD/USB,TAPE,PHONO/AUX ction. ・ ・ ・ ・ ・ ・ ・ ・ ・ ・ ・ ・ ・ ・...
- Page 33 Fonction de sauvegarde en mode CD/MP3 ・ ・ ・ liste de lecture CD en mode CD. ・ ・ Enregistrement USB...
- Page 34 Radio ・ ・ ・...
- Page 35 ・ ・ Compartiment à cassette ・ ・ ・ Introduire la cassette. ・ ・ ・ Platine vinyle ・ ・ ・ ・ ・ ・ ・ ・ ・...
- Page 36 Remplacement du diamant ・ de vie du diamant. ・ ・ ・ ・ ・ ・ ・...
-
Page 37: Information Sur Le Recyclage
Information sur le recyclage Appareils électriques et électroniques usagés Vous trouverez sur le produit l’image ci-contre (une poubelle sur roues, barrée d‘une croix), ce qui indique que le produit se trouve soumis à la directive européenne 2012/19/ UE. Renseignez-vous sur les dispositions en vigueur dans votre région concernant la coll- ecte séparée des appareils électriques et électroniques. -
Page 38: Avvertenze Di Sicurezza
Gentile cliente, Avvertenze di sicurezza ・ tazioni future. ・ ・ ・ ・ ・ minime. ・ ・ ・ ・ ・ ・ Parti più piccole/imballaggio Trasporto del dispositivo... -
Page 39: Dati Tecnici
Dati t ecnici Alimentazione AC 220-240V, 50-60Hz Radio FM: 87.5-108MHz Velocità giradischi Porta USB Tape deck C60 - C90 Ausgangsleistung 2 x 2,5W Stromverbrauch W max. Maße / Gewicht 50 x 22 x 33cm, 8kg Lieferumfang Prima messa in funzione Disimb allare e installare il dispositivo ・... - Page 40 ・ ・ ・ ・ Levetta braccio del giradischi...
- Page 41 Comandi Giradischi Interruttore di selezione: CD/USB Interruttore di selezione: cassetta Porta USB Interruttore di selezione: giradischi PLAY/PAUSE UO/F-F Vano CD Vano cassetta...
- Page 42 UP /...
- Page 43 vano nel telecomando. Un clic indica il corretto inserimento. Giradischi Blocco braccio del giradischi Levetta Piatto del giradischi...
- Page 44 Utilizzo Accensione ・ ・ BT,FM,CD/USB,TAPE,PHONO/AUX funzione. ・ ・ ・ e il simbolo USB. ・ ・ ・ a USB. ・ ・ ・ ・ ・ ・ brano. ・ ・...
- Page 45 Funzione di memorizzazione in modalità CD/MP3 ・ tramite i tasti freccia. ・ ・ ・ brano selezionato casualmente. ・ cancellata. Registrazione USB successo.
- Page 46 uscire. di e il brano attuale viene cancellato. brano. Radio Premere il tasto FM per accendere la radio ・ si accende. ・ mono. ・ spostare il filo intorno per ottenere la migliore ricezione.
- Page 47 ・ ・ Tape Deck ・ ・ ・ Inserire una cassetta. ・ ・ ・ Giradischi ・ ・ ・ ・ ・ Posizionare il disco in vinile al centro del mandrino. ・ ・ ・ ・ vite di blocco. Prima di iniziare ad utilizzare il giradischi, svitare la vite in senso orario utilizzando un caccia -...
- Page 48 Sostituire la puntina ・ Sollevare il braccio del giradischi. ・ ・ ・ ・...
- Page 49 Smaltimento Se sul prodotto è presente la figura a sinistra (il cassonetto dei rifiuti mobile sbarrato), si applica la direttiva europea 2012/19/UE. Questi prodotti non possono essere smaltiti con i rifiuti normali. Informarsi sulle disposizioni vigenti in merito alla raccolta separata di dispositivi elettrici ed elettronici.
- Page 50 Estimado cliente, seguridad. Advertencia ・ ・ ・ ・ ・ ・ altura. ・ ・ ・ ・ ・ ・ Transporte del aparato original. Limpieza exterior...
-
Page 51: Datos Técnicos
Datos técnicos Suministr o eléctrico AC 220-240V, 50-60Hz Radio FM: 87.5-108MHz Velocidad de giro del disco Conexión USB Compartimento para casete C60 - C90 Potencia de salida 2 x 2,5W Consumo de energía W max. Dimensiones / peso 50 x 22 x 33cm, 8kg Contenido del envío Primer a puesta en marcha Desemb alaje y colocación... - Page 52 ・ ・ ・ ・ Conecte el enchufe en la toma de corriente.
- Page 53 Altavoz PLAY/PAUSE UO/F-F Indicador de banda FM LED de funcionamiento...
- Page 54 UP /...
- Page 55 El mando a distancia necesita una Tocadiscos Bloqueo del brazo del tocadiscos Brazo del tocadiscos con aguja Palanca de cue Plato del tocadiscos...
- Page 56 Utilización Encender aparato ・ BT,FM,CD/USB,TAPE,PHONO/AUX ・ de las funciones. ・ ・ ・ ・ ・ ・ ・ ・ ・ ・ ・ ・ CD/USB. ・ ・...
- Page 57 ・ ・ ・ memoria de CD en el modo CD. ・ ・ Grabación en USB anteriormente.
- Page 58 Radio Presione el botón de ENCENDIDO en el panel de control. Presione el botón FM para encender la radio. La luz de fondo de la radio se enciende. Gire el control de frecuencia hasta que reciba la estación deseada. Si se ha seleccionado FM, FM ST se enciende. a la recepción estéreo. Si la señal es débil, el dispositivo cambiará...
- Page 59 ・ ・ Caset era ・ volumen a un nivel bajo. El indicador de funci - ・ ・ Introduzca el casete. ・ ・ ・ Tocadiscos ・ ・ ・ ・ aguja. ・ Coloque el vinilo en el centro de la aguja. ・ el brazo lentamente en el surco del vinilo.
- Page 60 Sustituir la aguja ・ ・ ・ ・ la carcasa. ・...
-
Page 61: Indicaciones Para La Retirada Del Aparato
Pulse MENU en el modo FM o DAB y seleccione el punto de menú SYSTEM girando el regulador TU NER/SELECT. Pulse SELECT para acceder a los ajustes del sistema. Vuelva a girar el regulador para acceder al punto LANGUAGE e iniciar la configuración del idioma Pulse SELECT a continuación. -
Page 62: Ec Declaration Of Conformity
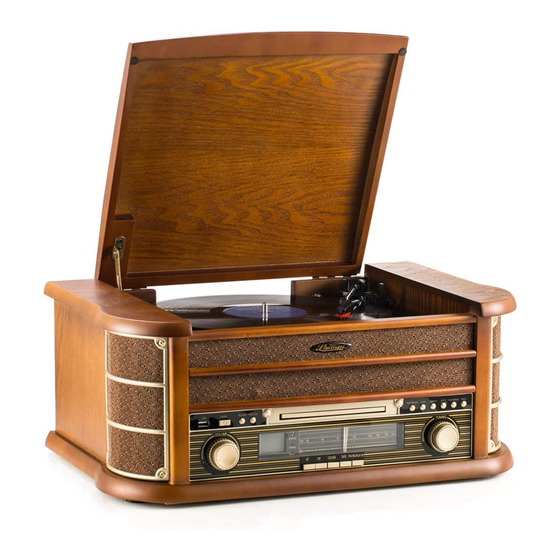
HONG KONG Brand Name: SHUMAN Product Model Name MC-250BT Description: Wooden turntable with usb encoding, cd player and radio We, MUSIC CARPENTER LTD declare under our sole responsibility that the above named product conforms to the essential requirement of the European Uninon.
Need help?
Do you have a question about the MC-250BT and is the answer not in the manual?
Questions and answers
how do you replace needle head
To replace the needle head on a Shuman MC-250BT, follow these steps:
1. Move the tonearm carefully without touching the cartridge housing.
2. Remove the old needle by gently pulling it out of the cartridge.
3. Insert the new needle into the cartridge housing until it fits securely.
Make sure the device is turned off and unplugged before starting the replacement.
This answer is automatically generated