
Subscribe to Our Youtube Channel
Related Manuals for OLG Axis Height Adjustable Workstation HA-90

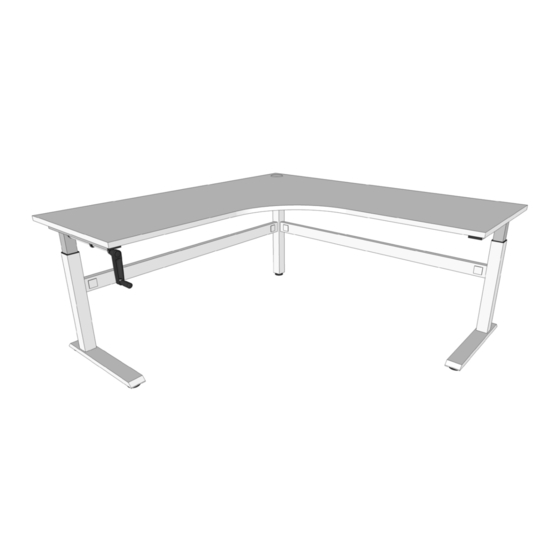
Summary of Contents for OLG Axis Height Adjustable Workstation HA-90
- Page 1 Axis Height Adjustable Workstation Installation Guide TOOLS REQUIRED: Powered screwdriver myolgoffice.com...
- Page 2 AXIS HEIGHT ADJUSTABLE WORKSTATION Installation Guide * To prevent possible scratches or damage, assemble the desk upside down on a soft surface such as a blanket, carpet or packaging. Recommended 2-person Step * Attach Leg to the Top assembly by using Bolts, spring washer, flat washer.
- Page 3 AXIS HEIGHT ADJUSTABLE WORKSTATION Installation Guide STEP 1: STEP 2: Attach crossbeam F to leg A using bolt J. Fit adjustable feet to all legs.
- Page 4 AXIS HEIGHT ADJUSTABLE WORKSTATION Installation Guide STEP 3: Insert long hex end of gear bar E to leg A. STEP 3a: Attached corner leg C to crossbeam F. STEP 3a: Cont. STEP 3b: Short end of gear bar E must be fitted into the drive socket in the corner leg C.
- Page 5 AXIS HEIGHT ADJUSTABLE WORKSTATION Installation Guide STEP 4: Attached crossbeam F to leg B using bolt J. STEP 5: Insert short end of gear bar E to leg B.
- Page 6 AXIS HEIGHT ADJUSTABLE WORKSTATION Installation Guide STEP 5b: Long end of gear bar E must be fitted into the drive socket in the corner leg C. STEP 5a: Attach corner leg C to crossbeam F. STEP 6: Attach the two top rails D to plate C1 using bolt K.
- Page 7 AXIS HEIGHT ADJUSTABLE WORKSTATION Installation Guide STEP 7: Attach top rails D to legs A and B using bolts I. STEP 8: Insert caps G into crossbeam F.
- Page 8 AXIS HEIGHT ADJUSTABLE WORKSTATION Installation Guide STEP 9: COMPLETED Fit top. Ensure that the top bars are parallel to the desk top.
- Page 9 HOW TO OPERATE HANDLE STEP 1: STEP 2: Pull handle lever. Tilt handle lever upward and klick into crank handle. Fold handle away parallel to desk top.
- Page 10 CHANGING CRANK HANDLE FROM LEFT TO RIGHT OPERATION STEP 1: Loosen grub screws from locking collar on leg B. STEP 5: Fit the hex drive assembly into the drive socket on leg A. STEP 6: Fit hanger bracket screws and tighten. STEP 2: Slide out crank handle and shaft.
Need help?
Do you have a question about the Axis Height Adjustable Workstation HA-90 and is the answer not in the manual?
Questions and answers