Table of Contents
Advertisement
Quick Links
Advertisement
Table of Contents

Subscribe to Our Youtube Channel
Related Manuals for Jimmy JF41

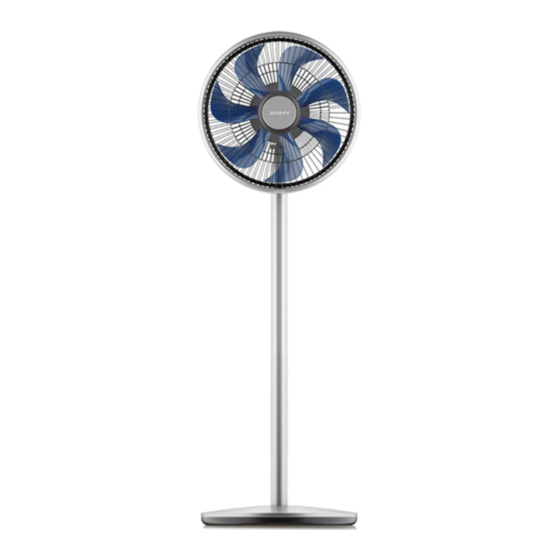
Summary of Contents for Jimmy JF41
- Page 1 JF41 Instruction Manual Smart Fan 사용설명서 스마트 공기조절팬...
-
Page 3: Product Installation
Product Installation Unpacking Open the package, take out the foam pad, all accessories and machine from the package and take off the plastic bags. Keep the carton and plastic bags in good condition for the purpose of maintenance and repair in the future. Support Pole Base 1.Decorative Ring... -
Page 4: Main-Body Assembly
Packing List Part Name Support Pole Base Power Adapter Quantity Remote Controller Coin Battery M8 Screw Wrench User Manual Main-body Assembly 1.Open the package, take out the support pole Support and base, insert the pole into the base and Pole make sure the release button of pole be on the top side. -
Page 5: Production Operation
Production Operation Operation Buttons and Indicator Instruction Button Indicator " " Button After being connected to the power, the whole machine will issue a bell and all the indicator lights will flash once. The machine is in the state of power on and standby. Press the “ ”button, the buzzer will sound a bell. - Page 6 "Swing Angle" button The machine provides three swing angles of 30° left and right, 60° right and left, and 360°infinite cycle. The swing of the machine is the left and right motion centered on the current position. Press the "swing angle" button to swing the fan head from side to side for 30°, press two times to swing the fan head from side to side for 60°, press three times to rotate the fan head for 360°...
-
Page 7: Cleaning And Maintenance
Keys and function description (Picture 6) "On/off" button: The same function as the " " button on the fan. "Constant Wind" button: The same as the "Constant Wind" button on the fan. "Natural Wind" button: The same way as the "Natural Wind"... - Page 8 4. After removing the fan blade, rotate the cover plate of the rear cover counterclockwise and Rear Cover remove the cover after unscrewing. (Picture 11) Cover plate of The installation the rear cover After the cleaning of all parts of the fan components, they can be assembled in reverse according to the disassembly sequence.
-
Page 9: Safety Notes
Safety Notes Before using the machine, please read this instruction carefully and keep it for future reference. In order to avoid failure and danger, please do not electrify the machine before it is assembled. Don't let children play with or operate the machine to avoid accidents. Before use, check whether the voltage is consistent with the marked voltage of the machine. -
Page 10: Troubleshooting
In addition to maintenance, please do not decompose or modify the product, which may cause fire, electric shock or injury. Do not let this product fall from the height or hit the product hard, otherwise it may lead to failure or damage. -
Page 11: Product Specification
Product Specification Model No. JF41 Rated Voltage Rated Power Adapter Rated Input Voltage 100-240V~50-60Hz 0.8A Adapter Rated Output Voltage 1000mA Circuit Diagram Swing control motor Main motor Remote controller Signal receiving PCB Adaptor Main PCB Disposal The machine, accessories and packaging should be sorted for environmental-friendly recycling. -
Page 12: Warranty Information
Warranty Information This product enjoys one year warranty from the date of purchase. Excluded from the guarantee is normal wear, commercial use, alterations to the appliance as purchased, cleaning activities, consequences of improper use or damage by the purchaser or a third person, damage that can be attributed to external circumstances. - Page 13 제품 설치 포장 해체 포장을 풀고 , 포말 패드와 내장된 모든 부품과 서류 , 팬을 꺼낸 후 포장백을 떼어낸다 . 향후 수 송 수요에 대비하여 외부 포장을 잘 보관하도록 한다 . 1. 장식링 2. 프론트 장식품 3. 프론트 커버 4. 리어 커버 5.
- Page 14 포장 명세서 명칭 팬 조립품 서포팅 로드 조립품 베이스 조립품 어댑터 수량 리모컨 코인 배터리 M8 볼트 볼트 렌치 매뉴얼 기기 설치 팬 조립품 1. 팬 포장박스를 해체한 후 서포팅 로드 조립 홀 품과 베이스 조립품을 차례로 꺼내 서포팅 로드 조립품을...
- Page 15 제품 사용 버튼 사용 및 지시등 설명 팬 조립품 지시등 항속 바람 자연 바람 스윙 타이머 버튼 기기에 전원이 연결되면 기기 전체가 조화로운 벨소리와 함께 모든 지시등이 한 번 깜박이며 기 기는 전기가 통하는 대기 상태가 된다 . 버튼을 누르면 버저가 조화로운 벨을 울리고 , 최초 작 동...
- Page 16 ' 스윙 ' 버튼 본 기기는 좌우 각 30° , 좌우 각 60° , 360° 무 한 사이클의 3 종 스윙 각도를 제공한 다 . 본 기기의 스윙은 현재 위치를 중심으로 좌 우로 움직이며 , ' 스윙 ' 버튼을 누르면 팬...
- Page 17 버튼 및 기능 설명 ( 그림 6) ' 스위치 ' 버튼 : 사용방법은 팬 버튼 방법과 동 일함 . ' 항속 바람 ' 버튼 : 사용 방법은 ' 항속 바람 ' 버 튼 방법과 동일함 . ' 자연 바람 ' 버튼 : 사용 방법은 ' 자연 바람 ' 버 튼...
- Page 18 4. 날개를 제거한 후 반대시계 방향으로 리어 커 버 덮개를 돌린 후 리어 커버를 제거한다 ( 그림 리어 커버 11). 리어 커버 덮개 설치 팬 각 부품은 청결이 완료되면 분해 순서에 따라 조립하고 다음과 같은 점에 주의한다 . 1. 리어 커버와 백 하우징을 조립할 경우 , 리어 커버의...
- Page 19 주의 사항 본 기기를 사용하기 전에 본 사용 설명서를 숙지하고 , 향후 참조를 위해 잘 보관한다 . 고장과 위험을 방지하기 위해 기기가 조립되지 않은 상태에서 전기를 연결하지 않는다 . 어린이의 사고를 방지 하기 위해 어린이가 기기를 만지거나 가지고 놀게 하지 않는다 . 사용하기...
- Page 20 유지 보수 외에 제품을 분해 및 개조를 진행하지 않는다 . 그렇지 않을 경우 화재 , 감전 또는 부 상을 초래할 수 있다 . 본제품을 높은 곳에서 떨어뜨리거나 강하게 두드리지 않는다 . 그렇지 않을 경우 , 고장이나 파 손을 초래할 수 있다 . 장시간...
- Page 21 제품 규격 JF41 모델 정격 전압 어댑터 모델 ZD024M240100EK 정격 출력 100-240V~50-60Hz 0.8A 어댑터 정격 입력 전압 1000mA 어댑터 정격 출력 전압 전기회로도 팬 날개 컨트 스윙 컨트롤 스 롤 메인 모터 테퍼 모터 리모컨 무선접수보드 어댑터 컨트롤 보드 보증 인포메이션...
- Page 22 NOTES...
- Page 24 1J-01 jimmy technology Web:www.jimmyglobal.com Contact us -we'll get back within 1 business day. Email:support@jimmyglobal.com...
Need help?
Do you have a question about the JF41 and is the answer not in the manual?
Questions and answers