Table of Contents
Advertisement
Available languages
Available languages
SEPARATIONS
JOB INFO
KNG #: KNG-737-0005
Agency Job #: –
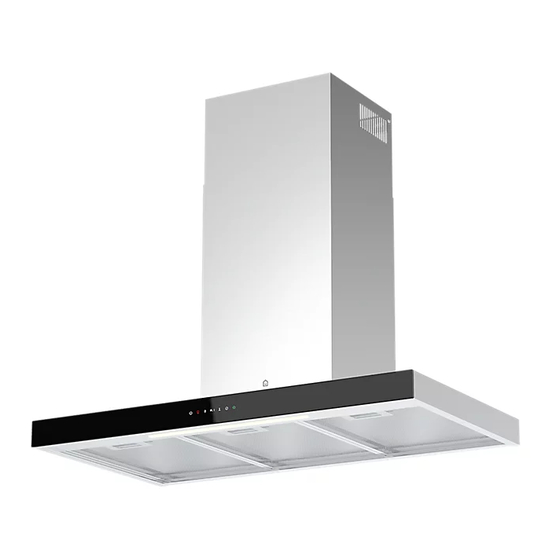
Product Description:
T Shape Angled Glass
Cooker Hood
PROCESS
BLACK
VERSION #
This file is the property of Kingfisher Group Plc. No copying, alteration or amendment is permitted
without written authorisation from the Kingfisher Brand Team.
5059340445953_MNL_IN_V04.indb 1
5059340445953_MNL_IN_V04.indb 1
DO NOT PRINT THIS PAGE -
IT IS FOR INFORMATION ONLY
1
2
28/04/22
11/05/22
Mohit
Mohit
Artwork done by Impala Services Ltd
Info@impala-tach.com
Kingfisher Contact: Stephanie Rankin /
EAN: 5059340445953 5059340445946 /
5059340445939 / 5059340445922
Vendor: Global Asia
No. of New Line Drawings: 0
Page Size: A5 / No. of Pages:
3
4
31/05/22
09/06/22
Mohit
Mohit
Jet Deng
5
XX/XX/21
XXX
09-06-2022 14:31:31
09-06-2022 14:31:31
Advertisement
Table of Contents

Related Manuals for Kingfisher CLBH60ASBL


Summary of Contents for Kingfisher CLBH60ASBL
- Page 1 11/05/22 31/05/22 09/06/22 XX/XX/21 Mohit Mohit Mohit Mohit This file is the property of Kingfisher Group Plc. No copying, alteration or amendment is permitted without written authorisation from the Kingfisher Brand Team. 5059340445953_MNL_IN_V04.indb 1 5059340445953_MNL_IN_V04.indb 1 09-06-2022 14:31:31 09-06-2022 14:31:31...
- Page 2 Należy ją dokładnie przeczytać przed obsługą produktu i zachować do wykorzystania w przyszłości. RO IMPORTANT - Aceste instrucțiuni sunt pentru siguranța ta. Citește- CLBH60ASBL le cu atenție înainte de montarea produsului și păstrează-le pentru 5059340445953 consultare ulterioară.
- Page 3 EN Parts FR Pièces PL Części RO Piese ES Piezas PT Peças 03. x1 04. x1 01. x1 02. x1 05. x1 EN Not included FR Non inclus PL Brak w zestawie 06. x8 07. x8 08. x4 RO Neinclus VENT PACK CARBFILT4 (4 x 32mm)
-
Page 4: Before You Start
EN Safety FR Sécurité PL Bezpieczeństwo RO Siguranță ES Seguridad PT Segurança on 0800 324 7818 (UK) and 1-800 932 230 (Eire). Before you start • Check the package and These instructions are for your make sure you have all of the safety. - Page 5 Safety MANUAL. FAILURE TO FOLLOW THESE WARNING: THERE IS INSTRUCTIONS A RISK OF ELECTRIC MAY RESULT SHOCK AND FIRE IN ELECTRICAL IF CLEANING IS HAZARDS. NOT CARRIED OUT WARNING: SWITCH IN ACCORDANCE OFF THE APPLIANCE WITH THESE AT THE MAINS INSTRUCTIONS.
- Page 6 WARNING: DO NOT WARNING: WHEN FLAMBE UNDER THE THE EXTRACTOR HOOD. TO AVOID HOOD IS LOCATED THE RISK OF FIRE, ABOVE AN CLEAN OR REPLACE APPLIANCE, THE THE GREASE FILTER MINIMUM DISTANCE REGULARLY AND BETWEEN THE CLOSELY MONITOR SUPPORTING PANS CONTAINING SURFACE FOR THE HOT OIL.
- Page 7 IN ACCORDANCE WARNING: THE WITH THESE HOOD MAY STOP INSTRUCTIONS WORKING DURING MAY RESULT IN A AN ELECTROSTATIC SAFETY HAZARD. IF DISCHARGE (E.G. IN DOUBT, ASK FOR LIGHTNING). THIS ADVICE INSTORE OR INVOLVES NO FROM A QUALIFIED RISK OF DAMAGE. INSTALLER.
- Page 8 IN A SAFE WAY AND • Do not use flammable sprays in close vicinity to the UNDERSTAND THE appliance. HAZARDS INVOLVED. • Please dispose of the packing CHILDREN SHALL material carefully. There is NOT PLAY WITH a fire risk if cleaning is not THE APPLIANCE.
-
Page 9: Electrical Installation
• Do not use the hood if it shows signs of damage or imperfection. Contact customer services for assistance. • The manufacturer declines all liability for personal or material damage as a result of misuse or incorrect installation of this appliance. -
Page 10: Technical Data
DSL - 5 - S - 385mm x 10mm Information for EU No. 66/2014 and No. 65/2014 A. Information of the cooker hood ( www.diy.com Value Trademark Cooke&Lewis GoodHome CLBH60ASBL CLBH90ASBL Model identification GHBH60ASBL GHBH90ASBL Annual Energy Consumption (AEC hood) (kWh/year) 18.9 Energy Efficiency class Fluid Dynamic Efficiency 30.4... -
Page 11: Recycling And Disposal
Measured power consumption off mode (Po) (W) 0.31 Measured power consumption in standby mode (Ps) (W) Time increase factor (f) Energy Efficiency Index (EEIhood) 43.3 Measured air flow rate at best efficiency point (QBEP) (m 238.0 Measured air pressure at best efficiency point (PBEP) (Pa) Measured electric power input at best efficiency point (WBEP) (W) 46.5 Nominal power of the lighting system (WL) (W) -
Page 12: Avant De Commencer
To make a claim under this guarantee, you must present your proof of purchase (such as a sales Avant de commencer receipt, purchase invoice or other evidence admissible under applicable law), please keep your Ces consignes concernent votre proof of purchase in a safe place. For this guarantee to apply, the product you purchased must be new, sécurité. - Page 13 Sécurité que cette dernière n’est pas endommagée. En cas de AVERTISSEMENT : doute, ne pas utiliser l’appareil UN RISQUE DE et contacter le service client CHOC ÉLECTRIQUE au 0805 114 951. ET D’INCENDIE PEUT • Contrôler l’emballage et s’assurer de disposer SURVENIR SI LE de toutes les pièces NETTOYAGE N’EST...
- Page 14 AVERTISSEMENT : APPAREILS UTILISER DE CUISSON. UNIQUEMENT DES IL CONVIENT RACCORDS ET DES D’ÉLOIGNER LES VIS DE FIXATION ENFANTS DE MOINS AUX DIMENSIONS DE 8 ANS, À MOINS RECOMMANDÉES QU’ILS NE SOIENT DANS CETTE SURVEILLÉS EN NOTICE. LE NON- PERMANENCE, AFIN RESPECT DES D’ÉVITER TOUT PRÉSENTES...
- Page 15 AVERTISSEMENT : MINIMALE ENTRE DES DISPOSITIFS DE LA SURFACE DE COUPURE TOTALE SUPPORT DES DOIVENT ÊTRE RÉCIPIENTS DE INCORPORÉS DANS CUISSON SUR LE CÂBLAGE FIXE LA PLAQUE DE CONFORMÉMENT CUISSON ET LA PARTIE LA PLUS RÉGLEMENTATIONS BASSE DE LA HOTTE LOCALES RELATIVES DOIT ÊTRE D’AU À...
- Page 16 INSTRUCTIONS S’ASSURER QUE D’INSTALLATION DE LA VENTILATION L’APPAREIL PEUT DE LA PIÈCE ENTRAÎNER UN EST EFFECTUÉE RISQUE D’ACCIDENT. CONFORMÉMENT EN CAS DE DOUTE, AUX EXIGENCES DEMANDER CONSEIL DES AUTORITÉS EN MAGASIN OU À LOCALES. UN INSTALLATEUR AVERTISSEMENT : QUALIFIÉ. LA HOTTE PEUT AVERTISSEMENT : CESSER DE FONC- CONSULTER LES...
- Page 17 PHYSIQUES, SURVEILLANCE. SENSORIELLES TENIR L’APPAREIL OU MENTALES ET SON CÂBLE RÉDUITES, OU D’ALIMENTATION PRÉSENTANT HORS DE PORTÉE UN MANQUE DES ENFANTS DE D’EXPÉRIENCE MOINS DE 8 ANS. ET DE • Si le cordon d’alimentation CONNAISSANCES, est endommagé, il doit être À...
-
Page 18: Installation Électrique
charbon et en aluminium (si la • Ne pas utiliser la hotte si hotte en est équipée). elle présente des signes • Les lampes LED de cet d’endommagement ou des appareil ne peuvent pas être défauts. Contacter le service remplacées par l’usager. client pour obtenir de l’aide. -
Page 19: Données Techniques
Informations relatives aux règlements (UE) n° 66/2014 et n° 65/2014 A. Informations relatives à la hotte (www.diy.com) Valeur Marque déposée COOKE&LEWIS GOODHOME CLBH60ASBL CLBH90ASBL Identification du modèle GHBH60ASBL GHBH90ASBL Consommation énergétique annuelle de la hotte (AEC hotte) (kWh/an) 18.9 Classe d'efficacité énergétique Efficacité... - Page 20 600mm: 94 Efficacité lumineuse (LEhotte) (lux/W) 900mm: 83 Classe d'efficacité lumineuse 600mm: 68.9 Efficacité de filtration des graisses (GFEhotte) 900mm: 73.5 Classe d'efficacité de filtration des graisses (GFEhotte) Débit d'air minimal au point de travail (en utilisation normale) (m 146.2 Débit d'air maximal au point de travail (en utilisation normale) (m 385.6 Débit d'air maximal au réglage maximal (Qmax) (m...
-
Page 21: Recyclage Et Mise Au Rebut
C. Informations relatives au démontage. ou aux modèles d’exposition. Sauf indication contraire prévue par la loi en vigueur, tout produit de L’utilisateur ne peut pas démonter cet appareil d’une remplacement fourni au titre de la présente garantie autre manière que celle indiquée dans le manuel ne sera garanti que jusqu’à... -
Page 22: Przed Rozpoczęciem Użytkowania
vient s’ajouter à la durée de la garantie qui reste à courir. Cette période court à compter de la Przed rozpoczęciem demande d’intervention de l’acheteur ou de la mise à disposition pour réparation du bien en cause, si użytkowania cette mise à disposition est postérieure à la demande d’intervention. - Page 23 • Aby ograniczyć do sprzedaży urządzenia, minimum ryzyko związane przekazania go innym z użytkowaniem urządzeń osobom lub pozostawienia elektrycznych, niezwykle w domu po wyprowadzce ważne jest, aby ten okap należy przekazać niniejszą kuchenny został prawidłowo instrukcję obsługi nowemu zamontowany oraz aby właścicielowi, aby umożliwić...
- Page 24 ODPOWIEDNIE OSTRZEŻENIE: DO PODŁOŻA, NA DOSTĘPNE CZĘŚCI KTÓRYM MA BYĆ MOGĄ NAGRZEWAĆ ZAMONTOWANE SIĘ W TRAKCIE URZĄDZENIE, ORAZ KORZYSTANIA Z ŻE UTRZYMAJĄ URZĄDZENIA. DZIECI JEGO CIĘŻAR. PONIŻEJ 8 ROKU ŻYCIA NIE POWINNY OSTRZEŻENIE: UŻY- ZBLIŻAĆ SIĘ DO WAĆ WYŁĄCZNIE URZĄDZENIA, JEŚLI MOCOWAŃ...
- Page 25 OSTRZEŻENIE: ODLEGŁOŚĆ MIĘDZY ELEMENT POWIERZCHNIĄ UMOŻLIWIAJĄCY PŁYTY GRZEWCZEJ CAŁKOWITE A NAJNIŻSZĄ ODŁĄCZENIE CZĘŚCIĄ OKAPU URZĄDZENIA POWINNA WYNOSIĆ: NALEŻY PODŁĄCZYĆ - PŁYTY GAZOWE DO INSTALACJI ≥760 MM ELEKTRYCZNEJ - PŁYTY ZGODNIE Z ELEKTRYCZNE PRZEPISAMI ≥650 MM DOTYCZĄCYMI OSTRZEŻENIE: INSTALACJI PRZED PODŁĄCZE- ELEKTRYCZNYCH NIEM OKAPU NALE- OBOWIĄZUJĄCYMI...
- Page 26 KWALIFIKOWANEGO OSTRZEŻENIE: MONTERA. OKAP MOŻE PRZE- STAĆ DZIAŁAĆ OSTRZEŻENIE: PODCZAS WYŁADO- ZAPOZNAĆ SIĘ WANIA ELEKTROSTA- Z LOKALNYMI TYCZNEGO (NP. UDE- PRZEPISAMI RZENIE PIORUNA). DOTYCZĄCYMI NIE WIĄŻE SIĘ TO Z WYCIĄGÓW I RYZYKIEM USZKO- UPEWNIĆ SIĘ, DZENIA. NALEŻY ŻE SĄ ONE WYŁĄCZYĆ...
- Page 27 WYSTARCZAJĄCEJ • Jeśli dojdzie do uszkodzenia przewodu zasilania, ze WIEDZY, POD względów bezpieczeństwa WARUNKIEM powinien on zostać ŻE BĘDĄ wymieniony przez producenta, NADZOROWANE przedstawiciela serwisowego LUB ZOSTAŁY lub inną osobę o podobnych POINSTRUOWANE kwalifikacjach. O ZASADACH • Nie wolno montować urządzenia na zewnątrz UŻYTKOWANIA w wilgotnym miejscu lub...
-
Page 28: Podłączenie Elektryczne
• Oświetlenie LED w tym • Producent nie ponosi urządzeniu nie może żadnej odpowiedzialności być wymienione przez za obrażenia ciała lub użytkownika. Jeśli dojdzie uszkodzenia mienia powstałe do awarii oświetlenia, należy na skutek nieprawidłowego skontaktować się z infolinią użytkowania lub montażu dla klientów w celu umówienia urządzenia. -
Page 29: Dane Techniczne
DSL - 5 - S - 385mm x 10mm Informacje dla krajów UE nr 66/2014 i nr 65/2014 Informacje dotyczące okapu kuchennego (www.diy.com) Wartość Znak towarowy COOKE&LEWIS GOODHOME CLBH60ASBL CLBH90ASBL Oznaczenie modelu GHBH60ASBL GHBH90ASBL Roczne zużycie energii (AEChood) (kWh/rok) 18.9 Klasa efektywności energetycznej Dynamiczna wydajność... - Page 30 Klasa sprawności oświetlenia 600mm: 68.9 Efektywność pochłaniania zanieczyszczeń (GFEhood) 900mm: 73.5 Klasa efektywności pochłaniania zanieczyszczeń (GFEhood) Minimalny przepływ powietrza w punkcie roboczym (przy normalnym 146.2 użytkowaniu) (m Maksymalny przepływ powietrza w punkcie roboczym (przy normalnym 385.6 użytkowaniu) (m Maksymalne natężenie przepływu powietrza przy najwyższym 397.2 ustawieniu (Qmax) (m Maksymalne natężenie przepływu powietrza przy najwyższym...
-
Page 31: Recykling I Utylizacja
C. Informacje dotyczące demontażu. używanych lub z ekspozycji. Produkt zamienny objęty niniejszą gwarancją będzie nią objęty aż Urządzenie nie może być demontowane przez do wygaśnięcia okresu obowiązywania gwarancji użytkownika w sposób inny, niż przedstawiony w oryginalnego produktu, chyba że określono inaczej oryginalnej instrukcji obsługi. -
Page 32: Înainte De A Începe
serviciul de Asistență clienți la 0800 895 099. Înainte de a începe • Verifică ambalajul și asigură- Aceste instrucțiuni sunt pentru te că ai toate piesele siguranța ta. Citește cu atenție specificate, apoi stabilește următoarele instrucțiuni înainte locul adecvat pentru de montarea și utilizarea amplasarea produsului. - Page 33 AVERTISMENT: AVERTISMENT: DACĂ ESTE CAZUL, DECONECTEAZĂ ACEST APARAT APARATUL DE ESTE LIVRAT CU LA REȚEAUA DE ELEMENTE DE ALIMENTARE FIXARE. ASIGURĂ- ÎNAINTE DE TE CĂ UTILIZEZI A EFECTUA ELEMENTELE DE LUCRĂRILE DE FIXARE CORECTE, ÎNTREȚINERE SAU ADECVATE PENTRU DE CURĂȚARE. SUPORTUL PE CARE AVERTISMENT: VA FI INSTALAT...
- Page 34 CU ATENȚIE VASELE DE PE PLITĂ ȘI CEA CARE CONȚIN ULEI MAI JOASĂ PARTE A FIERBINTE. HOTEI TREBUIE SĂ FIE: AVERTISMENT: - PLITE PE GAZ CABLAJUL FIX ≥ 760 MM TREBUIE SĂ - PLITE ELECTRICE INCLUDĂ MĂSURI ≥ 650 MM DE DECONECTARE COMPLETĂ, ÎN AVERTISMENT:...
- Page 35 AVERTISMENT: DE DETERIORARE. CONSULTĂ OPREȘTE REGLEMENTĂRILE ALIMENTAREA LOCALE CU PRIVIRE ELECTRICĂ A HOTEI LA IEȘIRILE DE ȘI RECONECTEAZĂ EVACUARE ȘI DUPĂ UN MINUT. RESPECTĂ-LE. NU AVERTISMENT: CONECTA HOTA LA ACEST APARAT O TUBULATURĂ DE POATE FI FOLOSIT VENTILAȚIE SAU DE DE COPII CU VÂRSTA AER CALD CARE DE PESTE 8 ANI...
- Page 36 ACEST APARAT. nu este realizată conform instrucțiunilor. Consultă cu CURĂȚAREA ȘI atenție secțiunea Îngrijire ÎNTREȚINEREA DE și întreținere pentru detalii CĂTRE UTILIZATOR privind curățarea și înlocuirea NU TREBUIE filtrelor din aluminiu și carbon EFECTUATE (dacă aparatul este prevăzut DE COPII cu aceste filtre).
- Page 37 • Nu folosi hota dacă apar semne de deteriorare sau imperfecțiuni. Contactează serviciul de Asistență clienți pentru ajutor. • Producătorul nu își asumă răspunderea pentru leziunile corporale sau daunele materiale rezultate din utilizarea sau montarea incorectă a acestui aparat. • Aparatul este destinat ca hotă de evacuare pentru uz casnic. Conectarea la alimentarea electrică...
-
Page 38: Date Tehnice
DSL - 5 - S - 385mm x 10mm Informații pentru UE nr. 66/2014 și nr. 65/2014 A. Informații despre hotă (www.diy.com) Valoare Marcă comercială COOKE&LEWIS GOODHOME CLBH60ASBL CLBH90ASBL Identificare model GHBH60ASBL GHBH90ASBL Consum anual de electricitate (hotă AEC) (kWh/an) 18.9 Clasa de eficiență energetică... - Page 39 Consum de energie măsurat în modul oprit (Po) (W) 0.31 Consum de energie măsurat în modul standby (Ps) (W) Factor de creștere a duratei (f) Indice de eficiență energetică (hotă EEI) 43.3 Debit de aer măsurat la punctul cu eficiența cea mai mare (QBEP) (m3/h) 238.0 Presiunea aerului măsurată...
-
Page 40: Antes De Empezar
Garanție Dacă achiziționați acest produs din Turcia sau România, veți primi o garanție. Avem o grijă deosebită să selectăm materiale de IMPORTANT - înaltă calitate şi să utilizăm tehnici de fabricare care ne permit să creăm produse care încorporează PĂSTREAZĂ ACESTE designul şi durabilitatea. - Page 41 • Para evitar los riesgos el nuevo propietario pueda siempre presentes al familiarizarse con el aparato y utilizar un aparato eléctrico, las advertencias de seguridad. es importante instalar Seguridad correctamente esta campana extractora y leer atentamente ADVERTENCIA: las instrucciones de seguridad EXISTE RIESGO para evitar el mal uso y DE INCENDIO...
- Page 42 ADVERTENCIA: ADVERTENCIA: LAS UTILICE PARTES ACCESI- ÚNICAMENTE BLES PUEDEN CA- ACCESORIOS LENTARSE CUANDO Y TORNILLOS SE UTILIZAN CON DE MONTAJE ELECTRODOMÉS- DEL MISMO TICOS DE COCINA. TAMAÑO QUE LOS LOS NIÑOS MENO- RECOMENDADOS RES DE 8 AÑOS EN ESTE MANUAL DEBERÁN MANTE- DE INSTRUCCIONES.
- Page 43 ADVERTENCIA: RECIPIENTES DE SE DEBEN COCCIÓN SITUADOS INCORPORAR EN LA PLACA Y LA MEDIOS QUE PARTE MÁS BAJA DE PERMITAN LA LA CAMPANA DEBE DESCONEXIÓN SER: COMPLETA DE - PLACAS DE GAS LA INSTALACIÓN ≥ 760 MM FIJA DE ACUERDO - PLACAS CON LAS NORMAS ELÉCTRICAS...
- Page 44 CASO DE DUDA, ADVERTENCIA: CONSULTE A LA LA CAMPANA TIENDA O A UN PUEDE DEJAR INSTALADOR DE FUNCIONAR CUALIFICADO. DURANTE UNA DESCARGA ADVERTENCIA: ELECTROSTÁTICA CONSULTE LA (P. EJ. UN RAYO). NORMATIVA LOCAL ESTO NO IMPLICA SOBRE LAS SALIDAS NINGÚN RIESGO DE DE EXTRACCIÓN DAÑOS.
- Page 45 SUPERVISADO O • No instale el aparato al aire libre, en un lugar húmedo o INSTRUIDO ACERCA en una superficie propensa a DEL USO DEL fugas de agua, como debajo APARATO DE UNA de un fregadero o cerca de él. FORMA SEGURA En caso de que el aparato se Y COMPRENDEN...
-
Page 46: Instalación Eléctrica
• El aparato no está diseñado para funcionar con un programador externo ni un sistema de control remoto independiente. • Debe haber una buena ventilación en la sala cuando se utilice la campana al mismo tiempo que otros aparatos que funcionen con gas u otros combustibles. -
Page 47: Datos Técnicos
DSL - 5 - S - 385mm x 10mm Información de la UE N.º 66/2014 y N.º 65/2014 A. Información de la campana extractora (www.diy.com) Valor Marca comercial COOKE&LEWIS GOODHOME CLBH60ASBL CLBH90ASBL Identificación del modelo GHBH60ASBL GHBH90ASBL Consumo energético anual (campana AEC) (kWh/año) 18.9 Clase de eficiencia energética Eficiencia fluidodinámica... - Page 48 Flujo de aire máximo en el punto de trabajo (con uso normal) (m 385.6 Flujo de aire máximo con el ajuste más alto (Qmax) (m 397.2 Flujo de aire máximo con el ajuste más alto (Qmax) (m /h) (con función 571.5 de potencia máxima) Nivel de potencia acústica ponderado con el ajuste mínimo (LWA) (dB)
-
Page 49: Reciclaje Y Eliminación
Reciclaje y eliminación La presente garantía cubre los fallos y anomalías del producto siempre y cuando este se haya Los residuos procedentes de equipos utilizado para los fines para los que está eléctricos y electrónicos (RAEE) no deben destinado y que su instalación, limpieza, cuidado y desecharse con la basura doméstica. -
Page 50: Antes De Começar
dúvida, não utilize o aparelho. Entre em contacto com o Antes de começar serviço de atendimento ao Estas instruções são para sua cliente através do número segurança. Leia as seguintes 800 814 566. instruções cuidadosamente • Verifique a embalagem, antes de avançar com a certifique-se de que dispõe instalação e utilização deste de todas as peças listadas... - Page 51 Segurança NESTE MANUAL DE INSTRUÇÕES. O AVISO: EXISTE INCUMPRIMENTO UM RISCO DE DESTAS CHOQUE ELÉTRICO INSTRUÇÕES E INCÊNDIO SE PODE RESULTAR A LIMPEZA NÃO EM PERIGOS FOR EFETUADA ELÉTRICOS. DE ACORDO COM AVISO: DESLIGUE ESTAS INSTRUÇÕES. O APARELHO DA AVISO: QUANDO REDE ELÉTRICA APLICÁVEL, ANTES DE EFETUAR...
- Page 52 EVITAR TOCAR NO SEPARAÇÃO MÍNIMA APARELHO. ENTRE CONTACTOS DE 3 MM EM TODOS AVISO: NÃO OS POLOS. FLAMBAR SOB O EXAUSTOR. PARA AVISO: CASO EVITAR O RISCO DE O EXAUSTOR INCÊNDIO, LIMPE OU SE ENCONTRE SUBSTITUA O FILTRO POR CIMA DE DE GORDURAS UM APARELHO, REGULARMENTE...
- Page 53 DO APARELHO. A CONFIRME, COM NÃO INSTALAÇÃO AS AUTORIDADES DESTE APARELHO LOCAIS, SE A DE ACORDO COM VENTILAÇÃO ESTAS INSTRUÇÕES DO ESPAÇO É PODERÁ RESULTAR ADEQUADA. EM RISCOS DE AVISO: O EXAUSTOR SEGURANÇA. PODE PARAR EM CASO DE DE FUNCIONAR DÚVIDA, PEÇA DURANTE UMA ACONSELHAMENTO...
- Page 54 SENSORIAIS CRIANÇAS COM OU MENTAIS MENOS DE 8 ANOS REDUZIDAS, OU DE IDADE. COM FALTA DE • Se o cabo de alimentação EXPERIÊNCIA E estiver danificado, este CONHECIMENTO, tem de ser substituído pelo fabricante, o seu fornecedor CASO LHES SEJA de serviços ou por uma DISPONIBILIZADA pessoa qualificada de modo a...
-
Page 55: Instalação Elétrica
alumínio e de carbono (caso de atendimento ao cliente estejam equipados). para obter assistência. • As lâmpadas LED deste • O fabricante está isento de aparelho não são substituíveis qualquer responsabilidade por pelo consumidor. Se uma danos pessoais ou materiais lâmpada falhar, contacte resultantes da utilização a linha de atendimento ao... -
Page 56: Dados Técnicos
Código ILCOS - Iluminação do fogão Informações para a UE n.º 66/2014 e n.º 65/2014 A. Informações sobre o exaustor (www.diy.com) Valor Marca comercial COOKE&LEWIS GOODHOME CLBH60ASBL CLBH90ASBL Identificação do modelo GHBH60ASBL GHBH90ASBL Consumo energético anual (CEA do exaustor) (kWh/ano) 18.9 Classe de eficiência energética 30.4... - Page 57 Fluxo de ar mínimo no ponto de funcionamento (em utilização normal) (m 146.2 Fluxo de ar máximo no ponto de funcionamento (em utilização normal) (m 385.6 397.2 Fluxo de ar máximo na definição máxima (Qmax) (m 571.5 Fluxo de ar máximo na definição máxima (Qmax) (m /h) (com reforço) Nível de potência sonora ponderada na definição mínima (LWA) (dB) Nível de potência sonora ponderada na definição máxima (LWA) (dB)
- Page 58 Reciclagem e eliminação Esta garantia não cobre defeitos e danos causados pelo desgaste normal, nem danos que possam Os resíduos de produtos elétricos (REEE) resultar de utilização indevida, instalação ou não devem ser eliminados com resíduos montagem incorreta, negligência, acidentes, domésticos.
- Page 59 EN Installation FR Installation PL Instalacja RO Montare ES Instalación PT Instalação VENT PACK CARBFILT4 ( Ø 150mm) EN See 10A-12A EN See 10B-11B FR Voir 10A-12A FR Voir 10B-11B PL Patrz 10A-12A PL Patrz 10B-11B RO Vezi 10A-12A RO Vezi 10B-11B ES Véase 10A-12A ES Véase 10B-11B PT Consultar 10A-12A...
- Page 60 250mm 250-453mm 235mm 270mm 250mm 250mm 36mm ≥ 460mm 60cm 420mm 90cm 580mm DIM.B ≥ 760mm ≥ 650mm 5059340445953_MNL_IN_V04.indb 59 5059340445953_MNL_IN_V04.indb 59 09-06-2022 14:31:34 09-06-2022 14:31:34...
- Page 61 EN Mark the wall with the hole positions as shown in the diagram. The fixings supplied are suitable for solid walls only. When fixing to any other type of wall use suitable alternative fixings. WARNING: Caution! Before drilling it is extremely important to check the wall for hidden pipes and electrical cables using an appropriate detection device.
- Page 62 RO Marchează pozițiile găurilor pe perete, conform schiței. Elementele de fixare furnizate sunt adecvate numai pentru pereți solizi. La montarea pe orice alt tip de perete, folosește elemente de fixare alternative adecvate. AVERTISMENT: Atenție! Înainte de face găuri este extrem de important să se verifice peretele pentru a depista țevi și cabluri electrice ascunse folosind un dispozitiv de detectare adecvat.
- Page 63 07. x8 250mm 235mm 250mm 60cm: 420mm 90cm: 580mm 06. x2 250mm 235mm 250mm 60cm: 420mm 90cm: 580mm 5059340445953_MNL_IN_V04.indb 62 5059340445953_MNL_IN_V04.indb 62 09-06-2022 14:31:35 09-06-2022 14:31:35...
- Page 64 03. x1 04. x1 06. x4 250-453mm 01. x1 5059340445953_MNL_IN_V04.indb 63 5059340445953_MNL_IN_V04.indb 63 09-06-2022 14:31:35 09-06-2022 14:31:35...
- Page 65 06. x2 5059340445953_MNL_IN_V04.indb 64 5059340445953_MNL_IN_V04.indb 64 09-06-2022 14:31:36 09-06-2022 14:31:36...
- Page 66 05. x1 08. x2 EN Only for ducted option FR Uniquement pour l’option avec conduit PL Dotyczy wyłącznie opcji z kanałem odprowadzającym RO Numai pentru opțiunea cu tubulatură ES Solo para la opción con conducto PT Apenas para a opção entubada 5059340445953_MNL_IN_V04.indb 65 5059340445953_MNL_IN_V04.indb 65 09-06-2022 14:31:36...
- Page 67 VENT PACK (Ø150mm) 02. x1 5059340445953_MNL_IN_V04.indb 66 5059340445953_MNL_IN_V04.indb 66 09-06-2022 14:31:36 09-06-2022 14:31:36...
- Page 68 CARBFILT4 EN Only for recirculation option. FR Uniquement pour l’option de recyclage. PL Dotyczy wyłącznie opcji obiegu zamkniętego. RO Numai pentru opțiunea cu recirculare. ES Solo para la opción de recirculación. PT Apenas para a opção de recirculação. 02. x1 5059340445953_MNL_IN_V04.indb 67 5059340445953_MNL_IN_V04.indb 67 09-06-2022 14:31:37...
- Page 69 08. x2 5059340445953_MNL_IN_V04.indb 68 5059340445953_MNL_IN_V04.indb 68 09-06-2022 14:31:37 09-06-2022 14:31:37...
-
Page 70: Control Panel
EN Use Before you start WARNING: Read the instructions before using the appliance. Switch on the Residual Current Device (RCD) at the consumer unit. The appliance is ready for use. EN Functions & Settings 01 Control panel To obtain the best results from your cooker hood it is recommended that you leave it switched on for up to 15 minutes after you have finished cooking. - Page 71 FAN SPEED UP When the hood is on but the fan is off, press the Fan Speed Up key once to turn on the fan at full power in Manual Mode and “S.P” is shown in the display. This speed automatically drops down to level 5 after five minutes to conserve energy.
-
Page 72: Using The Appliance
SENSOR USE Calibration data is stored in memory in the event of a power cut, and this process can be repeated at any time However, if calibration has not finished correctly or has not been run, the hood cannot operate in Automatic Mode anc “E.C”... -
Page 73: Troubleshooting
• The Light will be white or red. • The display will show the motor speed from off as “A.O” up to boost as “A.P”. USING MANUAL MODE AND AUTOMATIC MODE Automatic Mode After calibration is completed, the hood will be configured in Automatic Mode and when the hood is turned on, the sensor will take an initial reading of the air quality in your kitchen. - Page 74 Problem Possible cause Solution Speed may be too low. Select a higher speed. Clean the aluminium filters. (See Care Aluminium filters are dirty. and maintenance section). Top vent might be obstructed. Clear any obstruction. Suction performance Ensure that the vent kit is fitted reduced.
-
Page 75: Panneau De Commande
FR Utilisation Avant de commencer AVERTISSEMENT : Lire les instructions avant d'utiliser l'appareil. Allumer le dispositif différentiel à courant résiduel (DDR) au niveau du tableau électrique. L'appareil est prêt à l'emploi. FR Fonctions et réglages 01 Panneau de commande Pour tirer le meilleur parti de votre hotte, il est recommandé de la laisser allumée pendant au moins 15 minutes après la fin de la cuisson. - Page 76 Lorsque le ventilateur fonctionne à une vitesse supérieure à 1, chaque pression sur cette touche réduit la vitesse du ventilateur d'un niveau à la fois jusqu'à ce que le ventilateur s'arrête. Il est également possible d'appuyer sur cette touche et de la maintenir enfoncée pendant deux secondes pour éteindre complètement la hotte.
- Page 77 • Appuyer sur la commande d'état du capteur d'air . Elle commence à clignoter en vert et l'écran affiche « 00 ». L'étalonnage démarre et l'affichage lance un compte à rebours de « 00 » à « 99 » d'une durée d'environ cinq minutes.
- Page 78 02 Utilisation de l'appareil électroménager UTILISATION NORMALE Une fois l'étalonnage terminé, la hotte peut fonctionner en mode manuel ou automatique. Mode manuel • Les icônes de marche/arrêt , de diminution de la vitesse du ventilateur et d'augmentation de la vitesse du ventilateur s'allument en blanc dans ce mode.
-
Page 79: Dépannage
Dépannage Problème Causes possibles Solutions L'appareil n'est pas installé correctement Démonter l'appareil et vérifier qu'il est sur les supports. correctement fixé. Vibration excessive. La pale du ventilateur est endommagée. Le moteur du ventilateur n'est pas bien Éteindre l'appareil. La réparation doit être fixé. -
Page 80: Panel Sterowania
PL Użytkowanie Przed rozpoczęciem użytkowania OSTRZEŻENIE: Przed rozpoczęciem korzystania z urządzenia zapoznać się z instrukcją obsługi. Włączyć wyłącznik różnicowoprądowy (RCD) na rozdzielnicy. Urządzenie jest gotowe do użytku. PL Funkcje i ustawienia 01 Panel sterowania W celu uzyskania najlepszych efektów podczas użytkowania okapu kuchennego zaleca się pozostawić... - Page 81 Gdy wentylator pracuje z wyższą prędkością niż 1, każde naciśnięcie tego przycisku powoduje zmniejszenie prędkości o jeden poziom aż do wyłączenia wentylatora. Można również nacisnąć i przytrzymać ten przycisk przez dwie sekundy, aby całkowicie wyłączyć okap. ZWIĘKSZANIE PRĘDKOŚCI WENTYLATORA Gdy okap jest włączony, a wentylator wyłączony, naciśnij jednokrotnie przycisk zwiększania prędkości wentylatora, aby włączyć...
- Page 82 • Naciśnij ikonę stanu funkcji Air Sense — zacznie ona migać na zielono, a na wyświetlaczu pojawi się wskazanie „00”. Rozpocznie się proces kalibracji, a wskazanie na wyświetlaczu będzie rosnąć od wartości „00” do „99” (zajmie to ok. pięciu minut). •...
-
Page 83: Korzystanie Z Urządzenia
• Ponownie naciśnij jednocześnie i przytrzymaj przez dwie sekundy przycisk zmniejszania prędkości wentylatora i przycisk zwiększania prędkości wentylatora , aby wyjść z trybu konfiguracji, lub zaczekaj trzydzieści sekund, aż nastąpi to samoczynnie. 02 Korzystanie z urządzenia NORMALNE UŻYTKOWANIE Po przeprowadzeniu kalibracji okap kuchenny może działać w trybie ręcznym lub automatycznym. Tryb ręczny •... -
Page 84: Rozwiązywanie Problemów
Rozwiązywanie problemów Usterka Możliwa przyczyna Rozwiązanie Urządzenie nie jest prawidłowo Zdejmij urządzenie i sprawdź, czy jest zamontowane na wspornikach. prawidłowo zamontowane. Nadmierne drgania. Łopatka wentylatora jest uszkodzona. Silnik wentylatora nie jest zamocowany Wyłączyć urządzenie. Naprawy mogą we właściwy sposób. być wykonywane wyłącznie przez Oświetlenie jest Łopatka wentylatora jest zablokowana. -
Page 85: Panou De Comandă
RO Utilizare Înainte de a începe AVERTISMENT: Citește instrucțiunile înainte de a utiliza aparatul. Pornește siguranța automată cu protecție diferențială (RCD) de la tabloul de distribuție. Aparatul este gata de utilizare. RO Funcții și setări 01 Panou de comandă Pentru a obține cele mai bune rezultate de la hotă, se recomandă să o lași pornită până la 15 minute după... - Page 86 MĂRIRE TURAȚIE VENTILATOR Când hota este pornită, dar ventilatorul este oprit, apasă o dată pe tasta Mărire turație ventilator pentru a porni ventilatorul la putere maximă în modul Manual, iar pe afișaj vă apărea „S.P”. Această turație scade automat la nivelul 5 după cinci minute, pentru a face economie de energie. Când ventilatorul este la una din turațiile 1 - 5, fiecare apăsare a acestei taste va mări turația ventilatorului cu câte un nivel până...
- Page 87 • Menține apăsate simultan comenzile de Reducere turație ventilator și Mărire turație ventilator timp de două secunde pentru a ieși din modul Configurare sau se va ieși automat din acesta după treizeci de secunde. • Comanda Detectare stare aer va fi acum verde și este gata pentru detectare automată când hota este pornită...
-
Page 88: Utilizarea Aparatului
02 Utilizarea aparatului UTILIZARE NORMALĂ Dacă a fost încheiată calibrarea, hota poate funcționa în modul Manual sau Automat. Modul Manual • Pictogramele de pornire/oprire , Reducere turație ventilator și Mărire turație ventilator sunt aprinse în alb în acest mod. • Pictograma pentru Detectare stare aer va fi albă, verde, portocalie sau roșie, în funcție de calitatea aerului din bucătărie. - Page 89 Depanare Problemă Cauză posibilă Soluție Aparatul nu este montat corespunzător Demontează aparatul și verifică dacă pe console. este fixat corespunzător. Vibrații excesive. Pala ventilatorului este defectă. Motorul ventilatorului nu este fixat Oprește aparatul. Reparațiile trebuie corespunzător. efectuate numai de personal de Lumina este aprinsă, Pala ventilatorului este blocată.
-
Page 90: Panel De Control
ES Uso Antes de empezar ADVERTENCIA: Lea las instrucciones antes de utilizar el aparato. Conecte el dispositivo de corriente residual (RCD) en la unidad de consumo. El aparato está listo para su uso. ES Funciones y ajustes 01 Panel de control Para obtener los mejores resultados de la campana extractora, se recomienda dejarla encendida hasta 15 minutos después de haber terminado de cocinar. - Page 91 AUMENTAR VELOCIDAD DEL VENTILADOR Con la campana encendida y el ventilador apagado, pulse una vez la tecla de aumento de velocidad del ventilador para encender el ventilador a plena potencia en modo manual y se mostrará "S.P" en la pantalla. Esta velocidad baja automáticamente al nivel 5 después de cinco minutos para ahorrar energía.
- Page 92 • Mantenga pulsados nuevamente los controles de reducción de la velocidad del ventilador y de aumento de la velocidad del ventilador durante dos segundos para salir del modo de configuración; o bien, se saldrá automáticamente después de treinta segundos. • El control de estado del sensor de aire ahora estará...
-
Page 93: Uso Del Aparato
02 Uso del aparato USO NORMAL Si se ha completado la calibración, la campana extractora puede funcionar en modo manual o en modo automático. Modo manual • En este modo, los iconos de encendido/apagado , reducción de la velocidad del ventilador aumento de la velocidad del ventilador se iluminan en blanco. -
Page 94: Resolución De Problemas
Resolución de problemas Problema Posible causa Solución El aparato no está instalado Intente quitar el aparato y compruebe que correctamente en los soportes. está bien fijado. Vibración excesiva. El aspa del ventilador está dañada. El motor del ventilador no está bien Apague el aparato. -
Page 95: Painel De Controlo
PT Utilização Antes de começar AVISO: Leia as instruções antes de utilizar o aparelho. Ligue o disjuntor diferencial residual (DDR) ao contador elétrico. O aparelho está pronto para ser utilizado. PT Funções e definições 01 Painel de controlo Para obter os melhores resultados do exaustor, recomenda-se que o deixe ligado até 15 minutos após terminar de cozinhar. - Page 96 AUMENTO DA VELOCIDADE DA VENTOINHA Quando o exaustor estiver ligado mas a ventoinha estiver desligada, prima a tecla de aumento da velocidade da ventoinha uma vez para ligar a ventoinha na potência máxima no modo manual e o visor apresenta "S.P". Esta velocidade desce automaticamente para o nível 5 após cinco minutos, a fim de poupar energia.
- Page 97 • Mantenha novamente premidos o controlo de diminuição da velocidade da ventoinha e o controlo de aumento da velocidade da ventoinha em conjunto durante dois segundos para sair do modo de configuração, ou sairá automaticamente deste modo após trinta segundos. •...
-
Page 98: Utilizar O Aparelho
02 Utilizar o aparelho UTILIZAÇÃO NORMAL Se a calibração tiver sido executada, o exaustor pode funcionar no modo manual ou no modo automático. Modo manual • Os ícones ligado/desligado , diminuição da velocidade da ventoinha e aumento da velocidade da ventoinha estão acesos a branco neste modo. -
Page 99: Resolução De Problemas
Resolução de problemas Problema Causa possível Solução O aparelho não está devidamente Retire o aparelho e verifique se está instalado nos suportes. fixo corretamente. Vibração excessiva. A lâmina da ventoinha está danificada. Desligue o aparelho. Reparação a O motor da ventoinha não está bem fixo. ser efetuada apenas por pessoal de A luz está... - Page 100 EN Care & maintenance IMPORTANT: Switch off the electrical supply at the consumer unit before replacing the carbon filters. 01 Carbon filter replacement Replace every three months. 3 MONTHS 2 x Carbon filter, model number CARBFILT4 3663602843092 available via the customer helpline - see end of Care &...
-
Page 101: Lamp Replacement
03 Lamp replacement The LED lamps in this appliance are not replaceable by the consumer. If a lamp fails, please contact the Customer helpline to arrange an engineer visit. Customer helpline (toll free): UK 0800 324 7818 uk@kingfisherservice.com Eire 1800 932 230 eire@kingfisherservice.com IMPORTANT: Switch off the electrical supply at the consumer unit before cleaning the air sensor. - Page 102 FR Entretien et maintenance IMPORTANT : Couper l'alimentation électrique au niveau du tableau électrique avant de remplacer les filtres à charbon. 01 Remplacement des filtres à charbon Changer tous les trois mois. 3 MOIS 2 filtres à charbon, numéro de modèle CARBFILT4 3663602843092, disponibles via l'assistance téléphonique (voir la fin de la section Entretien et maintenance pour en savoir plus).
-
Page 103: Remplacement De La Lampe
AVERTISSEMENT : Augmenter la fréquence de remplacement/nettoyage des filtres si la hotte est utilisée plus de 2 heures par jour. Toujours utiliser des filtres d'origine du fabricant. 03 Remplacement de la lampe Les lampes LED de cet appareil ne peuvent pas être remplacées par l'usager. En cas de panne d'une lampe, contacter l'assistance téléphonique afin de planifier un rendez-vous avec un technicien. - Page 104 PL Czyszczenie i konserwacja WAŻNE: Przed przystąpieniem do wymiany filtrów węglowych należy wyłączyć zasilanie z poziomu rozdzielnicy. 01 Wymiana filtra węglowego Wymieniać co trzy miesiące. 3 MIESIĄCE 2 x filtr węglowy, numer modelu CARBFILT4 3663602843092, dostępny za pośrednictwem infolinii dla klientów —...
- Page 105 OSTRZEŻENIE: Jeśli okap jest używany dłużej niż przez 2 godziny dziennie, należy zwiększyć częstotliwość czyszczenia/wymiany filtrów. Należy zawsze używać oryginalnych filtrów dostarczonych przez producenta. 03 Wymiana oświetlenia Oświetlenie LED w tym urządzeniu nie może być wymienione przez użytkownika. Jeśli dojdzie do awarii oświetlenia, należy skontaktować...
- Page 106 RO Îngrijire și întreținere IMPORTANT: Oprește alimentarea cu electricitate de la tabloul de distribuție înainte de a înlocui filtrele din carbon. 01 Înlocuirea filtrului din carbon Înlocuiește la fiecare trei luni. 3 LUNI 2 filtre din carbon, număr model CARBFILT4 3663602843092, disponibile prin linia de Asistență clienți - consultă...
- Page 107 03 Înlocuirea becului Becurile cu LED din acest aparat nu pot fi înlocuite de client. Dacă se arde un bec, contactează linia de Asistență clienți pentru a programa vizita unui inginer. Linia de Asistență clienți (fără taxă suplimentară): 0800 895 099 romania@kingfisherservice.com IMPORTANT: Oprește alimentarea cu electricitate de la tabloul de distribuție înainte de a curăța senzorul de aer.
- Page 108 ES Cuidado y mantenimiento IMPORTANTE: Desconecte el suministro eléctrico en la unidad de consumo antes de sustituir los filtros de carbono. 01 Sustitución del filtro de carbono Sustituir cada tres meses. 3 MESES 2 filtros de carbono, número de modelo CARBFILT4 3663602843092, disponibles a través de la línea de atención al cliente;...
-
Page 109: Sustitución De La Lámpara
03 Sustitución de la lámpara El usuario no puede sustituir las bombillas LED de este aparato. Si una bombilla falla, póngase en contacto con el servicio de atención al cliente para organizar la visita de un técnico. Línea telefónica de atención al cliente (número gratuito): 800 098 794 spain@kingfisherservice.com IMPORTANTE: Desconecte el suministro eléctrico en la unidad de consumo antes de limpiar el sensor de aire. - Page 110 PT Cuidados e manutenção IMPORTANTE: desligue a alimentação elétrica no contador elétrico antes de substituir os filtros de carbono. 01 Substituição do filtro de carbono Substituir a cada três meses. 3 MESES 2 filtros de carbono, número de modelo CARBFILT4 3663602843092, disponíveis através da linha de atendimento ao cliente - consulte a parte final da secção Cuidados e manutenção para obter mais detalhes.
- Page 111 AVISO: aumente a frequência de limpeza/substituição se o exaustor for utilizado durante mais de 2 horas por dia. Utilize sempre filtros genuínos do fabricante. 03 Substituição de lâmpada As lâmpadas LED deste aparelho não são substituíveis pelo consumidor. Se uma lâmpada falhar, contacte a linha de atendimento ao cliente para agendar a visita de um técnico.
- Page 112 (UK) Declaration of Conformity Name and address of the manufacturer or his authorized representative: Kingfisher International Products Limited, 3 Sheldon Square, London W2 6PX, United Kingdom This declaration of conformity is issued under the sole responsibility of the manufacturer. Object of the declaration: •...
-
Page 113: Eu Declaration Of Conformity
(EU) Declaration of Conformity Name and address of the manufacturer or his authorized representative: Kingfisher International Products B.V., Rapenburgerstraat 175E, 1011 VM Amsterdam, The Netherlands This declaration of conformity is issued under the sole responsibility of the manufacturer. Object of the declaration: •... - Page 114 5059340445953_MNL_IN_V04.indb 113 5059340445953_MNL_IN_V04.indb 113 09-06-2022 14:31:43 09-06-2022 14:31:43...
-
Page 115: Déclaration De Conformité Ce
• Produit : Plage de capteur d'air, hotte en T • Modèle : CLBH60ASBL / CLBH90ASBL / GHBH60ASBL / GHBH90ASBL • EAN : 5059340445953/ 5059340445939 / 5059340445946 / 5059340445922 L'objet de la déclaration décrit ci-dessus est conforme à la législation d'harmonisation de l'Union européenne applicable :... - Page 116 PL Deklaracja zgodności (UE) Deklaracja zgodności Nazwa i adres producenta oraz jego upoważnionego przedstawiciela: Kingfisher International Products B.V., Rapenburgerstraat 175E, 1011 VM Amsterdam, The Netherlands Niniejsza deklaracja zgodności została wydana na wyłączną odpowiedzialność producenta. Przedmiot deklaracji: • Produkt: Okap kominowy Air Sensor •...
- Page 117 RO Declarație de conformitate Declarație de conformitate (UE) Denumirea și adresa producătorului sau a reprezentantului autorizat al acestuia: Kingfisher International Products B.V., Rapenburgerstraat 175E, 1011 VM Amsterdam, The Netherlands Această declarație de conformitate este emisă sub răspunderea exclusivă a producătorului. Obiectul declarației:...
- Page 118 (UE) Declaración de conformidad Nombre y dirección del fabricante o de su representante autorizado: Kingfisher International Products B.V., Rapenburgerstraat 175E, 1011 VM Amsterdam, The Netherlands Esta declaración de conformidad se emite bajo la responsabilidad exclusiva del fabricante. Objeto de la declaración:...
- Page 119 PT Declaração de Conformidade Declaração de Conformidade (UE) Nome e endereço do fabricante ou do seu representante autorizado: Kingfisher International Products B.V., Rapenburgerstraat 175E, 1011 VM Amsterdam, The Netherlands Esta declaração de conformidade é emitida sob a responsabilidade exclusiva do fabricante. Objeto da declaração:...
- Page 120 Manufacturer • Fabricant • Producent • Pour consulter les manuels d’instructions Producător • Fabricante en ligne, rendez-vous sur le site www.kingfisher.com/products UK Manufacturer: Kingfisher International Products Limited, PL www.castorama.pl 3 Sheldon Square, London, W2 6PX Infolinia dla klientów (bezpłatna): United Kingdom 800 121 2222 poland@kingfisherservice.com EU Manufacturer: Aby zapoznać...
Need help?
Do you have a question about the CLBH60ASBL and is the answer not in the manual?
Questions and answers