Table of Contents
Advertisement
Quick Links
Advertisement
Table of Contents

Related Manuals for HOMCOM 820-228


Summary of Contents for HOMCOM 820-228
- Page 1 INcje029_US_CA 820-228 IMPORTANT, RETAIN FOR FUTURE REFERENCE: READ CAREFULLY...
- Page 5 PACKING DETAILS : TOTAL 2 BOX BOX 1/2: PARTNO. PARTS PARTNO. PARTS Ø7.8×30mm Ø5×50mm Ø4×35mm Ø4×24mm Ø7.8×20mm Ø4×14mm M4×24mm...
- Page 6 PACKING DETAILS : TOTAL 2 BOX BOX 2/2: PARTNO. PARTS PARTS Ø3×16mm Ø5.8×30mm PARTNO. PARTS Ø4×10mm 2extra Ø4×6mm 2extra...
- Page 7 Assembly Instructions ×2...
- Page 8 Assembly Instructions...
- Page 9 Assembly Instructions...
- Page 10 Assembly Instructions ×2...
- Page 11 Assembly Instructions 160°~185°...
- Page 12 Assembly Instructions 160°~185°...
- Page 13 Assembly Instructions...
- Page 14 Assembly Instructions...
- Page 15 Assembly Instructions...
- Page 16 Assembly Instructions 160°~185°...
- Page 17 Assembly Instructions...
- Page 18 Assembly Instructions 160°~185° 160°~185°...
- Page 19 Assembly Instructions...
- Page 20 Assembly Instructions 160°~185°...
- Page 21 Assembly Instructions...
- Page 22 Assembly Instructions °...
- Page 23 Assembly Instructions...
- Page 24 Assembly Instructions MAXIMUM LOAD 79.4 lbs (36 kg) MAXIMUM LOAD 63.9 lbs (29 kg) MAXIMUM LOAD 13.2 lbs (6 kg) MAXIMUM LOAD 13.2 lbs (6 kg)
-
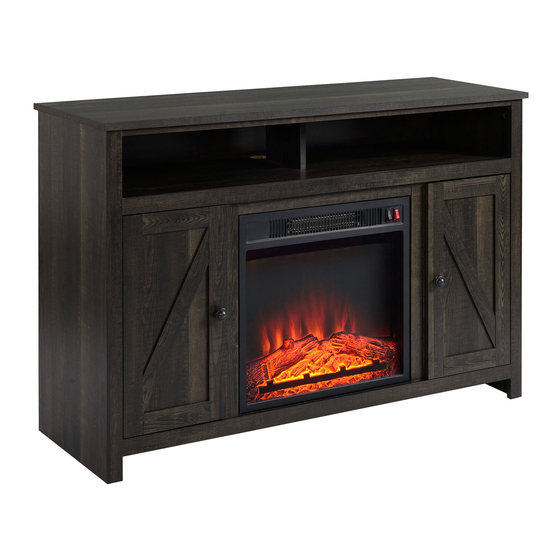
Page 26: Your Fireplace
IMPORTANT INSTRUCTIONS ASSEMBLY INSTRUCTIONS General 1. Read all instructions before using this appliance. 14. Do not insert or allow foreign objects to enter any 2. This heater is hot when in use. To avoid burns, do not let bare ventilation or exhaust opening as this may cause an electric Keep combustible materials, such as skin touch hot surfaces. - Page 27 ELECTRIC FIREPLACE SPECIFICATIONS 18 x 5 x 17 1/8 inch 45.7 x 12.8 x 43.5 cm 5.7kg / 7.4kg 1400 Watts...
-
Page 28: Required Tools
ASSEMBLY INSTRUCTIONS REQUIRED TOOLS HARDWARE Phillips Screwdriver (not included) Ф 4 X 10mm Ф 4 X 6mm AA x 1 BB x 2 CC x 6+2 extra DD x 6+2 extra 1. ATTACHING THE METAL TRIMS 2. INSTALLING THE FIREPLACE INSERT... -
Page 29: Power On/Off
POWER ON/OFF This button will turn on the power to the heater and blower. POWER HEATER... -
Page 30: Replacement Parts List And Exploded View
REPLACEMENT PARTS LIST AND EXPLODED VIEW Part Part name Heater / blower assembly Main power switch Heater switch Emberbed with log Flame effect circuit board Flame generator drive motor Flame generator / spinner Some parts and specifications may change without notice. -
Page 31: Troubleshooting Guide
TROUBLE SHOOTING GUIDE 1. No power. 1a.Check that unit is plugged into a standard 120V outlet. Open bottom of unit, check to see if "spinner" is correctly mounted at the rear of unit. 2. Power light is ON but the flame effect is not visible. - Page 32 colour...
- Page 33 INSTRUCTIONS IMPORTANTES INSTRUCTIONS DE MONTAGE Généralités 1. Lisez toutes les directives avant d'utiliser cet appareil. 14. Évitez d’introduire ou de faire tomber des corps étrangers 2. La chaufferette devient très chaude lorsqu'elle est en marche. dans les fentes d'entrée et de sortie de l'air car cela pourrait provoquer des décharges électriques, causer un incendie ou Pour éviter toute brûlure, ne laissez pas la peau non couverte endommager la chaufferette.
-
Page 34: Entretien
ENTRETIEN RECOMMANDATIONS À L'UTILISATEUR AVERTISSEMENT 1. Toute réparation de cet appareil ne doit être effectuée que par une N'utilisez pas ce foyer si l'une de ses pièces a été immergée. personne qualifiée. Contactez immédiatement un technicien qualifié pour inspecter 2. Cet appareil ne doit être modifié en aucune circonstance. l'appareil et remplacer des pièces du circuit électrique si besoin. -
Page 35: Instructions De Montage
INSTRUCTIONS DE MONTAGE OUTILS REQUIS QUINCAILLERIE Tournevis Cruciform Ф 4 X 10mm Ф 4 X 6mm (non compris) AA x 1 BB x 2 CC x 6+2 extra DD x 6+2 extra 1. ASSEMBLAGE LES MOULURES DE MÉTAL 2. INSTALLATION DU FOYER ENCASTRÉ... - Page 36 MODE D'EMPLOI TROUBLESHOOTING GUIDE ALIMENTATION ALLUMER / ÉTEINDRE L'APPAREIL DE CHAUFFAGE Ces boutons permettent de mettre en fonction le radiateur et le Il s'agit de l'alimentation principale du foyer. En appuyant sur ventilateur. le bouton « ALLUMER », le foyer se met en mode de veille et l'effet de flammes est visible.
- Page 37 LISTE DES PIÈCES DE RECHANGE ET VUE ÉCLATÉE Pièce Nom de la pièce Ensemble Chauffage / Ventilateur Interrupteur pour alimentation de courant principale Interrupteur de chauffage Lit de braises avec bûche Circuit imprimé de I'effet de flamme Moteur du générateur de flamme Générateur de flamme / pièce tournante Certaines pièces et caractéristiques peuvent changer sans préavis.
-
Page 38: Guide De Depannage
GUIDE DE DEPANNAGE PROBLÈME 1. Pas de courant. 1a.Vérifiez si l’unité est branchée dans une prise standard de 120V. r i r u ' l , é r é i f i 2. Le voyant d’alimentation estallumé, monté à l'arrière de l'unité. mais la flamme arrière n’est pas lumineuse ni visible. - Page 39 a été immergée. s'il a subi jetez...
Need help?
Do you have a question about the 820-228 and is the answer not in the manual?
Questions and answers