Advertisement
Quick Links
INGIS
ING 040 S1G GWGW AL
ING 080 S1G GWGW AL
EN 60335-1:2012+AC:2014+A11:2014+A13:2017+A1:2019+A2:2019+A14:2019 (2020)
EN 60335-2-30:2009+A11:2012 (2020)
EN 62233:2008 (2020)
Copyright ©2022 Attivita Business AB. Original
content rights reserved. All product names, logos,
and brands are property of their respective owners.
ING 060 S1G GWGW AL
ING 100 S1G GWGW AL
Information contained within this document was
considered accurate at the time of publication, but
may be subject to revision.
Advertisement

Related Manuals for ATTIPRO ING 040 S1G GWGW AL


Summary of Contents for ATTIPRO ING 040 S1G GWGW AL
- Page 1 INGIS ING 040 S1G GWGW AL ING 060 S1G GWGW AL ING 080 S1G GWGW AL ING 100 S1G GWGW AL EN 60335-1:2012+AC:2014+A11:2014+A13:2017+A1:2019+A2:2019+A14:2019 (2020) EN 60335-2-30:2009+A11:2012 (2020) EN 62233:2008 (2020) Copyright ©2022 Attivita Business AB. Original Information contained within this document was content rights reserved.
- Page 2 TABLE OF CONTENTS INNEHÅLLSFÖRTECKNING INNHOLDSFORTEGNELSE INDHOLDFORTEGNELSE SISÄLLYSLUETTELO Important Information/viktig information/viktig informasjon/vigtig informa- tion/tärkeää tietoa Tools/verktyg/verktøy/værktøjer/työkalut Specifications/specifikationer/spesifikasjoner/specifikationer/tekniset tiedot Assembly/montering/montage/kokoonpano Instructions for use/användningsinstruktioner/instruksjoner for bruk/brugsan- visning/käyttöohjeet Maintenance/skötsel/vedlikehold/vedligeholdelse/hoito Copyright ©2022 Attivita Business AB. Original Information contained within this document was content rights reserved. All product names, logos, considered accurate at the time of publication, but and brands are property of their respective owners.
- Page 3 Install an external power switch if you wish to toggle the light ON/OFF. Montera en extern knapp om du önskar förmåga att separat slå AV/PÅ belysningen. Monter en ekstern knapp hvis du vil ha muligheten til å slå belysningen PÅ/AV separat. Monter en ekstern knap, hvis du ønsker mulighed for at tænde/slukke belysningen separat.
- Page 4 Spirit-level Measure tape Drill Hammer Vattenpass Måttband Borr Hammare Vaterpass Måletape Hammer Vaterpas Målebånd Bore Hammer Vatupassi Iskuporakone Porakone Mlotek Screw Driver Drill Head Penna Skruvmejsel Borr Penn Skrutrekker Borr Penn Skruetrækker Kynä Ruuvimeisseli Poranterä Copyright ©2022 Attivita Business AB. Original Information contained within this document was content rights reserved.
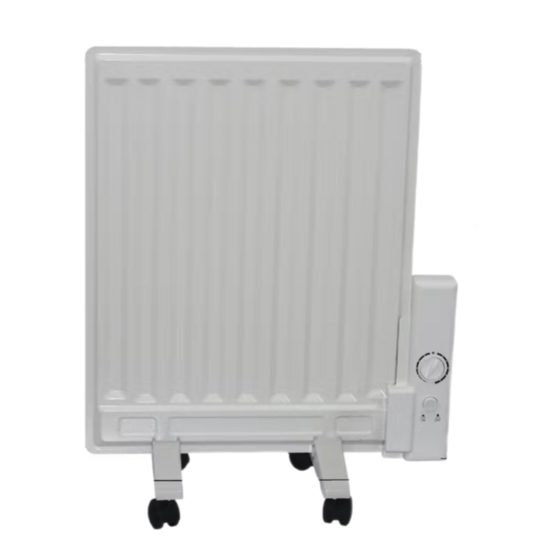
- Page 5 Housing Operation board Bostäder Drifttavla Bolig Driftsstyre Boliger Driftstavle Asuminen Käyttölauta Thermostat Termostat Termostat Termostat Termostaatti Foot On/Off switch På/av brytare På/av bryter Tænd/sluk knap Jalka On/off kytkin Copyright ©2022 Attivita Business AB. Original Information contained within this document was content rights reserved.
- Page 6 Protection SUPPLY Class 230~ Volts ac, Class I 50/60Hz, 400 Watts ING 040 S1G GWGW AL 230~ Volts ac, Class I 50/60Hz, 600 Watts ING 060 S1G GWGW AL Copyright ©2022 Attivita Business AB. Original Information contained within this document was content rights reserved.
- Page 7 POWER Protection SUPPLY Class 230~ Volts ac, Class I 50/60Hz, 800 Watts ING 080 S1G GWGW AL 230~ Volts ac, Class I 50/60Hz, 1000 Watts ING 100 S1G GWGW AL Copyright ©2022 Attivita Business AB. Original Information contained within this document was content rights reserved.
- Page 8 WHEN FREE STANDING NÄR FRI STÅENDE NÅR FRISTÅENDE NÅR FRITSTÅENDE KUN VAPAASTI SEISEVA Taking the unit and the 2 feet and 2 M6x14 screws out from the packing, insert the bottom side of the housing to the gap on the 2 feet, then fix the feet to the body with the screw provided. Ta ut enheten och de 2 fötterna och 2 M6x14-skruvarna ur förpackningen, för in undersidan av höljet i springan på...
- Page 9 WHEN WALL MOUNTING VID VÄGGMONTERING FOR VEGGMONTERING TIL VÆGMONTERING SEINÄKIINNITYKSEEN The wall brackets are best placed approx 100-150 mm from each end of the radiator. Install the radiator in an upright and horizontal position and observe the specified minimum distances. The heater should not be located directly under permanent wall sockets or near water so that people using the tub, shower or swimming pool cannot come into contact with live parts, such as switches.
- Page 10 Drill 2 holes in the wall, one per wall bracket, and fasten the wall brackets with suitable screws. Borra 2 hål i väggen, ett per väggfäste, och fäst väggfästena med lämpliga skruvar. Bor 2 hull i veggen, ett per veggbrakett, og fest veggbrakettene med passende skruer.
- Page 11 Pull out the upper part of the wall bracket and secure the radiator so that its upper and lower edges rest in the slots in the wall bracket. Dra ut den övre delen av väggfästet och fäst radiatorn så att dess övre och nedre kanter vilar i spåren i väggfästet.
- Page 12 On/Off switch function På/av-brytarfunktion På/av bryterfunksjon Tænd/sluk funktion Päälle/pois-kytkintoiminto Plug the power cable to the charge, press the On/Off switch to the down position, then the power is switched on, the product is standing by. When switching off the power, press the On/Off switch to the up position. Anslut strömkabeln till laddningen, tryck på...
- Page 13 OVERHEATING PROTECTION ÖVERHETTSSKYDD TILSYNSVERN TILSYNSBESKYTTELSE VALVONNAN SUOJAUS The radiator is fitted with an automatic cut-out to prevent overheating (e.g. if the heater gets covered). The radiator will restart when it cools down. Radiatorn är försedd med en automatisk avstängning för att förhindra överhettning (t.ex. om värmaren täcks över). Kylaren startar om när den svalnar.
- Page 14 Always unplug the appliance from the electrical socket and cool it down before cleaning. Koppla alltid ur apparaten från eluttaget och kyl ner den innan rengöring. Trekk alltid ut støpselet og avkjøl det før rengjøring. Tag altid stikket ud af stikkontakten, og køl det ned, før rengøring. Irrota laite aina pistorasiasta ja jäähdytä...
- Page 15 Waste electrical products should not be disposed of with household waste. Avfall från elektriska produkter ska inte slängas tillsammans med hushållsavfallet. Avfall fra elektriske produkter må ikke kastes sammen med husholdningsavfallet. Affald fra elektriske produkter må ikke bortskaffes sammen med husholdningsaffald. Sähkölaitteiden jätettä...
- Page 16 Copyright ©2022 Attivita Business AB. Original Information contained within this document was content rights reserved. All product names, logos, considered accurate at the time of publication, but and brands are property of their respective owners. may be subject to revision.
Need help?
Do you have a question about the ING 040 S1G GWGW AL and is the answer not in the manual?
Questions and answers