Table of Contents
Advertisement
Quick Links
Advertisement
Table of Contents

Related Manuals for Antylia Scientific Cole-Parmer PB-350 Series


Summary of Contents for Antylia Scientific Cole-Parmer PB-350 Series
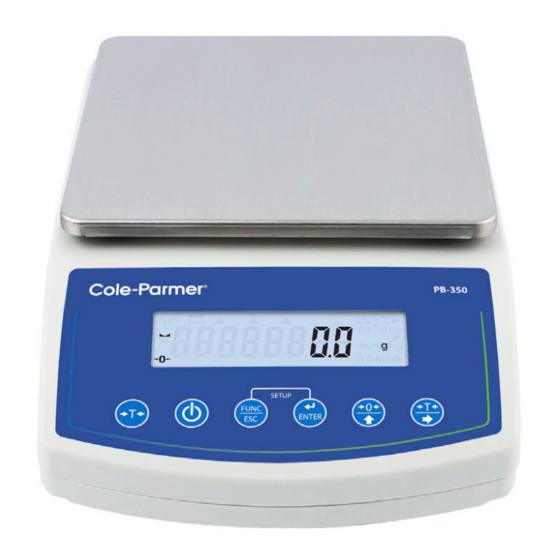
- Page 1 User Manual PB-350 SERIES BALANCES...
-
Page 3: Table Of Contents
Table of Contents INTENDED USE ............................................... 1 PRECAUTIONS ............................................... 1 Accumulator / Battery Pack ........................................2 Operation in a Strong Electrostatic Field....................................2 Maintenance Activities ..........................................2 WARRANTY CONDITIONS ..........................................3 UNPACKING AND ASSEMBLY ........................................3 GETTING STARTED ............................................4 BALANCE LEVELING ............................................. - Page 4 21 WORKING MODE – PARTS COUNTING...................................... 26 21.1 Local Settings ............................................26 21.1.1. Selecting Working Mode ......................................26 21.2. Setting Sample Mass by Entering Mass of a Single Part ..............................26 21.3. Setting Sample Mass by Determining Mass of a Single Part ............................... 27 22 WORKING MODE –...
-
Page 5: Intended Use
1 INTENDED USE Cole-Parmer® PB-350 Series precision scales enable fast and accurate mass measurements under laboratory and industrial conditions. The devices are equipped with an internal battery which allows their operation in places where there is no access to the mains. The PB-350 Series features a stainless-steel weighing pan, and a backlit LCD guaranteeing clear weighing result presentation. -
Page 6: Accumulator / Battery Pack
2.1 Accumulator / Battery Pack The device connected to mains power monitors the battery state and charges it if possible. After sudden lack of power supply from the mains the device automatically switches to accumulator without breaking operation. Cole-Parmer PB-350 scales (20kg and below capacity) are devices designed to be supplied from SLA accumulators (Sealed lead acid type) 6V and capacity 3 to 4Ah charged while connected to mains without stopping operation. -
Page 7: Warranty Conditions
Cleaning powder-coated components For the preliminary cleaning stage, you need a wet sponge featuring large holes, this will help you to remove loose, heavy dirt. Do not use cleansers containing abrasive substances. Next using cloth and cleanser-water solution (soap, dishwashing liquid) gently rub the cleaned surface. -
Page 8: Getting Started
5 GETTING STARTED After unpacking and mounting the scale, level the scale. Adjust the leveling feet until the • leveling bubble reaches the correct location. Turn the device on using the key – keep pressing the key for about 0.5 sec Wait for the test completion •... -
Page 9: Balance Leveling
6 BALANCE LEVELING Operation temperature range for this device is outlined as • C to +30 After powering up this device requires 30 minute warming up • During the warm-up time the indication can change • User calibration should be performed after the warm-uptime. •... -
Page 10: Keys' Functions
8 KEYS’ FUNCTIONS Switching on/off Function key (working mode selection) ENTER Enter key/sending a weighing result to printer or computer Zeroing Taring Manual internal calibration (.HC models only) Notice: ENTER ENTER After pressing keys’ functions changes. The way of operation in this mode is described in details further in this manual. -
Page 11: User Menu
tArE Memory of 9 tare values Indication in autozero zone (indication = exact zero) Stable result (ready to read) Operation mode - counting pieces kg (g) Operation mode - weighing Rechargeable battery pack or battery discharged (BAT-LO) Tare function has been used +/- control with reference to the standard mass: setting the lower threshold or mass below the first threshold +/- control with reference to the standard mass: load... -
Page 12: Browsing User Menu
4.1.rS1 RS232 (1) Port 4.2.rS2 RS232 (2) Port P5.duce 5.1.PC Computer 5.2.Prtr Printer 5.3.AdSP Additional Display P6.Prnt 6.1.CrEP Calibration Report 6.2.GLP GLP Printout P7.Othr 7.1.bLbt Backlight 7.2.bEEP ‘Beep’ Sound 7.3.t1 Automatic Shutdown 7.4.SdAt Current Date 7.5.Stnn Current Time 7.6.FdAt Date Format 7.7.Ftin Time Format 7.8.dFLu... -
Page 13: Return To The Weighing Mode
Press to: enter given submenu, • modify given parameter. • Press to confirm modification. ENTER ENTER Press to: exit, function remains unmodified, • move one menu level up. • 10.4 Return to the Weighing Mode The changes that have been introduced should be saved in order to keep them in the memory for good. -
Page 14: Taring
by eccentric weighing are outlined by standard PN-EN 45501 ch. 3.5 and 3.6.2): Do not load the pan with concentrated force: • Avoid side loads, particularly side shocks should be avoided • 11.1 Taring In order to determine the net mass put the packaging on the pan. After stabilizing press - (Net pictogram will be displayed in the left upper corner and zero will be indicated). -
Page 15: Zeroing
set the tare value, Using • Press ENTER ENTER ,to confirm value • Program returns to weighing’s mode. The inscribed tare value can be seen on the display • with "–" sign, Tare can be inscribed anytime in weighing’s mode. •... -
Page 16: Temporarily Selected Unit
11.5 Temporarily Selected Unit Temporary unit runs from the moment it is set to the scale shut-down and restart. Procedure: • Enter <P9.Unit / 9.2.Unin> submenu. • Press key, available units are displayed successively one by one. • g (gram) •... -
Page 17: User Calibration
12.2 User Calibration User calibration must be carried out using an external weight of class F , and of mass value ≥ 30% of the maximum capacity value. Procedure: • Enter <P1.CAL / 1.2.CA-u> submenu, edit box for declaring weight mass is displayed (the mass value must be ≥... -
Page 18: Automatic Internal Calibration Time
Calibration upon connection of the scale to the mains • Upon completed start-up procedure, scale stability conditions regarding calibration are checked, the internal calibration is triggered automatically. • Calibration process, when in progress, is signaled with display of 'dash', < - >. -
Page 19: Calibration Report
12.7 Calibration Report Calibration report, and calibration test report are both automatically printed (using scale-connected printer) at the end of each calibration process. To declare report content go to <P6.1.CrEP> submenu. For detailed information concerning report content read later sections of this manual. 13 MAIN SCALE PARAMETERS Scale parameters are set to adjust the weighing device to ambient conditions (filters) or individual needs (autozero on/off, tare values memory). -
Page 20: Autozero Function
13.4 Autozero Function 'Autozero' function has been designed to enable automatic control and correction of zero indication. This guarantees precise weighing results. There are, however, some cases when this function can be a disturbing factor for the measuring process, e.g. very slow placing of a load on the weighing pan (load adding, e.g. -
Page 21: Tare: Values Memory
Select to enter tare value manually by means of keys combination. tArEH Select to enter tare value that is stored in scale memory, use keys combination. tArnn • Press key to confirm, next go to the home screen. ENTER 13.7 Tare: Values Memory It is possible to store 10 tare values in scale memory. -
Page 22: Last Digit
Last Digit 13.8. Function designed to disable display of the last weighing indication digit, this results with less accurate measurement. Procedure: • Enter <P2.rEAd / 2.8.LdiG> submenu. • Press key, available values are displayed successively one by one: ALAS Select to make the last digit always on. nEur Select to make the last digit always off. -
Page 23: Usb B Port
• Connecting scale to PRNT-01 Cole- Parmer Printer 14.4 USB B Port USB port of type A is intended for connecting the scale to a computer. In order to make the connection of a scale and computer possible, it is necessary to install virtual COM port on the computer. For this software, please contact: support@schulersci.com 15 PERIPHERAL DEVICES... -
Page 24: Printer
Printer 15.2. Printer Port 15.2.1. ENTER Parameter enabling you to select port to which data is to be sent upon pressing key. Procedure: • Enter <5.2.Prtr / 5.2.1.Prt> submenu. • Press key, parameter values are displayed successively one by one: nonE None port selected. -
Page 25: Glp Printout
Difference between mass of Calibration weight that was measured during last 6.1.5. Calibration and mass of currently measured Calibration weight. 6.1.6. Dashed line separating printout data and signature fields. 6.1.7 An area for the signature of the operator carrying out the calibration Printouts are generated exclusively in English. -
Page 26: Other Parameters
17 OTHER PARAMETERS <P7.Othr> is a group of parameters enabling you to adapt the scale to individual needs. 17.1 Backlight Parameter allowing you to change display brightness, the brightness can be changed within 0% - 100% range. Procedure: • Enter <P7.Othr / 7.1.bLbt> submenu. •... -
Page 27: Date And Time
17.4 Date and Time Parameter allowing you to set current date and time and to specify date and time format. Procedure: • Enter <P7.Othr> submenu and change the settings. Refer to the below table: Parameter Description Enter this parameter to set current date, where the date format <7.4.SdAt>... -
Page 28: Running Working Mode
19.1 Running Working Mode • Go to home screen, press key, name of the first available working mode is displayed. • Press key, names of available working modes are displayed successively one by one. ENTER • Enter selected working mode, to do it press key. -
Page 29: Save Mode
Save Mode 19.2.2. Parameter allowing you to set mode of sending data from the weighing device to a peripheral device. Procedure: • Enter <P3.Func> menu and select given working mode. • Go to <Snn> function. • Press key, parameter values are displayed successively one by one: ENTER Manual printout of stable weighing result. -
Page 30: Working Mode - Weighing
20 WORKING MODE – WEIGHING <UUGG> is a standard working mode enabling you to carry out the weighing operation along with record of the result to the database. 20.1 Local Settings To go to local settings enter <3.1.UUGG> submenu. 3.1.1.Acc Working mode accessibility 3.1.2.Snn Save mode... -
Page 31: Setting Sample Mass By Determining Mass Of A Single Part
ENTER • Enter respective value and press key to confirm, home screen is displayed automatically along with quantity of parts loaded onto the weighing pan (pcs). If the value of entered single part mass is greater than max capacity value, then message <Err Hi> is displayed. Setting Sample Mass by Determining Mass of a Single Part 21.3. -
Page 32: Working Mode - +/- Control
22 WORKING MODE – +/- CONTROL +/- control is a working mode enabling you to enter checkweighing thresholds values (Min, Max). 22.1 Local Settings To go to local settings enter <3.3.HiLo> submenu. 3.3.1.Acc Working mode accessibility 3.3.2.Snn Save mode 3.3.3.Int Time interval 3.3.4.Lo Lo threshold... -
Page 33: Selecting Working Mode
Selecting Working Mode 23.1.1. Parameter allowing you to select method of determination of reference sample mass. Procedure: • Enter <3.4.dEu / 3.4.2.UUt> submenu. • Press key, parameter values are displayed successively one by one: Select to set reference sample mass by determining the mass value. Select to set reference sample mass by entering the mass value. -
Page 34: Peak Hold Operation
24.2 Peak Hold Operation • Enter <3.5.toP / 3.5.2.Lo> submenu, set <Lo> parameter value (Lo threshold) after exceeding of which maximum force is to be registered. • Enter <toP> working mode (Peak Hold). From now on the scale registers and holds every single weighing which is above the Lo threshold, and which is higher than the result of the previous peak hold. -
Page 35: Report Example
25.3 Report Example ENTER • In order to print the report once again press key. key. As a result home screen of <Add> working mode is • To exit "report printout mode" press displayed and all the data get zeroed automatically. If the display capacity is exceeded (i.e. -
Page 36: Import/Export
with display of 'dash', < - >. • Upon process completion mass value of an animal is snapped and displayed together with OK pictogram in the upper part of the display. The snapped mass value is sent to a scale-connected printer. •... -
Page 37: Diagrams Of Connection Cables
directory (file name: xxxxxx.par, where xxxxxx – serial number) Enter <IE / IE4.SPI> Submenu • • User parameters are automatically imported from xxxxxx.par file 28 DIAGRAMS OF CONNECTION CABLES scale – computer cable scale - printer cable (10100-84) -
Page 38: Error Commands
29 ERROR COMMANDS - E r 2 - Value beyond zero range. - E r 3 - Value beyond tare range. Adjustment weight or start mass out of range (±1% for adjustment weight, ±10 for start - E r 4 - mass). - Page 39 1. Unpack the scale, assemble it, then turn the scale one side down. 2. Remove the hole plug. 3. Fix the hook. 4. Turn the scale bottom side down.
-
Page 40: Main Dimensions
31 MAIN DIMENSIONS... -
Page 41: Trouble Shooting
32 TROUBLE SHOOTING Problem Cause Solution Power supply disconnected. Connect the power supply to the scale. Connect the power supply to the Battery discharged. Scale start-up fail. mains, charge the battery. No battery (not installed or installed Check if the battery is installed incorrectly). - Page 42 It is recommended that Cole-Parmer products are calibrated annually to ensure proper function and accurate measurements; however, your quality system or regulatory body may require more frequent calibrations. To schedule your recalibration, please contact InnoCal, an ISO 17025 calibration laboratory accredited by A2LA.
Need help?
Do you have a question about the Cole-Parmer PB-350 Series and is the answer not in the manual?
Questions and answers