
Related Manuals for FIRE BLAZE SPARTA 26

Summary of Contents for FIRE BLAZE SPARTA 26
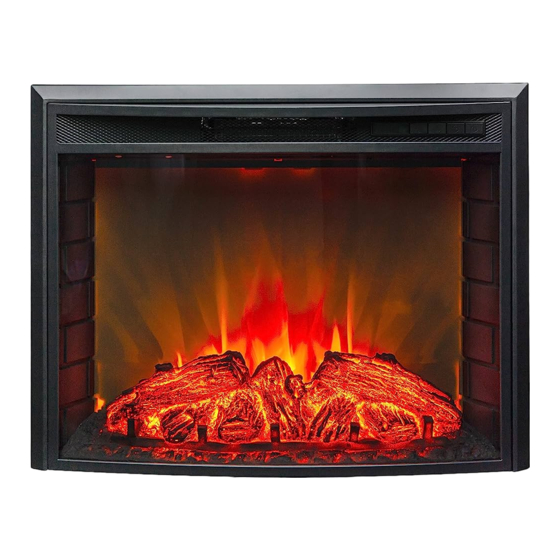
- Page 1 ELECTRIC FIREPLACE SPARTA 26 EUREKA 26 Model# : FB-SPA26, FB-ERK26 OWNER'S MANUAL. SPARTA 26 EUREKA 26 Flat glass electric fireplace Curved Glass Electric fireplace...
-
Page 2: Table Of Contents
TABLE OF CONTENTS Product Dimentions 2 - 3 Important Instructions 4 - 5 Recessed Instalation 6 - 8 Instalation Into Mantel 9 - 10 Operation 11 - 12 Temperature Limiting Control Remote Control Battery Information Troubleshooting Care and Maintenance Customer Support... -
Page 3: Product Dimentions
PRODUCT DIMENTIONS SPARTA 26 FB-SPA26 27,28’’ 6,67’’ 0,16’’ 24,41’’... - Page 4 PRODUCT DIMENTIONS EUREKA 26 FB-ERK26 8,44’’ 27,28’’ 6,67’’ 0,16’’ 24,41’’...
-
Page 5: Important Instructions
IMPORTANT INSTRUCTIONS WA R N I N G Please read all of the information in this operating manual, including all safety, operating, and maintenance information. When using electrical appliances, basic precautions should always be followed to reduce the risk of fire, electric shock, and injury to persons, including the following: Read all instructions before using this fireplace. - Page 6 IMPORTANT INSTRUCTIONS Do not insert or allow foreign objects into the ventilation or exhaust WARNING openings as this may cause an electric shock, fire, or damage the fireplace. The fireplace has hot and arcing or sparking parts inside. Do not use WARNING in areas where gasoline, paint, or flammable vapors or liquids are used or stored.
-
Page 7: Recessed Instalation
Recessed installation 1. Locating the Appliance Your new electric fireplace may be installed virtually anywhere in your home. However, when choosing a location, ensure that the general instructions for safety are followed. For best result, install out of direct sunlig ht, water or very damp air. Power supply service must be installed within proximity of electric fireplace prior to finishing avoiding reconstruction. - Page 8 Recessed installation 3. Remove the frame The trim kit for the firebox is attached by magnets, pull to remove. 4. Installing fireplace Install the fireplace into the wall opening and secure with 6 mounting screws supplied. Re-attach the trim kit to the fireplace.
- Page 9 Recessed installation CAUTION Do not block the ventilation areas.. Air outlet Air inlet Clearance for air circulation beneath the fireplace insert is provided CAUTION by 4 felt feet. Do not install the fireplace insert directly on carpet or similar surfaces which may restrict air flow. If installing the fireplace in a carpeted area, place a one-piece solid, flat surface under the fireplace.
-
Page 10: Instalation Into Mantel
Installation into mantel It is available to install the unit into a wood cabinet or mantel from the backside. 20,28’’ 1. Mantel framing dimensions 6,50’’ outlined in the illustration below 25,59’’ 2. Remove the trim kit The trim kit for the firebox is attached by magnets, pull to remove. - Page 11 Installation into mantel 3. Installing fireplace into mantel Install the fireplace into mantel from the backside and secure with 6 mounting screws supplied. Do not block the ventilation areas. Air outlet Air inlet Clearance for air circulation beneath the fireplace insert is provided CAUTION by 4 felt feet.
-
Page 12: Operation
Operation Product Specifications 120V 60Hz Rating voltage 1500 W WATTS This electric fireplace can be operated by the CONTROL PANEL, or by the battery-powered REMOTE CONTROL. Control Panel Remote Control Warning: This electric fireplace must be properly installed before it is used. Note: The element retains heat after shut down. - Page 13 Operation FUNCTION ICON DESCRIPTION POWER Turn on or turn off the fireplace. FLAME BRIGHTNESS Select one of four brig htness levels. 1. Press once to activate the low heat setting. 2. Press the button a second time to activate the hig h heat setting.
-
Page 14: Temperature Limiting Control
When the heater is first turned on, a slig ht odor may be present. NOTICE This is normal and should not occur again unless the heater is not used for a long period of time. To improve operation, aim the remote control at the front of the fireplace. NOTICE DO NOT press the buttons too quickly. -
Page 15: Troubleshooting
Troubleshooting PROBLEM ROOT CAUSE CORRECTIVE ACTION Display shows The thermostat Unplug the fireplace and remove the back panel. Check sensor is broken that the thermostat is plugged into the main circuit board. or disconnected. If this does not solve the problem, contact customer service for a replacement thermostat sensor. -
Page 16: Care And Maintenance
Care and Maintenance Care and maintenance The fan and flame generator motors are pre-lubricated for extended bearing life and require no further lubrication. However, we recommend periodic cleaning/vacuuming of the fan/fireplace. Buff the trim using a soft cloth slig htly dampened with a citrus oil based product (available at supermarkets and hardware stores). -
Page 17: Customer Support
Customer Support THANK YOU FOR CHOOSING FIREBLAZE! STOP! If you have any questions about assembly or operation of electric fireplace Please DO NOT RETURN Contact our customer service team first SUPPORT@FIRE-BLAZE.COM...
Need help?
Do you have a question about the SPARTA 26 and is the answer not in the manual?
Questions and answers