
Related Manuals for pasapair OL-A011D1-06CD


Summary of Contents for pasapair OL-A011D1-06CD
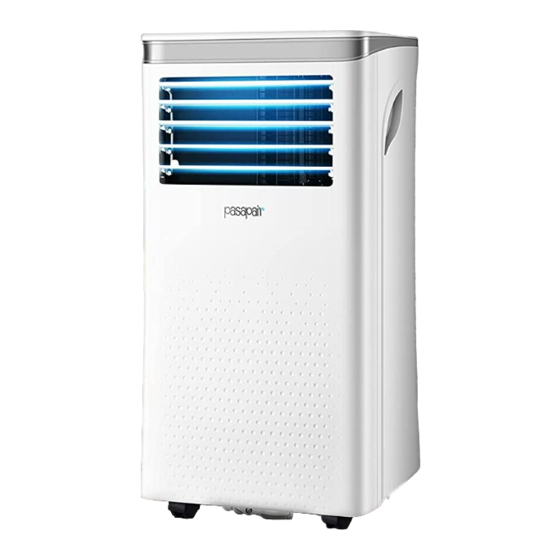
- Page 1 INSTRUCTION MANUAL PORTABLE AIR CONDITONER MODEL: OL-A011D1-06CD 115V 60Hz 965W PLEASE READ INSTRUCTIONS CAREFULLY BEFORE ASSEMBLY RETAIN THIS MANUAL FOR FUTURE REFERENCE...
-
Page 2: Table Of Contents
CONTENTS I. SAFETY INSTRUCTIONS................3 II. SPECIFICATIONS..................6 IILCOMPONENTES..................7 IV. INSTALLATION..................8 V. OPERATION....................13 VI. DRAINAGE..................... 18 VII. MAINTENANCE..................19 VIII. TROUBLESHOOTING................. 22 STORAGE..................... 23 X. DISPOSAL....................24 XI. WARRANTY................... 25... -
Page 3: Safety Instructions
I. SAFETY INSTRUCTIONS Please read the operating instructions carefully before using your air conditioners for the first time. Read the USER MANUAL carefully before operation. Before installing the appliance,read the MANUAL carefully. Service personnel are required to carefully read the MANUAL before operation. - Page 4 If the supply cord is damaged, it must be replaced by the manufacturer, its service agent or similarly qualified persons in order to avoid a hazard. The appliance shall be disconnected from its power source during maintenance. Always operate the unit from a power source of equal voltage, frequency and ...
- Page 5 Do not insert fingers or other objects into the air outlet. Do not touch the air inlet or the aluminum fins of the unit. Do not operate the unit if it is dropped, damaged or showing signs of product ...
-
Page 6: Specifications
II. SPECIFICATIONS MODEL OL-A011D1-06CD Rated Voltage AC115V 60Hz Cooling Rated Input Power 965W Cooling Rated Input Current 8.6A Cooling Capacity 10000Btu/h Refrigerant Charge R410a Net weight 24.5kg High Side Pressure 580psi Compressor input RLA: 6.7A/LRA:35A 0.236HP Fan Motor Power IPX1... -
Page 7: Iilcomponentes
III.COMPONENTES 1. Control panel 2. Air outlet with adjustable louver 3. Handle 4. Air inlet with air filter 5. Caster 6. Drainage Hole 7. Air Exhaust... -
Page 8: Installation
IV.INSTALLATION UNPACKING Unpack the carton and take the appliance and accessories (see below)out. Check the device after unpacking for any damage or scratches on it. Accessories: ■ 1. Exhaust hose ■ 2. Hose connector ■ 3. Window kit adapter ■ 4. - Page 9 LOCATION If tipped more than 45°, allow the unit to set upright for at least 24 hours before start up. Place the unit on a firm, level surface in an area with at least 50cm of free space around it to allow for proper air circulation.
- Page 10 ATTACH THE EXHAUST HOSE The air conditioner requires being vented outside so that the exhaust air can escape the room which coming from the appliance contains waste heat and moisture. Do not replace or extend exhaust hose which will result in decreased efficiency, even worse shut down the unit due to low backpressure.
- Page 11 Step 5: Attach the hose connector to the exhaust air outlet of unit. Step 6: Adjusting the length of the flexible exhaust hose, and avoid bends in the hose. Then place the appliance near an electrical outlet. Step 7: Adjust the louver at the air outlet, and then switch on the unit.
-
Page 12: Operation
V. OPERATION CONTROL PANEL AND DISPLAY LOCK Press to turn on or turn off the child lock function. Press to switch the operation mode between cooling, MODE dehumidifier and fan. Increasing the desired temperature(16°C ~ 32°C) or timer setting. POWER Press to turn on/off the appliance. - Page 13 SPEED Press to cycle the fan speed between High and Low. TIMER Sets a time for the unit to automatically start or stop. FAN SPEED Indicates the current fan speed. Indicator Digital Displays timer setting and room temperature. Display MODE Indicates the corresponding mode: cooling, Indicator dehumidifier(dry) and fan.
- Page 14 2.From the Home Page, press “Add Device” or press “+” in the top right corner of the screen. (If you already have a device added to your account, the “Add Device” button will not appear.) 3.Connecting Auto-connect:The app will automatically search when wifi and Bluetooth are switched on, so you can add the corresponding product directly from the automatic search.
- Page 15 Power your device on or off 6.Mode Toggle between cool, dry and fan modes 7. Fan Select the fan speed 8. More settings ①Timer Set a timer for when your device turns on/off ②Child Lock Toggle “Child Lock” Mode on and off After operating the child lock function on the APP,the mobile air conditioner can only controlled by the APP,Unless first unlocked via the phone or by clicking...
- Page 16 SETTINGS 1 .Start-up and Shutdown Press POWER to turn the unit on. The unit runs in in FAN as default Press MODE button to select the desired operation mode. Press POWER again to turn off the power. 2.Operation mode The unit has four operation modes: Cool, dry, fan, sleep. A.
- Page 17 To control the direction of the air flow horizontally, please adjust the inner louver by hand. Note:The air conditioner stops if the room temperature is lower than selected temperature. B. Ventilating your room Press MODE button repeatedly until FAN indicator lights up lights up. In ventilation mode the room air is circulated, but not cooled.
-
Page 18: Drainage
4.Automatic Defrost At low room temperatures, frost may buildup at the evaporator during operation. The unit will automatically start defrosting and the LED blinking. POWER 5.Overload Protection There is a protective 3-minutes time delay of the compressor. Wait 3 minutes for the appliance to resume operation. -
Page 19: Maintenance
Switch off the unit before operating. Remove the plug of the water outlet opening, and keep it in safe area. Securely and properly connect the drain hose and make sure it is not kinked and Remove the rubber sealing plug. - Page 20 3. Use a vacuum cleaner to suck dust from the filter. 4. Turn the filter over and rinse the air filter under running water. Let the water run through the filter in the opposite direction of air flow. Set aside and allow the filter to air dry completely before reinstalling.
- Page 21 REPLACE THE CHARCOAL FILTER This filter will be packed with the product and need to be installed by the users. When place it on the unit, please open the frame on the back side of the unit as below: Note: This filter cannot be washed or cleaned in any other way.
-
Page 22: Troubleshooting
7. Stop the source of the release, if safe to do so. Consider the use of water spray to disperse vapors. 8. Isolate the area until gas has dispersed. Ventilate and gas test area before entering. Contact competent authorities after a spill. VIII. -
Page 23: Storage
Noise sounds like water Noise comes from flowing flowing. refrigerant. This is normal. Communication faults betwe Check the wire harness of the en main PCB and display PCB. display PCB for damage. Check connection or replace ... -
Page 24: Disposal
X. DISPOSAL Releasing refrigerant into atmosphere is strictly forbidden! Do not dispose of electrical appliances as unsorted municipal waste, use separate collection facilities. Contact your local government for information regarding the collection systems available. If electrical appliances are disposed of in landfills or dumps, hazardous substances can leak into the groundwater and get into the food chain, damaging your health and wellbeing. -
Page 25: Warranty
XI. WARRANTY Thank you for choosing PASAPAIR product. We sincerely hope that you are satisfied with it. The manufacturer's warranty covers the product for a period of 24 months from the date of purchase against manufacturing faults. All warranties are automatically kept track of in our system, so there is no need to register your product.
Need help?
Do you have a question about the OL-A011D1-06CD and is the answer not in the manual?
Questions and answers
I need a new window kit for this...which one is compatible??
The compatible window kit for the Pasapair OL-A011D1-06CD is an adjustable window kit that connects to the exhaust hose using a window kit adapter. The kit should be extendable to fit the window size and able to hold the exhaust hose securely in place to allow proper venting of hot air outside.
This answer is automatically generated
Where can i get the compatible window kit for the Pasapair OL-A011D1-06CD - air ventilatir and window kit. I am in Knoxville TN