
Related Manuals for Samsung HW-K490


Summary of Contents for Samsung HW-K490
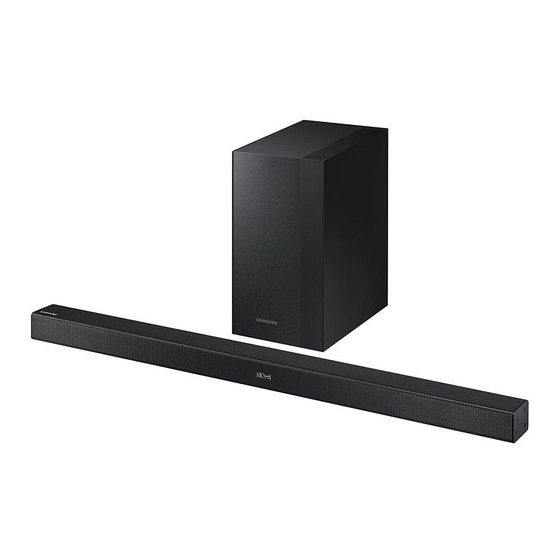
- Page 1 HW-K490 User manual Imagine the possibilities Thank you for purchasing this Samsung product. To receive more complete service, please register your product at www.samsung.com/register...
-
Page 2: Getting Started
GETTING STARTED GETTING STARTED SAFETY INFORMATION SAFETY WARNINGS TO REDUCE THE RISK OF ELECTRIC SHOCK, DO NOT REMOVE THE COVER (OR BACK). NO USER-SERVICEABLE PARTS ARE INSIDE. REFER SERVICING TO QUALIFIED SERVICE PERSONNEL. This symbol indicates that high voltage is present inside. - Page 3 GETTING STARTED PRECAUTIONS 68.6 mm 99.1mm 99.1mm 99.1mm Ensure that the AC power supply in your house complies with the power requirements listed on the identification sticker located on the back of your product. Install your product horizontally, on a suitable base (furniture), with enough space around it for ventilation (7~10 cm).
-
Page 4: Table Of Contents
GETTING STARTED CONTENTS GETTING STARTED 26 FUNCTIONS Safety Information Input Mode What’s Included Bluetooth Software Update DESCRIPTIONS 33 TROUBLESHOOTING Front / Right Side Panel Rear / Bottom Panel Troubleshooting Remote Control 34 APPENDIX 11 INSTALLATION Specifications Installing the Soundbar Installing the Wall Mount Figures and illustrations in this User Manual are Detaching the Soundbar from the Wall provided for reference only and may differ from... -
Page 5: What's Included
Bracket-Wall Mount L Bracket-Wall Mount R ● The appearance of the accessories may differ slightly from the illustrations above. ● Micro USB to USB adapter and HDMI cables are sold separately. To purchase, contact a Samsung Service Centre or Samsung Customer Care. -
Page 6: Descriptions
DESCRIPTIONS DESCRIPTIONS FRONT / RIGHT SIDE PANEL (Volume) Button Controls the volume level. The numeric value of the volume level appears in the front panel display. (Source) Button Right Side Selects the D.IN, AUX, HDMI, BT, TV, or USB input. ●... -
Page 7: Rear / Bottom Panel
DESCRIPTIONS REAR / BOTTOM PANEL DIGITAL AUDIO IN (OPTICAL) Connect to the digital (optical) output of an external device. (Micro USB Port) Connect a Micro USB to Standard USB adapter (not supplied) to the Micro USB port, DC 24V and then connect a USB device DIGITAL AUDIO IN (OPTICAL) (Power Supply In) -
Page 8: Remote Control
OFF - ANYNET+, ON - ANYNET+ The Anynet+ function lets you control the Soundbar with the remote from an Anynet+ compatible Samsung TV. The Soundbar must be connected to the TV via an HDMI cable. Press and hold the button for about 5 seconds to turn the Auto Power Link function on or off. - Page 9 DESCRIPTIONS Power Turns the Soundbar on and off. Volume Adjusts the volume level of the unit. Play / Pause Press the p button to pause a file temporarily. Press the p button again to play the selected file. Skip Back If there is more than one file on the device you are playing, and you press the [ button, the previous file is selected.
- Page 10 DESCRIPTIONS + Controlling the Soundbar using Your TV Remote Control 1. Press and hold the SOUND button for more than 5 seconds while the Soundbar is turned on. 2. "ON - TV REMOTE" appears on the Soundbar's display. 3. In the TV's menu, set the TV speaker to external speaker. ●...
-
Page 11: Installation
INSTALLATION INSTALLATION INSTALLING THE SOUNDBAR INSTALLING THE WALL MOUNT + Installation Precautions ● Install on a vertical wall only. ● For the installation, avoid a location with high temperature or humidity, or a wall that cannot sustain the weight of the set. - Page 12 INSTALLATION A-TYPE : 616mm CENTER LINE B-TYPE : 360mm Centre Line 2. Align the Paper Template's Centre Line with the centre of your TV (if you are mounting the Soundbar below your TV), and then fix the Wall Mount Guide to the wall using tape. ●...
- Page 13 INSTALLATION 5. Push a screw (not supplied) through each Holder-Screw, and then screw each screw firmly into a support screw hole. 6. Use the two Screws (M4 x L12) to attach both Bracket-Wall Mount L and R to the Soundbar's bottom. For a proper fit, make sure to align the bumps on the Soundbar to the holes on the brackets.
- Page 14 INSTALLATION 7. Install the Soundbar with the attached Bracket-Wall Mounts by hanging the Bracket-Wall Mounts on the Holder-Screws on the wall. ● Slightly tilt the Soundbar to insert both Holder-Screw heads into Bracket-Wall Mount holes. Push the Soundbar in the direction of the arrow to make sure both sides are firmly fixed.
-
Page 15: Detaching The Soundbar From The Wall
INSTALLATION DETACHING THE SOUNDBAR FROM THE WALL 1. To separate the Soundbar from the wall mount, push it in the direction of the arrow, and then pull it away from the wall as shown. ● Do not hang onto the installed unit and avoid striking or dropping the unit. ●... -
Page 16: Connections
CONNECTIONS CONNECTIONS ● Do not connect the power cord of this product or your TV to a wall outlet until all connections between components are complete. ● Before moving or installing this product, be sure to turn off the power and disconnect the power cord. CONNECTING THE SUBWOOFER CONNECTING TO THE SUBWOOFER AUTOMATICALLY The Subwoofer's linking ID is preset at the factory and the main unit and subwoofer should link (connect wirelessly) - Page 17 CONNECTIONS ● Before moving or installing the product, be sure to turn off the power and disconnect the power cord. ● If you use a device that uses the same frequency (2.4GHz) as the Soundbar near the Soundbar, interference may cause some sound interruption. ●...
- Page 18 CONNECTIONS Expand to true wireless surround sound by connecting the Samsung Wireless Rear Speaker Kit (SWA-8000S) to your Soundbar. (Sold separately) CONNECTING THE SUBWOOFER AND THE SWA-8000S (SOLD SEPARATELY) CONNECTING THE SUBWOOFER AND THE SWA-8000S MANUALLY If the blue LED lights do not stop blinking when the main unit, subwoofer, and SWA-8000S are turned on, please reset the linking ID by following the procedure below.
-
Page 19: (Sold Separately)
CONNECTIONS CONNECTING THE SURROUND SPEAKERS (SOLD SEPARATELY) SURROUND SPEAKERS OUT SPEAKER IMPEDANCE : 3Ω ID SET Surround Speaker (L) Surround Speaker (R) Wireless Receiver Module ● Place these speakers to the side of your listening position. If there isn't enough room, place these speakers so they face each other. -
Page 20: Connecting To A Tv
CONNECTIONS CONNECTING TO A TV ● Important: Before you begin, put the battery into the remote. See page 10 for instructions. CONNECTING TO A TV USING A DIGITAL OPTICAL CABLE Optical Cable OPTICAL OUT DIGITAL AUDIO IN (OPTICAL) DIGITAL AUDIO IN (OPTICAL) HDMI IN DIGITAL AUDIO IN... -
Page 21: Connecting To A Tv Using An Hdmi (Digital) Cable
● Anynet+ must be turned on. ● This function is not available if the HDMI cable does not support ARC. TV SOUNDCONNECT You can enjoy TV sound through your Soundbar when it is connected to a Samsung TV that supports the TV SoundConnect function. Connect 1. - Page 22 To connect to the other TV, follow Steps 1 through 4 on the previous page. ● The TV SoundConnect (SoundShare) function is supported by some Samsung TVs released from 2012 on. Check whether your TV supports the TV SoundConnect (SoundShare) function before you begin.
-
Page 23: Connecting To External Devices
CONNECTIONS CONNECTING TO EXTERNAL DEVICES OPTICAL OR ANALOGUE AUDIO CABLE This unit comes equipped with one digital optical in jack and one analogue audio (AUX) in jack, giving you two ways to connect it to external devices. Audio Cable (not supplied) AUX OUT AUX IN BD / DVD player /... -
Page 24: Hdmi Cable
2.0 USB jack (Type A) on the other end to the micro USB jack on your Soundbar. ● The Micro USB to USB adapter cable is sold separately. To purchase, contact a Samsung Service Centre or Samsung Customer Care. - Page 25 CONNECTIONS 4. USB appears on the display screen. • The Soundbar connection to the USB device is complete. • The Soundbar automatically turns off (Auto Power Off) if no USB device has been connected for more than 5 minutes. + Before you connect a USB device Be aware of the following: ●...
-
Page 26: Functions
FUNCTIONS FUNCTIONS INPUT MODE button on the main unit’s right side or the SOURCE button on the remote control to select the mode Press the you want. Right Side of the Soundbar Input mode Display Optical Digital input D.IN ARC (HDMI OUT) input AUX input HDMI HDMI input... -
Page 27: Bluetooth
3. Select the Stereo headset menu on the Bluetooth device. • You will see a list of scanned devices. 4. Select "[AV] Samsung Soundbar Kxxx K-Series" from the list. • When the Soundbar is connected to the Bluetooth device, it will display [Bluetooth device name] BT on the front display. - Page 28 ● You cannot connect the Soundbar to a Bluetooth device that supports only the HF (Hands Free) function. ● Once you have paired the Soundbar to a Bluetooth device, selecting "[AV] Samsung Soundbar Kxxx K-Series" from the device's scanned devices list will automatically change the Soundbar to BT mode.
- Page 29 FUNCTIONS ● In Bluetooth connection mode, the Bluetooth connection will be lost if the distance between the Soundbar and the Bluetooth device exceeds 10 meters. ● The Soundbar automatically turns off after 5 minutes in the Ready state. + More About Bluetooth Bluetooth is a technology that enables Bluetooth-compliant devices to interconnect easily with each other using a short wireless connection.
- Page 30 Market search : Samsung Audio Remote + Launching the Samsung Audio Remote App To launch and use the Samsung Audio Remote app, touch the Audio Remote icon on your smart device, and then follow the directions on the screen. ● The Samsung Audio Remote app is only compatible with Android mobile phones and mobile devices...
-
Page 31: Software Update
2.0 USB jack (Type A) on the other end to the micro USB jack on your Soundbar. ● The Micro USB to USB adapter cable is sold separately. To purchase, contact a Samsung Service Centre or Samsung Customer Care. - Page 32 FUNCTIONS IF UPDATE IS NOT DISPLAYED 1. Turn off the Soundbar, connect the USB storage device that contains update files to the Soundbar’s USB port. 2. Disconnect the power cord, reconnect it, and then turn on the Soundbar. ● Insert a USB device containing the firmware update into the USB port on the main unit. ●...
-
Page 33: Troubleshooting
The TV SoundConnect (TV pairing) failed. • Does your TV support TV SoundConnect? ¼ TV SoundConnect is supported by some Samsung TVs released from 2012 on. Check your TV to see if it supports TV SoundConnect. • Is your TV firmware the latest version? ¼... -
Page 34: Appendix
Design and specifications are subject to change without prior notice. Nominal specification Samsung Electronics Co., Ltd reserves the right to change the specifications without notice. Weight and dimensions are approximate. For more information about the power supply and power consumption, refer to the label attached to the product. - Page 35 HW-K590 دفترچه راهنما فرصت ها را مجسم کنید . از شما ممنونیمSamsung بابت خرید این دستگاه برای دریافت خدمات کامل تر، لطفا ً محصول خود را در این نشانی ثبت نمایید www.samsung.com/register...
- Page 36 آغاز به کار آغاز به کار اطالعات ایمنی هشدارهای ایمنی .جهت کاهش خطر برق گرفتگی، از برداشتن درپوش (یا پشت) دستگاه خودداری کنید .هیچ قطعه ای در داخل دستگاه وجود ندارد که مصرف کنندگان بتوانند آنها را تعمیر کنند. جهت تعمیرات به پرسنل خدماتی واجد شرایط مراجعه نمایید این...
- Page 37 آغاز به کار نکات احتیاطی 6,86 میلیمتر 68.6 mm 1,99 میلیمتر 99.1mm 1,99 میلیمتر 99.1mm 1,99 میلیمتر 99.1mm مطمئن شوید که منبع برق متناوب خانه شما با الزامات توان ذکر شده در برچسب مشخصات پشت دستگاه مطابقت داشته باشد. دستگاه خود را به صورت افقی و...
- Page 38 آغاز به کار فهرست مطالب 62 قابلیت ها آغاز به کار حالت ورودی اطالعات ایمنی Bluetooth آنچه همراه دستگاه است بروزرسانی نرم افزار شرح 33 عیب یابی صفحه جلو / سمت راست عیب یابی پانل پشت / پایین کنترل از راه دور 43 ضمیمه...
- Page 39 .ممکن است شکل لوازم جانبی کمی با تصاویر فوق متفاوت باشد ● یا مرکزSamsung به صورت جداگانه فروخته می شوند. برای خرید، با مرکز خدماتHDMI وUSB به آداپتورUSB کابل های میکرو ● . تماس بگیریدSamsung پشتیبانی مشتریان...
- Page 40 شرح شرح صفحه جلو / سمت راست )(تنظیم صدا 1 دکمه .میزان صدا را کنترل می کند .مقدار عددی میزان صدا روی نمایشگر پانل جلو دیده می شود )(منبع 2 دکمه . را انتخاب می کندUSB ، TV ، BT ، HDMI ، AUX ، D.IN ورودی های سمت...
- Page 41 شرح پانل پشت / پایین DIGITAL AUDIO IN )OPTICAL( خروجی دیجیتال (نوری) وسیله بیرونی را به آن وصل .کنید )USB (پورت میکرو DC 24V یا کابل میکروUSB اگر اتصال دستگاه حافظه میکرو )(ورودی منبع برق (همراه با دستگاه ارائه نشدهUSB به آداپتورUSB DIGITAL AUDIO IN (OPTICAL) آداپتور...
- Page 42 .+ روشن یا خاموش شودAnynet را به مدت 5 ثانیه فشار دهید و نگهدارید تا عملکرد دکمه ON - ANYNET+ ,OFF - ANYNET+ سازگارSamsung به شما امکان می دهد با استفاده از کنترل از راه دور از تلویزیونAnynet+ عملکرد . را کنترل کنیدSoundbar ، بتوانیدAnynet+ با...
- Page 43 شرح روشن/خاموش . را روشن و خاموش می کندSoundbar میزان صدا .برای تنظیم میزان صدای دستگاه به کار برده می شود پخش/مکث . را فشار دهیدp برای مکث در پخش فایل به طور موقت، دکمه . را دوباره فشار دهیدp برای پخش مجدد فایل انتخابی، دکمه رد...
- Page 44 شرح با استفاده از کنترل از راه دور تلویزیونSoundbar کنترل . روشن می شودSoundbar را برای مدت زمان بیشتر از 5 ثانیه فشار دهید و نگهدارید و در همین حال SOUND دکمه . نشان داده می شودSoundbar " بر روی صفحه نمایشON - TV REMOTE" "عبارت .در...
- Page 45 نصب SOUNDBAR نصب نصب نگهدارنده دیواری نکات احتیاطی نصب .فقط روی یک دیوار عمودی نصب کنید ● .نباید در محیط هایی با دما و رطوبت باال یا روی دیواری که قادر به تحمل وزن دستگاه نیست نصب شود ● قدرت تحمل دیوار را کنترل کنید. اگر دیوار برای تحمل وزن دستگاه به اندازه کافی قدرت ندارد، دیوار را تقویت کرده و یا دستگاه را روی دیواری دیگر ●...
- Page 46 نصب A-TYPE : 616mm CENTER LINE B-TYPE : 360mm خط وسط را زیر تلویزیون وصل می کنید)، و سپس راهنمای اتصال به دیوار راSoundbar خط وسط الگوی کاغذی را با قسمت میانی تلویزیون تراز کنید (اگر .با استفاده از نوار به دیوار وصل کنید .اگر...
- Page 47 نصب .یک پیچ (همراه با دستگاه ارائه نشده است) از داخل هر پیچ نگهدارنده فشار دهید و سپس هر کدام را محکم داخل سوراخ پیچ نگهدارنده بپیچانید استفاده کنید. برای اینکه به درستی در جای خود قرارSoundbar ) برای اتصال دو قالب اتصال به دیوار چپ و راست به پایینL12 x M4( از دو پیچ ....
- Page 48 نصب . را با قالب اتصال به دیوار وصل شده، نصب کنیدSoundbar قالب اتصال به دیوار را روی پیچ نگهدارنده بر روی دیوار آویزان کنید و را در جهت پیکانSoundbar . را کج کنید تا هر دو سر پیچ نگهدارنده وارد سوراخ های قالب اتصال به دیوار شودSoundbar به آرامی ●...
- Page 49 نصب از دیوارSOUNDBAR جدا کردن . از اتصال دیواری، آن را در جهت پیکان فشار دهید و سپس همانطور که نشان داده شده است، بکشیدSoundbar برای جدا کردن .به دستگاه نصب شده آویز نشوید و از ضربه زدن یا انداختن دستگاه خودداری کنید ●...
- Page 50 اتصاالت اتصاالت .قبل از اینکه تمام اتصاالت بین اجزا را برقرار نکرده اید، سیم برق دستگاه یا تلویزیون را به پریز برق وصل نکنید ● .پیش از جابجاکردن یا نصب کردن دستگاه، حتما ً دستگاه را خاموش کرده و سیم برق را قطع کنید ●...
- Page 51 اتصاالت .پیش از جابجا کردن یا نصب دستگاه، حتما ً آنرا را خاموش کرده و سیم برق را قطع کنید ● ، تداخل ممکن است باعث اختاللSoundbar در مجاورتSoundbar )در صورت استفاده از دستگاهی با فرکانس مشابه (4.2 گیگاهرتز ●...
- Page 52 اتصاالت ) بهSAMSUNG )SWA-8000S با متصل کردن کیت بلندگوی پشتی بیسیم سیستم خود را به صدای سوراند بیسیم واقعی ارتقاء دهید. (به طورSOUNDBAR )جداگانه فروخته می شود (بطورSWA-8000S متصل کردن ساب ووفر و )جداگانه به فروش می رسد...
- Page 53 اتصاالت )اتصال بلندگوهای صدای فراگیر (به صورت جداگانه فروخته می شوند SURROUND SPEAKERS OUT SPEAKER IMPEDANCE : 3Ω ID SET )بلندگوی صدای فراگیر (چپ )بلندگوی صدای فراگیر (راست مادول گیرنده بی سیم .این بلندگوها را در اطراف محل شنیدن قرار دهید. اگر فضای کافی وجود ندارد، بلندگوها را طوری قرار دهید تا در مقابل یکدیگر باشند ●...
- Page 54 اتصاالت وصل کردن به تلویزیون .مهم: قبل از شروع به کار، باتری را در کنترل از راه دور بگذارید. برای اطالع از دستورالعمل ها به صفحه 01 مراجعه کنید ● )اتصاالت با تلویزیون با استفاده از کابل اپتیکال (دیجیتال کابل نوری OPTICAL OUT DIGITAL AUDIO IN (OPTICAL)
- Page 55 . پشتیبانی نکند، این قابلیت قابل دسترس نخواهد بودARC ازHDMI در صورتیکه کابل ● TV SOUNDCONNECT پشتیبانی میTV SoundConnect که از عملکردSamsung TV بشنوید، البته در صورتی که به یکSoundbar می توانید صدای تلویزیون را از .کند اتصال...
- Page 56 . فقط خاموش می شودSoundbar ، : وقتی تلویزیون را خاموش می کنیدOFF - BLUETOOTH POWER • . که از سال 3102 به بعد به بازار عرضه شده اند، پشتیبانی می شودSamsung این عملکرد در بعضی از تلویزیون های ●...
- Page 57 اتصاالت اتصاالت با دستگاه های بیرونی کابل صدای نوری یا آنالوگ ) است که با وجود آن به دو روش می توانید به دستگاه هایAUX( این دستگاه دارای یک فیش داخلی نوری دیجیتال و یک فیش داخلی صدای آنالوگ .خارجی متصل شوید کابل...
- Page 58 ) روی یک انتها و یک فیش مادگی استانداردB (نوعUSB 2.0 از نوعUSB را با یک دوشاخه نرینه میکروUSB به آداپتورUSB کابل میکرو . وصل کنیدSoundbar رویUSB ) را روی انتهای دیگر به فیش میکروA (از نوعUSB 2.0 یا مرکز پشتیبانی مشتریانSamsung جداگانه فروخته می شود. برای خرید، با مرکز خدماتUSB به آداپتورUSB کابل میکرو ●...
- Page 59 اتصاالت . روی صفحه نمایش ظاهر می شودUSB . برقرار شده استUSB با دستگاهSoundbar اتصال • .) بطور خودکار خاموش خواهد شد (خاموش شدن خودکارSoundbar ، وصل نشده باشدUSB اگر برای بیش از 5 دقیقه هیچ وسیله • USB پیش از وصل کردن وسیله :به...
- Page 60 قابلیت ها قابلیت ها حالت ورودی . را از روی کنترل از راه دور فشار دهید تا حالت دلخواهتان انتخاب شودSOURCE را در سمت راست دستگاه اصلی یا دکمه دکمه Soundbar انتهای راست حالت ورودی صفحه نمایش ورودی دیجیتال نوری D.IN ARC )HDMI OUT( ورودی...
- Page 61 .یک فهرست از وسایل اسکن شده مشاهده خواهید کرد • ." را از فهرست انتخاب کنیدAV] Samsung Soundbar Kxxx K-Series]" ) درBluetooth => BT (نام وسیلهBluetooth device name] => BT] متصل شدBluetooth به وسیلهSoundbar هنگامی که •...
- Page 62 جفت کردید، انتخاب گزینهBluetooth را با یک وسیلهSoundbar بعد از اینکه ● BT را به حالتSoundbar [" از فهرست وسیله های اسکن شده بطور خودکارAV] Samsung Soundbar Kxxx K-Series" .تغییر خواهد داد . باشد در دسترس استBluetooth در میان دستگاه های جفت شده با دستگاهSoundbar فقط در صورتی که...
- Page 63 قابلیت ها قطع خواهدBluetooth از 01 متر بیشتر شود، اتصالBluetooth و وسیلهSoundbar ، اگر فاصله بینBluetooth در حالت اتصال ● .شد . بطور خودکار بعد از سپری شدن 5 دقیقه در حالت آماده خاموش خواهد شدSoundbar ● Bluetooth اطالعات...
- Page 64 Samsung Audio Remote : جستجو در بازار Samsung Audio Remote راه اندازی برنامه را از روی دستگاه هوشمندتان لمس کنید و سپسAudio Remote و استفاده از آن، نمادSamsung Audio Remote برای راه اندازی برنامه .دستورالعمل های روی صفحه را دنبال کنید...
- Page 65 . تماس بگیریدSamsung :برای دانلود نرم افزار محصول، مراحل زیر را طی کنید نام مدل را جستجو کنید - گزینه پشتیبانی از مشتری را انتخاب کنید (نام این ) برویدsamsung.com/sec( به نشانیSamsung به وب سایت )گزینه ممکن است تغییر کند...
- Page 66 قابلیت ها نمایش داده نمی شودUPDATE اگر . وصل کنیدUSB Soundbar حاوی فایل های به روز رسانی را به پورتUSB را خاموش کنید، دستگاه ذخیره سازیSoundbar . را روشن کنیدSoundbar سیم برق را جدا کنید، دوباره وصل کنید و سپس ....
- Page 67 آیا فاصله بین کنترل از راه دور و دستگاه اصلی خیلی زیاد است؟ » . (جفت سازی تلویزیون) انجام نشدTV SoundConnect کهSamsung در بعضی از تلویزیون هایTV SoundConnect پشتیبانی می کند؟TV SoundConnect آیا تلویزیون شما از »...
- Page 68 .وزن و ابعاد دستگاه تقریبی هستند .برای آگاهی از مشخصات منبع تغذیه و توان مصرفی به برچسب دستگاه مراجعه کنید اطالعیه مجوز کد باز ) باoss.request@samsung.com( برای ارسال سؤاالت و درخواست های مربوط به کدهای باز، از طریق ایمیل به آدرس . تماس بگیریدSamsung مجوز...
- Page 69 .. کلیه حقوق محفوظ استSamsung Electronics Co.,Ltd 2016© در سراسر دنیاSAMSUNG تماس با . تماس بگیریدSAMSUNG دارید، لطفا ً با مرکز خدمات مشتریانSamsung اگر هرگونه پرسش یا نظری در رابطه با محصوالت Web Site Contact Centre ...
Need help?
Do you have a question about the HW-K490 and is the answer not in the manual?
Questions and answers