Table of Contents
Advertisement
Quick Links
Advertisement
Table of Contents

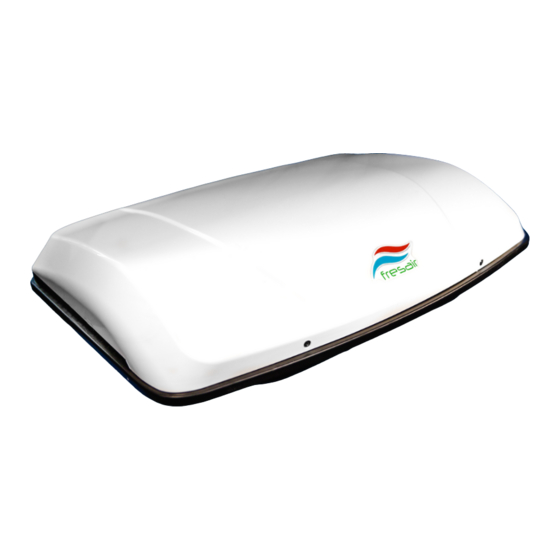
Summary of Contents for Fresair S7i
- Page 1 S7i MANUAL © Fresair, LLC. | All Rights Reserved...
-
Page 2: Table Of Contents
Dear User Congratulations on your new purchase! As a Fresair Air Cooler owner, you’re about to enjoy the fruits of an innovative, high quality product designed exclusively to provide you with extreme comfort in hot climates. We take pride in our products and want you to feel confident installing and operating the Fresair Air Cooler, that’s why we prepared this manual. -
Page 3: Main Components
➊ Remote Control IR receiver ➋ Low Water LED ➌ Water Pump on LED ➍ Fan on LED ➎ Fan On/Off ➏ Water Pump On/Off ➐ Interior Light On/Off ➑ Cycle through Fan Speeds (5 Fan speeds) © Fresair, LLC. Fresair.com 3 of 21... -
Page 4: Safety Information
Children must be supervised to ensure that they do not play with the product. Do not undo the upper cover of the Fresair Air Cooling Unit in case of a fire. Use approved extinguishing agents instead. Do not use water to extinguish fires. - Page 5 Only install the Fresair Air Cooling Unit using the installation instructions provided in the manual. The Fresair unit uses minimal 12V power to pull air from the outside of the vehicle, through an anti-bacterial and anti-fungal pine straw filter, delivering strong directional air through the four adjustable air vents.
-
Page 6: Technical Data
Average Water Consumption external moisture and temperature Capacity 12L water tank Double fan with ohmic resistance Voltage Maximum Nominal Current 12V/10A Fan Speed 4000 rpm Weight Maximum Air Flow 400 m³/h Insulation Class 1Ω © Fresair, LLC. Fresair.com 6 of 21... - Page 7 Cool with air flow (ceiling fan or window.) Use directional air from vents on the body. Daytime cooling only. For enclosed RV/VAN/Trailer sleeping you will need traditional AC. NOTE These figures are estimates based upon aggregated data. Fresair is not responsible for exact achievable temperatures or comfort zones as installations differ.
-
Page 8: Technical Assistance
Technical Assistance Fresair is committed to providing guidance to ensure optimal performance, understanding routine maintenance and preventative care. Should you need any assistance or guidance on performance, preventative care, maintenance or general questions please contact an authorized dealer or reach out to us directly at support@fresair.com. -
Page 9: Operation Information
Fresair Air Cooling unit. Do not insert foreign objects into the system. Observe the following instructions to ensure your Fresair Air Cooling Unit is used properly and efficiently. It is recommended that you: Park your vehicle in the shade when possible. -
Page 10: Warranty Information
In no case will Fresair exchange the product for a replacement solely due to a defective component. A. Damages caused by accidents;... -
Page 11: Parts: Maintenance
Water Pumps INJECTION: The injection pump is located on the outside of the water reservoir and sends water to the Fresair unit. RETURN: The return pump is located in the tray and returns excess water to the reservoir. - Page 12 NOTICE! Periodical maintenance is essential for optimal performance and prolonging the life of your Fresair Air Cooling unit. We recommend preventative maintenance and replacing of wearable parts annually or as outlined in the manual, coinciding with your yearly vehicle maintenance.
-
Page 13: Parts: Installation
(2) 4mm x 50mm (2) VDO (10) Zip Ties (5) Tie Mounting Washer Head Water Pumps Pads Screws (1) Water Fill (1) Remote Control (1) Hose Adaptor Fresair Owner's Connector Manual (2) Fresair Decals © Fresair, LLC. Fresair.com 13 of 21... - Page 14 Prep Tip: It is very important that the roof surface is clean to ensure a weather-tight seal between the base of the Fresair unit and your roof. Take time to determine where you wish to install your Fresair. Ensure that the unit is placed between roof support bars so you don’t compromise roof integrity.
-
Page 15: How To Install
Step 3 - Testing the Fit What you’ll need: Fresair Unit Test the fit of the Fresair Unit by first detaching the mounting bracket and lowering it in the area you’ve just cut out and make any necessary adjustments accordingly. - Page 16 How to Install Step 4 - Adhering the Sealing Foam Tape What you’ll need: Fresair Unit, Sealing Foam Tape With the unit still in place and secure, use a permanent marker to draw an outline around the outside base of the unit on the roof.
- Page 17 How to Install Step 5 - Mounting the Fresair Unit What you’ll need: Fresair Unit, Mounting Bracket, Finishing Frame Screws, *Screwdriver, *Crescent Wrench(es), *Self-leveling lap sealant/Silicone Inside the vehicle, secure the unit by attaching the mounting bracket onto each bolt, followed by a nut.
- Page 18 Connect the negative wire (black) to the negative terminal of your fuse block. Ensure both wire connections are tightened properly and completely secured to the fuse block. Next, test the power (using the Fresair power button on the unit) to ensure your unit turns on. Electrical Diagram...
- Page 19 When you see water emerge from the “out” hose on the water fill connector the reservoir is full. Finally, power on your Fresair and ensure there are no leaks. Additionally, test all functions to ensure your Fresair is working properly.
-
Page 20: Cleaning & Care
Cleaning & Care Please observe the following tops for the cleaning and care of your Fresair Air Cooling Unit. Clean the external cover of the unit removing dirt and debris on and around the unit as often as you wash your vehicle. - Page 21 Your Local Your Local Dealer Support fresair.com/dealer fresair.com/contact © Fresair, LLC. | All Rights Reserved...


Need help?
Do you have a question about the S7i and is the answer not in the manual?
Questions and answers