
Related Manuals for Alarko ALG Series

Summary of Contents for Alarko ALG Series
- Page 1 ALG SERIES GAS BURNERS ALG 50/2, ALG 70/2 INSTALLATION , OPERATION MAINTENANCE ALG SERIES NATURAL GAS & LPG BURNERS ALG 200/M, ALG 120/M, ALG 200/M (LPG), ALG 120/M (LPG) INSTALLATION, OPERATION, MAINTENANCE...
- Page 2 Code: A.6.1.5i Revision Date: 071116 Print Date: 071116...
- Page 3 ASSEMBLY OPERATION MAINTENANCE ALARKO Models ALG 200/M , ALG120/M Natural Gas & LPG Burners.
-
Page 4: Table Of Contents
CONTENTS INTRODUCTION ..............5 DECLARATION OF CONFIRMITY . -
Page 5: Introduction
Provided that the principles, warnings and standards as set out in the operation User Manual are complied with, your burner shall be covered by the warranty of ALARKO CARRIER for a period of 3 (three) years starting from the date of sale, against any faults, of material and workmanship. -
Page 6: Precautions
•Do not keep flammable substances in any for (gas / liquid / solid) close to your burner. GENERAL INFORMATION Alarko ALG gas burners of modulating kinds are designed for the combustion of natural gas and LPG and are equipped with appropriate safety equipment requested by the international standards. - Page 7 The burner modulating unit (RWF 50) is sold seperately from the burner. The modulating unit can be mo Min / Max Gas Line Components Burner Gas Line Stage Fuel Type Diameter Pressure Filter Multiblock [mbar] 2" 90-360 DUNGS MBC 700 VEF 2"...
-
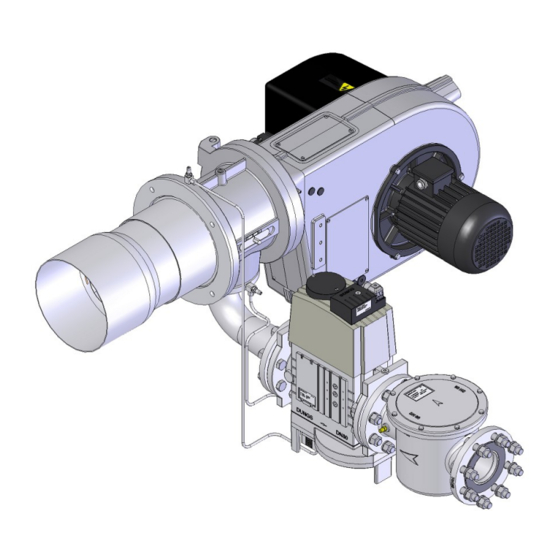
Page 8: Main Parts
Min. gas pressure values are given for burner maximum capacity. İn case of operating the burner under the maximum capacity, the minimum required gas pressure values are lower then the declared value and can be determined by using the "gas line pressure loss graph". MAIN PARTS 1. -
Page 9: Principles Of Operation
PRINCIPLE of OPERATION Air supplied through suction cell into the burner. The air is pressurized via the fan in the special shell shaped burner body and delivered to the mixing group. The mixing group consists of the turbulator and and the combustion head. The gas is delivered to this volume by the gas line. The gas and air is mixed in this volume and formes an ideal air –... -
Page 10: Gas Line
GAS LINE The gas line components which are mandatory or optional to use are schematically shown below. Multiblock Gas Line (Modulating) 1. Ball valve 2. Flexible connection (optional) 3. Gas line inlet pressure measuring point 4. Gas Filter 5. Minimum Gas Pressure Switch 6. - Page 11 GAS LINE PRESSURE LOSS GRAPHS & CAPACITY ADJUSTMENT The following graphs show the minimum “gas line inlet pressure” and “burner gas pressure” values for burners having various gas line diameters and various gas line types. The measuring points of these values are respectively shown in 3. and 12. points on page 9. “Combustion chamber pressure” must be added to the values gathered from the graphs according to the capacity need.
- Page 12 GAS LINE PRESSURE LOSS GRAPHS & CAPACITY ADJUSTMENT ALG 200/M GAS LINE PRESSURE LOSS (LPG) MBC 700 VEF Gas Line (DN 50) MBC 1200 VEF Gas Line (DN 50) MBC 1900 VEF Gas Line (DN 65) MBC 3100 VEF Gas Line (DN 80) Burner Gas Pressure 1000...
- Page 13 GAS LINE PRESSURE LOSS GRAPHS & CAPACITY ADJUSTMENT ALG 120/M GAS LINE PRESSURE LOSS 50,0 45,0 MBC 700 VEF Gas line 2" 40,0 35,0 30,0 25,0 MBC 1200 VEF Gas Line 2" 20,0 15,0 Burner Gas Pressure 10,0 1000 1100 1200 1300 Capacity (kW)
- Page 14 GAS LINE PRESSURE LOSS GRAPHS & CAPACITY ADJUSTMENT ALG 120/M GAS LINE PRESSURE LOSS (LPG) 25,0 MBC 700 VEF Gas Line 2" 20,0 MBC 1200 VEF Gas Line 2" 15,0 Burner Gas Pressure 10,0 1000 1100 1200 1300 Capacity (kW) Flue gas losses should be added to the Gas line inlet pressure value in above graph.
-
Page 15: Example Of Capacity Adjustment
4. Determination of the gas line diameter for the given inlet pressure. Solution 1. Gas burner is selected from the Alarko-Carrier Boiler-Burner Compatibility Charts as ALG 200/M 2. The boiler max capacity (outlet) is given as 1.250.000 kcal/h (1453,5kW), in the same document, it is also stated that the burner should be operating at a min capacity of 1579,9kW as the boiler inlet capacity. -
Page 16: Dimensions
DIMENSIONS (mm) ALG 200/M, ALG 200/M LPG ALG 200/M, ALG 200/M LPG , ALG 120/M ALG, 120/M LPG... -
Page 17: Connection To The Boiler
CONNECTION TO THE BOILER Combustion head connection body group (3) is connected to the boiler with the gasket (4) in between utilizing connection bolts (5). Burner is placed to the hinge on the connection body and is stabilized with the hinge rod (2) and bolt (1). -
Page 18: Combustion Head & Turbulator Adjustment
COMBUSTION HEAD – TURBULATOR ADJUSTMENT The combustion head and turbulator must be placed correctly in order to achieve a proper combustion efficiency. Stroke length Somun Namlu Ayar Kapağı Head Adjustment Cover The turbulator can be placed to min, medium and max (1, 2, 3) values by unscrewing the nuts. The position of the combustion head relative to the turbulator is adjusted and nuts are tightened when positioning is ended. -
Page 19: Air Flow Adjustment
The damper is run by damper motor (See Figure on the right). 0 value on the indicator means the damper is fully closed, 9 value ALARKO CARRIER SANAYİ VE TİCARET A.Ş. GOSB - Gebze Organize Sanayi Bölgesi Þahabettin Bilgisu Cad. - Page 20 AIR DAMPER MOTOR & AIR FLOW ADJUSTMENT FOR MODULATING BURNERS (SQN 30.401A2700 ) Siemens SQN30 actuators are used on modulating burners. There are 5 cams on this actuator. (II) 0 point cam. (III) Minimum capacity adjustment cam. 0 point cam (I) Maximum capacity adjustment cam.
-
Page 21: Burner Control Unit (Lfl 1.322) For Modulating Burners Alg200/M
BURNER CONTROL UNIT (LFL 1.322) for MODULATING BURNERS (ALG200/M, ALG 200/M LPG, ALG120/M and ALG120/M LPG) LR : Boiler control unit (RWF50) Z : Ignition transformer R : Boiler thermostate or pressure switch BV1 : Gas Solenoid Valve LK : Damper motor RV : Modulating Gas Solenoid Valve M : Burner motor FS : Flame signal... -
Page 22: Error Codes (Lfl 1.322)
ERROR CODES (LFL 1.322) 1. The red light on the control unit is on when burner is in error mode. Take off the plastic cover by unscrewing the 3 screws. Determine the below defined error types from the indicator on LFL 1.322. -
Page 23: Gas Line Assembly
GAS LINE ASSEMBLY Gas line assembly must be done by an authorized service according to the the regulations stated in this manual. The weight of the gas line should not be balanced (carried) by the burner prior to tightening of the bolts. The rules for gas line assembly of attention are stated below for each type: ALG 200/M ,ALG 120/M GAS LINE (MBC Series) -
Page 24: Comissioning
COMISSIONING Remove the control box cover. Make the wiring connections of the power supply and boiler thermostat cables inserting through cable connectors and follow the wiring diagram directions. L1, L2, and L3 are phase and N is neutral. Connect earth cable to earth sign, boiler thermostat to BT and safety thermostat to ST. -
Page 25: Rwf40 Menu System And Setting
RWF50 MENU SYSTEM AND SETTING RWF50 menu system has three Levels beyond the Basic display • The User Level • The Parameter Level • The Configuration Level The setting principle is shown below. It will be referred in further pages. - Page 27 RWF50 BASIC DISPLAY Shown at the right is the basic display. The upper larger 4 digit LEDs will be referred to as, the “Actual Value Display” The lower,smaller,4 digit green LEDs, will be referred to as,the”Setpoint Display”. You may exit any level and return to the basic display at any time in two ways. Press ad hold for minimum of 2 seconds.
- Page 28 You can adjust the values, within limits, for SP1,SP2 and DsP, also view InP1 and Y depending on your specific configuration. To alter ‘SP1’, ‘SP2 and ‘DsP’ you can use the setting principle map. 0pr is displayed in the user level.
- Page 29 SELF-TUNING FUNCTION FOR PARAMETER SETTING RWF50 parameter setting also can be setted by using Self-Tuning Function. For parameter setting of RWF50 Self-Tuning Function is recommended • Start self-setting with pressing the left buttons at the same time for 5 seconds. It will start “tunE”...
- Page 30 Configuration setpoint values are given in below table for Siemens PT1000 temparature and pressure sensors. In case of using other kinds of sensors RWF 50 user’s manual must be referred for further detailed sensor setpoints values. Setpoint values are given for standard analog input1 (InP1: sensor) usage. For the selection of sensor analog input ConF - InP1 - [4] should be followed (i.e.
-
Page 31: Pressure Switch
PRESSURE SWITCH Wiring The relevant cables from the control panel mustbe connected to the gas pressure switch as shown in the below table. Key Functions : CABLE CONNECTI PRES. SW. COLOR ON TIPS Rising pressure; TIPS 1 NC opens, 2 NO closes. COM (3) Falling pressure;... -
Page 32: Pressure Switch Settings
PRESSURE SWITCH SETTINGS AIR PRESSURE SWITCH Stops the burner operation if the air feed for combustion is not enough. The pressure adjustment must be made around 20% lower of the low fire air pressure value. The CO emissions must be lower than 10000ppm in this setting condition. Air Pressure Switch Type : DUNGS GW10 A6 Connection must be... -
Page 33: Valve Proving System -Vps 504 So2
VALVE PROVING SYSTEM –VPS 504 SO2 OPERATION AND ASSEMBLY GUIDELINES Setting work not necessary on site. The important issues about the operation and assembly of Valve proving system VPS 504 SO2 are as follows: Installation and Assembly 1.Turn off gas supply 2-Switch off power supply 3.Remove screw plugs 1,2 (Fig.1) 4.Insert sealing rings(10,5x2,25 into VPS 504 (Fig2) - Page 34 VALVE PROVING SYSTEM –VPS 504 SO2 Dimensions Lockout...
- Page 35 VALVE PROVING SYSTEM –VPS 504 SO2 Replacing Filter Replace the filter Fitter replacement set art no:243.801 • -2 O-Ring • -2 Microfilter mats • -4 screw Replace the screw see page 30 of the assembly instruction. Functional Test Leaks can be simulated and function can be tested by opening the test Screw plug in the test socket p2 during the test time (pumping time)
-
Page 36: Valve Proving System -Vps 504 So2 Safety Instruction
VALVE PROVING SYSTEM (VPS 504 SO2) SAFETY INSTRUCTION Work n the VPS 504 may only be performed by specialist staff Do not operate the VPS 504 below 0 °C in liquid gas systems. Only suitable for gaseous liquid gas, liquid hydrocarbons destroy the sealing meterials. Protect flange surfaces.Tighten screws cross-wise.Mount tension free. -
Page 37: Gas Multiblock Mbc 700Vef Mbc 1200 Vef Settings
GAS MULTIBLOCK MBC 700VEF MBC 1200 VEF SETTINGS OPERATION AND ASSEMBLY GUIDELINES The important issues about the operation and assembly of Multiblock Servo pressure regulator MBC...VEF are as follows: Mounting Position Electric and Hydrolic Connections Maximum Torque Values... - Page 38 GAS MULTIBLOCK MBC 700VEF MBC 1200 VEF SETTINGS PRESSURE VALVES MBC 700 VEF 1,2,3,4,5 ; Shut-off screw G 1/8 6,7 ; Air purge tap G 1/8 MBC 1200 VEF ADJUSTMENT ABILITIES = Combustion chamber pressure (Page 9) = Air pressure (Page 9) = Burner gas pressure (Page 9) ∆...
- Page 39 GAS MULTIBLOCK MBC 700VEF MBC 1200 VEF SETTINGS The device should not be used as a lever. ASSEMBLY 1. Electrical connection for valves. 2. Input flange 3. Pressure connection G 1/8 upstream of filter. 4. Filter 5. Type plate 6. Cover 7.
- Page 40 GAS MULTIBLOCK MBC 700VEF MBC 1200 VEF SETTINGS THREADED FLANGE VERSION MBC…VEF ASSEMBLY & DISASSEMBLY 1. Mount flange on to tube line. Use appropriate sealing agent (Figure 1). 2. Insert MBC...VEF. Note position of O-rigns. (Figure 2) 3. Tighten screws A – H. 4.
- Page 41 GAS MULTIBLOCK MBC 700VEF MBC 1200 VEF SETTINGS FREE GAP NEED FOR EASY FILTER CHANGE MBC-700-VEF: (L) 170 mm MBC-1200-VEF: (L) 230 mm Inspect the filter at least once a year. Change filter if ∆p between pressure connections 1 and 2 > 10 mbar.
- Page 42 GAS MULTIBLOCK MBC 1200 VEF SETTINGS CHANGING SOLENOID MBC-1200 1. Interrupt gas supply, switch off power supply. 2. Undo locking screw A (Figure 1). 3. Remove cover B (Figure 2). 4. Cautiously remove magnetic cover (Figure 3). 5. Unplug the earth connection and conductive plate conneciton (Figure 4). 6.
-
Page 43: Gas Multiblock Mbc 1900 Vef Mbc 3100 Vef Settings
GAS MULTIBLOCK MBC 1900 VEF MBC 3100 VEF SETTINGS OPERATING AND ASSEMBLY GUIDELINES The important issues about the operation and assembly of Double Solenoid Valve Gas – Air Ratio Control MBC...VEF are as follows: MBC 1900 : DN 65 MBC 3100 : DN 80 Installation Position Electrical and Hydraulic Connections... - Page 44 GAS MULTIBLOCK MBC 1900 VEF MBC 3100 VEF SETTINGS PRESSURE TAPS 1,2,3 ; G 1/8 Screwed seal plug 4,5 ; Connecting bore for system accesories 6,7 ; G ¼ Screwed seal plug 8,9 ; G ½ Screwed seal plug (option) Pulse Line P (built in) 11,12 ;...
- Page 45 GAS MULTIBLOCK MBC 1900 VEF MBC 3100 VEF SETTINGS Do not use unit as a lever. MOUNTING 1. Insert setscrews A. 2. Insert seals. 3. Insert setscres B. 4. Tighten screws A + B. Ensure correct sealing of the seal! 5.
- Page 46 GAS MULTIBLOCK MBC 1900 VEF MBC 3100 VEF SETTINGS MBC-VEF SETTING THE PRESSURE CONTROLLER Pressure controller is provosionally set at the factory. The setting value must be locally adapted to the machine conditions. 1. Open protective caps V and N. 2.
-
Page 47: Gas Multiblock Mbc
GAS MULTIBLOCK MBC… VEF WARNINGS Work on the MBC unit may only be performed by specialist staff. Protect flange surfaces. Tighten screws crosswise. Make sure there is no mechanical stress formed on the system. Do not allow any direct contact between the MBC and hardened masonry, concrete walls or floors. - Page 48 GAS CONVERSION (NG to LPG; LPF to NG) Turbulator and gas line are changed in order to make the gas conversion. TURBULATOR CHANGE The proper turbulator must be used on the burner for particular gases such as NG or LPG. The following points are followed for turbulator change: Figure 1 Dismount the Multiblock (1).
- Page 49 Unscrew the centering bolt (4) and see the turbulator gas supply pipe (3) is freed. Pull the turbulator gas supply pipe (3) upwards to unmount it from the connection body. Take the turbulator gas supply pipe (3) out as seen in Figure 3. Figure 3 Unscrew the electrode bolts (6) and loosen the electrodes (5) (Figure 4).
-
Page 50: Gas Line Change (Ng To Lpg, Lpg To Ng)
GAS LINE CHANGE (N.G. to LPG, LPG to N.G.) The new gas line and connections must be selected to be compatible with the capacity. Follow the below guidelines for gas line change: Dismount and keep the measurement pipe set (No.3) from the nipples and gas line (this changes according to the gas line, see Page 22). -
Page 51: Maintenance
MAINTENANCE The yearly maintenanace of ALG burners are done by Alarko authorized services. Following are performed on this maintenance: • Gas leakage test is performed on all gas line components. • All filters are checked and tested. • Fan and turbulators are clenaed. - Page 52 ELECTROMAGNETIC COMPATIBILTY The burners designated in this booklet are approved via being used by the below RFI filter models in accordance with the related issues of 2004/108/EC – EMC Directive. The appropriate filter should be mounted to the entrance of the RWF 50 or the main supply line used burners. EMC FILTER CIRCUIT EMC FILTER CIRCUIT MODEL: SCHAFFNER FN 610-3/06...
-
Page 53: Wiring Diagrams
WIRING DIAGRAMS (RWF50) ALG 200/M and ALG 200/M LPG... - Page 54 WIRING DIAGRAMS (RWF50) ALG 120/M and ALG 120/M LPG...
- Page 55 WIRING DIAGRAMS (SDC 12-31) ALG 200/M and ALG 200/M LPG...
- Page 56 WIRING DIAGRAMS (SDC 12-31) ALG 120/M and ALG 120/M LPG...
-
Page 57: Problems / Possible Causes / Remedies
PROBLEMS / POSSIBLE CAUSES / REMEDIES PROBLEM POSSIBLE CAUSES REMEDIES Burner does not start. a) Disconnection of the boiler thermostates. a) Check the connections. b) Fuse break. b) Check the fuses. c) Gas pressure switch is over setted or c) Set the gas pressure switch to 3- disconnection.
Need help?
Do you have a question about the ALG Series and is the answer not in the manual?
Questions and answers