Table of Contents
Advertisement
Quick Links
When you are use an electrical appliance, basic safety precautions should always be
adhered to as follows: Read all instructions before using this sewing machine.
Notes on safety for household sewing machines according to IEC/EN 60335-2-28.
DANGER– To reduce the risk of electric shock:
1. A sewing machine should never be left unattended when
plugged in. Always unplug this sewing unplug this sewing
machine from the electric outlet immediately after using
and before cleaning.
2. To avoid electrical shock never put the machine or the
mains cable or mains plug into water or other liquids.
WARNING- to reduce the risk of burns,fire,electrick
shock , or injury to persons:
1. This sewing machine is not intended for use by persons
(including children) with reduced physical,sensory or
mental capabilities, or lack of experience and knowledge,
unless they have been givensupervision or instruction
concerning use of the sewing machine by a person
responsible for their safety.
2. Children should be supervised to ensure that they do not
play with the sewing machine.
3. Use this sewing machine only for its intended use as
described in this manual.. Use only attachments
recommended by the manufacturer as contained in this
manual.
4. The user must exercise adequate caution with regard to
the up and down moving of the needle and constantly
observe the sewing area during work.
5. When leaving the machine, during maintenance work or
when changing mechanical parts or accessories,always
disconnect the machine by pulling out the main plug.
6. The tension of the drive belt must only be adjusted by a
specialist mechanic.
7. The machine must be put into operation according to the
indications on the specification plate.
8. Never drop or insert any object into the any opening.
9. Do not use the sewing machine if:
a. there is a visible damage,
b. its function is disturbed,
c. it is wet, e.g. with condensation.
d. where aerosol spray products or oxygen is being
administered.
e. in outdoors.
10. Never operate this sewing machine if it has a damaged
cord or plug, if it is not working properly, if it has been
dropped or damaged, or dropped into water. Return the
sewing machine to the nearest authorized dealer or
service center for examination, repair, electrical or
mechanical adjustment.
11. To disconnect the sewing machine , turn the on/off switch
to off ("O") position, then remove plug from outlet .
12. Do not unplug by pulling on cord. To unplug, grasp the
plug, not the cord.
13. Switch off or unplug the appliance when leaving it unattended,
or making any adjustments in the needle area,such as
threading needle,changing needle, threading bobbin ,
or replacing presser foot and bulb and before carrying
out maintenance.
14. If this appliance is used for another purpose than
intended or if it is wrongly operated, we will not accept
any liability for any damage caused.
15. To avoid the risk of electric shock, do not open the
machine, There are no parts inside the machine which
the user can repair. This is solely the responsibility of our
qualified service staff.
IMPORTANT SAFETY INSTRUCTIONS:
SAVE THESE INSTRUCTIONS
16. Be sure to use only original parts.
17. Keep fingers away from all moving parts. Special care is
required around the sewing machine needle.
18. Do not use bent needles.
19. Do not pull or push fabric while stitching. It may deflect
the needle causing it to break.
20. Never sew with a damaged needle plate as this can
cause needle to break .
21. This sewing machine is designed for mains supply with a
nominal voltage of ± 10% and a rated frequency of ± 4%.
22. If the power plug or power cords damage, it must be
replaced by the Manufacturer or it's service agent or a
similarly qualified person.
23. Attention the following to avoid injury:
a. Unplug the foot controller of the appliance when leaving
it unattended.
b. Unplug the foot controller of the appliance before
carrying out any maintenance.
24. The LED lamp maximum power is 3 W, if the LED lamp is
damaged , you should not use the sewing machine and
send it to the manufacture or service agent to repair or
replace it.
25. This sewing machine uses the foot control model HKT72C
or FL3902.
Environment:
The recommended environment is
-Ambient temperature 20°C to 30°C
-Humidity 20% to 80%.
-Storage temperature - 25°C to + 60°C
This sewing machine is a high-quality electronic-mechanical
appliance; it is a machine for supervised use at home. It
should be operated in such a way that it is not subjected to:
dust, severe dampness,direct sunlight, static electricity, heat -
producing object, corrosive chemicals or liquids.
For ventilation purposes the machine must be used on a free
surface, which is both firm and even.
This sewing machine is a suppressed and immune to
interference ;however , it should not be operated near
electronic devices such as radios,TVs,PCs,broadcasing
transmitters etc.
Care of the sewing machine:
Always protect the machine against damage which might
occur by hitting or dropping.
Cleaning:
Housing: To clean the housing, use a dry, clean and soft cloth
which is free of fluff.To remove any of stubborn dirt, use a soft
cloth with alcohol .
Please note!
Do not use any insecticides or chemical products such as
petrol (gasoline) or thin chemicals for cleaning the housing.
Run this appliance for at least 2 minutes
before actual sewing.
This equipment is marked with the recycling
symbol. Do not dispose this product as
unsorted municipal waste. Collection of such
waste separately for special treatment is
necessary.If in doubt please contact your
Disposal
retailer for guidance.(European Union only)
Advertisement
Table of Contents

Related Manuals for Gritzner Varimatic 935


Summary of Contents for Gritzner Varimatic 935
- Page 1 IMPORTANT SAFETY INSTRUCTIONS: When you are use an electrical appliance, basic safety precautions should always be adhered to as follows: Read all instructions before using this sewing machine. Notes on safety for household sewing machines according to IEC/EN 60335-2-28. DANGER–...
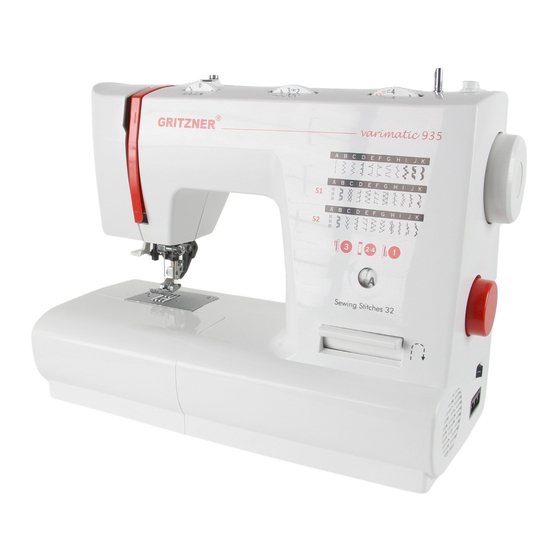
- Page 2 Congratulations! As the owner of a new sewing machine Gritzner Varimatic 935, you will enjoy precision quality stitching on all types of fabrics, from multiple layers of denim to delicate silks. Your sewing machine offers the ultimate in simplicity and ease of operation.
-
Page 3: Table Of Contents
Contents: Page: Parts of your sewing machine................... 4 Accessories ......................5 Remove and installing the removable extension table..........6 Connecting machine to power source............... 7 Presser bar lifter ....................... 8 Darning plate ......................8 Removing and setting the presser foot ..............9 Fitting the edge guide .................... -
Page 4: Parts Of Your Sewing Machine
Parts of your sewing machine 1. Needle tension dial 2. Take-up lever 3. Bobbin winder thread cpl. 4. Face plate 5. Thread cutter 6. Needle threader 7. Presser foot 8. Needle plate 9. Sewing table and accessory box 10. Reverse sewing lever 11. -
Page 5: Accessories
Accessories: The following accessories are supplied with this machine. a. Standard sewing foot b. Zipper foot c. Buttonhole foot d. Applique foot e. L-screwdriver f. Seam ripper/ brush g. Oil bottle h. Spool pin cap (Spool holder) i. Edge guide j. -
Page 6: Remove And Installing The Removable Extension Table
Remove and installing the removable extension table: To removing the removable extension table, hold removable extension table and pull in the dirction of the arrow.(1) To install the removable extension table, hold the removable extension table sewing table horizontal, and push it in the opposite direction of the arrow.(1) The inside of the snap-in sewing table can be utilized as an accessory box.To open, lift up at the point of the arrow. -
Page 7: Connecting Machine To Power Source
Connecting machine to power source: Connect the machine to a power source as illustrated. (1) Attention: Unplug power cord when machine is not in use. Foot control: Connect the plug of the foot control to the connecting socket (A) of the sewing machine and to the wall socket. -
Page 8: Presser Bar Lifter
Presser bar lifter: The presser foot is raised or lowered with the presser foot lifter. When sewing several layers or thick fabrics, the presserfoot can be raised a second stage for easy positioning of the work. Darning plate: For certan types of work,(e.g. darning or free-hand embroidery), the darning plate must be used. -
Page 9: Removing And Setting The Presser Foot
Before changing the presser foot and setting up the presser foot, the main switch must be switched off (“O”). Setting the presser foot: Removing the presser foot: Place the presser foot under the presser foot Position the needle at its highest holder so that when the presser foot lifter is point. -
Page 10: Winding The Bobbin
Winding the bobbin: - Place thread onto spool pin and press the spool holder firmly against the spool pin. (1) - Wind thread clockwise around bobbin winder tension discs.(2) - Thread bobbin as illustrated and place on bobbin winder spindle. (3) - Push bobbin to right. -
Page 11: Inserting The Bobbin Into The Shuttle
Inserting the bobbin into the shuttle: turn main switch off “O” before inserting or removing the bobbin. When inserting or removing the bobbin, the needle must be fully raised. - Hold the hook cover and open it forwards. (1) - Pull the bobbin case tab (a) and remove the bobbin case. -
Page 12: Inserting And Changing Needle
Inserting and changing needle: Turn main switch off “O” before inserting and changing needle. Change the needle reguarly, especially if it is showing signs of wear and causing problems. Please always use good quality needle available in the market which it presentated by your dealer. -
Page 13: Threading The Upper Thread
Threading the upper thread: Turn main switch off “O” before threading the upper thread. This is simple is operation but if does not perform correctly, so many sewing problems could result. - start by raising the needle to its highest point and also raise the presser foot to release the tension discs .(1) - Place thread on spool pin and press... -
Page 14: Automatic Needle Threader
Automatic needle threader: Turn main switch off “O” before threading the needle with automatic needle threader. - Raise the needle to its highest position. - Raise the presser foot. - Push the lever (A) down as far as it will go. - The threader automatically swings to the threading position (B). -
Page 15: Dual Feed Transporter/ Dft System
Dual Feed Transporter/ DFT system: We offer the ideal solution for sewing difficult material:Dual Feed Transporter. This system feeds the material from the top and bottom simultaneously as is done in industrial sewing machines. The fabric is fed precisely. When sewing light or heavy material such as silk and rayon fabrics, the dual feed prevents seam puckering. -
Page 16: Thread Tension
Thread tension: Upper needle thread tension (Figure 1): For the best stitch appearance and durability, make sure the needle thread tension is correctly adjusted. For general sewing, the threads evenly meet between the two layers of fabric - The normal setting for utility stitches is in the range 4-5. -
Page 17: Raising The Bobbin Thread
Raising the bobbin thread: Hold the upper thread with the left hand. Pull on the upper thread to bring the Turn the handwheel towards you bobbin thread up through the needle (counterclockwise) lowering, then plate hole. raising needle (1). Now pull both threads back under the presser foot approx. -
Page 18: Reverse Sewing
Reverse sewing: To secure the beginning and the end of a seam, press down the reverse sewing lever (A). Sew a few reverse stitches. Release the lever and the machine will sew forwards again. At the end of the sew, repeat this process. -
Page 19: Selection Guide Table Of Needle And Fabric And Thread
Selection guide table of needle and fabric and thread: Needle size Fabrics Thread 65-75(9-11) Lightweight fabrics: Thin cottons, voile, Light-duty thread in serge, silk, muslin, Liana , interlocks, cotton, nylon or cotton knits, tricot, jerseys, crepes, polyester. woven polyester, shirt & blouse fabrics. 80(120) Medium weight fabrics: Cotton, satin, Most threads sold are... -
Page 20: Selection Table Of Needle And Fabric
Selection table of needle and fabric: Needles Explanation Type of fabric Hax1 Standard sharp needles. Sizes range Natural woven fabrics: 15x1 thin to large.65(9) to 110(18) Wool, cotton, silk, etc. Qiana. Not recommended for double knits. 15x1/705H Semi-ball point needle, scarfed. Natural and synthetic 65(9) to 110(18) woven fabrics,... -
Page 21: How To Choose Your Pattern
How to choose your pattern: To select a stitch, simply turn the pattern selector dial (d) , until the desired symbol or letter appears in the stitch display (c). Adjust the stitch length with the stitch length dial (b) according to the fabric being used. -
Page 22: Straight Stitch
Straight stitch: Turn the stitch selection dial to letter “A” appears in Stitch width dial Stitch length dial the stitch display (c). The needle position for the straight stitch is also determined with the stitch width dial where “0” is the position in the left and “2.5”... -
Page 23: Zigzag Stitch
Zigzag stitch: Function of stitch width dial: The maximum zigzag stitch Stichbreitenrad Stichlängenrad width for zigzag stitching is Stitch length dial Stitch width dial 5 mm, however, the width can be reduced on any patterns. The width increases as you turn stitch width dial from “0”... -
Page 24: Triple Stitch
Triple stitch: If you want to select these stitches, you must turn the pattern selector dial to the stitch you want. Then set the stitch length dial to "S1" or "S2". There are several elastic stitches. Here are two examples: Triple straight stitch: Turn the stitch selection dial... -
Page 25: Honeycomb Stitch
Honeycomb stitch: Turn the stitch selection dial to letter “C” appears in the stitch display and turn the stitch length dial to “S1”. To sew the honeycomb, adjust the stitch width dial between “3” and “5”. The honeycomb stitch is an elastic and decorative hem which is particularly suitable for different types... -
Page 26: Blind Hem Stitch
Blind hem stitch: The blind hem stitch is used to make invisible hems on hems, curtains, trousers, skirts, etc.. Blind hem for stretch fabrics.. Blind hem / lingerie for firm fabrics. - Insert the blind stitch foot and Set the machine as illustrated. -
Page 27: Button Sewing
Button Sewing: Remove the zigzag foot . Set the machine as illustrated and install the darning plate. (1) Position the work under the presser foot holder. Place the button in the desired position, lower the presser foot lifter, this holds the button in place. -
Page 28: Buttonholes Sewing
Buttonholes Sewing: Preparation: Remove the zigzag foot and attach the buttonhole foot. Adjust the stitch length dial between “0.5” – “1”. The density of the stitch depends on thickness of the fabric. To prepare the fabric: Measure the diameter of the button and add 0.3 cm for the bartacks. -
Page 29: Sewing On Zipper
Sewing on Zipper: Remove the zigzag foot and attach the zipper foot. Set pattern selector dial on straight stitch “A” and set stitch width dial in center needle position. Adjust the stitch length dial between “1” – “4” (according to thickness of fabric). -
Page 30: Sewing With The Hemmer Foot
Sewing with the hemmer foot: With the hemmer you can stabilize the edge of blouses, silk cravats and valance without having to iron the edges before hand. The hemming prevents the edges from fraying and produces a neat and durable edge finish. Remove the zigzag foot and attach the zipper foot. -
Page 31: Steps Zigzag Stitch
3 Steps zigzag stitch: This stitch is used to sew on lace and elastic, darning, mending, reinforce edges. Turn the pattern stitch selection dial to “C” and set the machine as illustrated above. Place patch in position. The stitch length can be shortened to produce very close stitches. -
Page 32: Darning
Darning: Position the needle up and remove the presser foot and holder (2) and install the darning plate (1) . Turn pattern selector dial to straight stitch “A” and set stitch width dial in center needle position. Attach the darning foot to the presser bar. -
Page 33: Decorative Stitches
Decorative stitches: Set the machine as illustrated above. Turn the stitch length dial to suit the fabric. Shell stitch (A) For decorative edges. Suitable for edges on sheer, fine and stretch fabrics. The larger stitch should go just over the edge of the fabric to create the shell effect. -
Page 34: Couching
Couching: Turn the pattern stitch selection dial to “B” and set the machine as illustrated above. The stitch length and width are variable and set stitch width according to width of cord. (1) Sewing instruction: Couching is simply technique of zigzag stitch over fine cords, wool threads, etc. -
Page 35: Twin Needle
Twin Needle: - Select the desired stitch length by rotated the stitch length dial. - Turn stitch selector dial to straight stitch and set the stitch width dial in center needle position. - For twin needle sewing, place second thread on other spool pin. -
Page 36: Monograming And Embroidering With Embroidery Hoop
Monogramming and embroidering with embroidery hoop: - Remove the presser foot and holder and install the darning plate. - Set the machine as illustrated above. - Lower presser foot lever before starting to sew. - Adjust the stitch width according to the size of lettering or design. - Page 37 Monogramming and embroidering with embroidery hoop: Monogramming: 1. Sew while moving the hoop slowly along the lettering at a constant speed. 2. Secure with a few straight stitches at the end of the last letter.. Ebbroidering 1. Stitch the outline of the design by moving the embroidery hoop.
-
Page 38: Maintenance
Maintenance: Disconnect the machine from electricity supply by removing the plug from mains socket. When cleaning the machine, it must always be disconnected from electricity supply. Remove the stitch plate (1): Turn the handwheel until the needle is fully raised. Open the hinged front cover and unscrew the needle plate screws with the screw driver. -
Page 39: Trouble Shooting Guide
Trouble shooting guide Problem Cause correction The needle 1. The machine is not threaded 1. Rethread the machine. (upper) thread properly. breaks 2. The thread tension is too 2. Reduce the thread tension tight. (lower number). 3. The thread is too thick for 3. - Page 40 Trouble shooting guide Problem Cause correction Loose stitches 1. The machine is not correctly 1. Check the threading. threaded. 2. The bobbin case is not 2. Thred the bobbin case as correctly threaded. described. 3. Needle/ fabric / thread 3.
Need help?
Do you have a question about the Varimatic 935 and is the answer not in the manual?
Questions and answers