Table of Contents
Advertisement
Quick Links
Advertisement
Table of Contents

Subscribe to Our Youtube Channel
Related Manuals for HT HT9020


Summary of Contents for HT HT9020
- Page 1 ENGLISH User manual Copyright HT ITALIA 2016 Release EN 1.00 - 29/12/2016...
-
Page 2: Table Of Contents
LINESPLITTER Table of Contents: PRECAUTIONS AND SAFETY MEASURES ............... 2 1.1 Preliminary instruction ....................... 2 GENERAL DESCRIPTION ................... 3 PREPARATION FOR USE ................... 3 3.1 Initial checks ........................3 3.2 Instrument power supply ....................3 3.3 ... -
Page 3: Precautions And Safety Measures
LINESPLITTER 1 PRECAUTIONS AND SAFETY MEASURES The instrument has been designed in compliance with IEC/EN61010-1 guidelines relevant to electronic measuring instruments. For your safety and in order to prevent damaging the instrument, please carefully follow the procedures described in this manual and read all notes preceded by symbol with the utmost attention. -
Page 4: General Description
LINESPLITTER 2 GENERAL DESCRIPTION The instrument has the following features: Splitting phase conductor L from N and PE conductors for 2-poles, 3-poles cables Easy (L-N, L-PE, N-PE) AC voltage measurement with clamps/multimeters Easy AC current measurement with external clamps ... -
Page 5: Nomenclature
LINESPLITTER 4 NOMENCLATURE 4.1 DESCRIPTION OF INSTRUMENT CAPTION: 1. Schuko plug connection to main supply 2. Ring for leakage measurement PE cable 3. Not usable current rings 4. Input terminals for L-N, L-PE, N-PE voltage measurements 5. Ring for leakage measurement L-N cables 6. -
Page 6: Operating Instructions
LINESPLITTER 6 OPERATING INSTRUCTIONS 6.1 LINE CURRENT MEASUREMENT 1. Connect LINESPLITTER to 230V AC main socket through Schuko plug. 2. Connect the main cable of the load to the instrument’s Schuko plug. 3. Put the clamp around the Ax1 or Ax10 rings and switch on the load. 4. -
Page 7: Voltage And Power Measurement
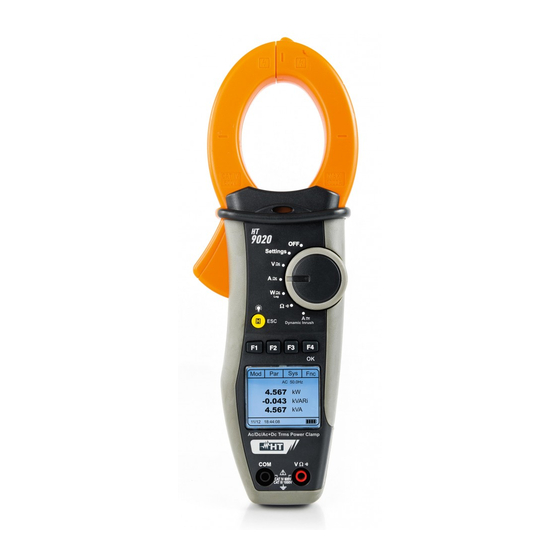
2. Connect the main cable of the load to the instrument’s Schuko plug. 3. Put a power clamp (e.g. HT9020 or HT9022 models) around the Ax1 ring and the clamp’s test leads in the V inputs of the instrument and switch on the load 4. -
Page 8: Technical Specifications
LINESPLITTER 8 TECHNICAL SPECIFICATIONS Power supply: 230VAC (10%), 240VAC (10%) 50/60Hz Main connection integrated Schuko plug, 50cm length Load connection: integrated Schuko plug Load current: max 16A -20°C 40°C (-4°F 104°F) Operating temperature: Operating humidity: <80%RH -20°C 60°C (-4°F 140°F) Storage temperature: Storage humidity: <80%RH... -
Page 9: Assistance
LINESPLITTER 9 ASSISTANCE WARRANTY CONDITIONS This instrument is warranted against any material or manufacturing defect, in compliance with the general sales conditions. During the warranty period, defective parts may be replaced. However, the manufacturer reserves the right to repair or replace the product. Should the instrument be returned to the After-sales Service or to a Dealer, transport will be at the Customer's charge.
Need help?
Do you have a question about the HT9020 and is the answer not in the manual?
Questions and answers