Table of Contents
Advertisement
Advertisement
Table of Contents

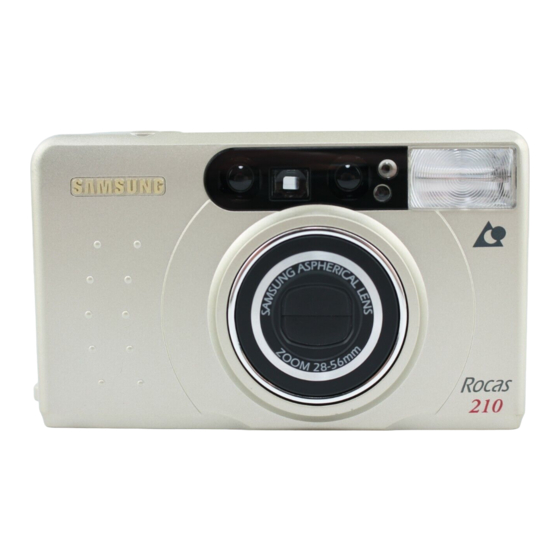
Summary of Contents for Samsung Rocas 210 i
- Page 1 ENGLISH...
- Page 2 • This camera will not function without a battery. • Ensure that the battery is inserted in the correct position. • Use one 3V lithium battery(CR 2 - this battery can not be recharged. Do not attempt to recharge non rechargeable batteries).
-
Page 3: Parts Names
PARTS NAMES Front / Top Autofocus windows Zoom button(WIDE) Zoom button(TELE) Exposure sensor Shutter button Battery chamber cover Flash Lens Red-eye reduction lamp/ View Finder Self - timer Iamp / Action lamp... -
Page 4: Lcd Panel
LCD PANEL Battery condition indicator(P12) Date, Time(210i model) < 210 MODEL > Film present indicator Flash off( /P26) Fill-in flash( /P26) Self-timer ( /P27) Red-eye reduction/ Exposure unit(EX) /P25) NOTE When the power is turned off , the “date” and the “Exposure unit” will still be displayed on the LCD panel.(210i model) When the power is turned off , the LCD panel will be cleared about in 4 sec.(210 model) - Page 5 3. Processing information All photographic information (magnetic or optical information) necessary for development is stored on the film. This information enables high quality results.(PQI - Print Quality Improvement) It is possible to alter the print types of the pictures, when taking in the film for development. NOTE .Please take your film to be processed where you see the APS sign.
-
Page 6: Loading The Battery
LOADING THE BATTERY Open the chamber cover by sliding the battery chamber cover. Insert a new battery and ensure it is placed in the correct position. Close the chamber cover. NOTE Use one CR-2 battery. This camera will automatically turn power off when not used after 3 minutes. Remove the battery from the camera when the camera is not used for an extended period. -
Page 7: Attaching The Strap
ATTACHING THE STRAP Refer to the illustrations above. - Page 8 NOTE This camera uses IX 240 film for APS cameras. You can check the film status from the mark on the film. Check that the symbol( ) is white on the unexposed film film. If the symbols( ) are white on a film, partially exposed film this means that the film has already been used.
-
Page 9: Holding The Camera
HOLDING THE CAMERA In order to avoid camera shake, hold the camera steadily with both hands. Place the camera strap over your wrist. Both elbows(horizontal picture) or one elbow(vertical picture)should be held close to your body. Keep your eye close to the viewfinder when using the camera. -
Page 10: Rewinding The Film
REWINDING THE FILM 1. Automatic rewinding After taking all pictures on an IX film, the camera will automatically rewind the film. The motor stops when the rewinding is completed. When the rewind is complete, the “0”and the icon( ) will blink on the LCD panel. Open the film chamber cover by moving the chamber open lever. - Page 11 2. Changing the date setting To change the Date, press and hold down the DATE button for 2 seconds. The first sector of the date format will blink. To select the sector that you want to change, press the DATE button. Change the date setting by operating the SET button.
-
Page 12: Selecting The Print Type
SELECTING THE PRINT TYPE This camera is an APS(Advanced Photo System) camera and it is possible for changing the print type(C/H/P) at any time during a film. Select the print type by moving the C/H/P lever. C-classic (3:4) H-hi-vision (6:9) P-panorama (16:5) -
Page 13: Red-Eye Reduction
RED-EYE REDUCTION You can decrease the red-eye phenomenon when taking a portrait picture in low light. The red-eye reduction mode reduces the possibility of the “red-eye” phenomenon. <Without red-eye reduction> <With red-eye reduction> NOTE When selecting this mode, the red-eye reduction lamp blinks for about 0.5 second. After this, the flash will fire. - Page 14 SELF-TIMER You can take a picture of yourself by using this mode. This can be selected by pressing the SELF button once. When pressing the shutter button, the self-timer lamp illuminate for 7 seconds. Then the lamp blinks rapidly for 3 seconds and the picture is taken.
-
Page 15: Troubleshooting
TROUBLE SHOOTING If the shutter does not operate after pressing the shutter button. Check point Remedy Page Is the power on? Press the power button to turn on the camera. Is the battery loaded correctly? Reinsert correctly. Has it been a long time since you used the camera? Change the battery. 11,12 If a picture is partially dark or out of focus. - Page 16 Red-eye reduction / Fill-in flash / Flash off POWER SOURCE One 3V lithium battery(CR-2) DIMENSIONS(WxHxD) 99X59.5X35.7mm 150g 5.3oZ(Without battery) WEIGHT PRINT TYPE C/H/P *Specifications are subject to change without prior notice. *All data are based on SAMSUNG s standard test methods.


Need help?
Do you have a question about the Rocas 210 i and is the answer not in the manual?
Questions and answers