Table of Contents
Advertisement
Quick Links
®
Technaxx
* User Manual
Retro Video Digitizer TX-182
Before using the appliance for the first time, please read the instructions
for use and safety information carefully.
This appliance is not intended for use by persons (including children) with
reduced physical, sensory or mental capacities, or by persons lacking in
experience or knowledge, unless they are supervised or instructed on the
use of this device by a person responsible for their safety. Children should
be supervised to ensure they do not play with this device.
Keep this user manual for future reference or product sharing carefully. Do
the same with the original accessories for this product. In case of warranty,
please contact the dealer or the store where you bought this product.
Enjoy your product. *Share your experience and opinion on one of
the well-known internet portals.
1
Model: TX-182 Article No. 4980, 01/2022
Advertisement
Table of Contents

Related Manuals for Technaxx TX-182


Summary of Contents for Technaxx TX-182
- Page 1 In case of warranty, please contact the dealer or the store where you bought this product. Enjoy your product. *Share your experience and opinion on one of the well-known internet portals. Model: TX-182 Article No. 4980, 01/2022...
-
Page 2: Table Of Contents
Make sure that the work to be digitized does not have a copyright disclaimer, if this is the case do not use the TX-182 to digitize the work. ⚫ Never hold or carry the device by the power cable. ⚫... -
Page 3: Safety Instructions
We accept no liability for consequential damage. Warnings ⚫ Do not disassemble the TX-182, it may result in short-circuit or damage. ⚫ Battery warning: Improper use of the battery may cause fire or chemical burns. The battery may explode in case of damage. ⚫ Do not modify, repair... -
Page 4: Features
⚫ Do not use corrosive or volatile liquid for cleaning. ⚫ Do not drop or shake the TX-182, it may break internal circuit boards or mechanics. ⚫ Keep the TX-182 in dry and ventilated environment. Avoid high humidity and high temperature. ⚫ This TX-182 is not water-resistant;... -
Page 5: Quick Start Guide
HDMI OUT port or use the AV cable to plug in the AV OUT port. (See chapter “Show recordings on TV” for details.) 6. If want to view recorded videos on the computer. Connect the TX-182 to the computer via the USB data/power cable. (See chapter “Copy recordings to PC”... -
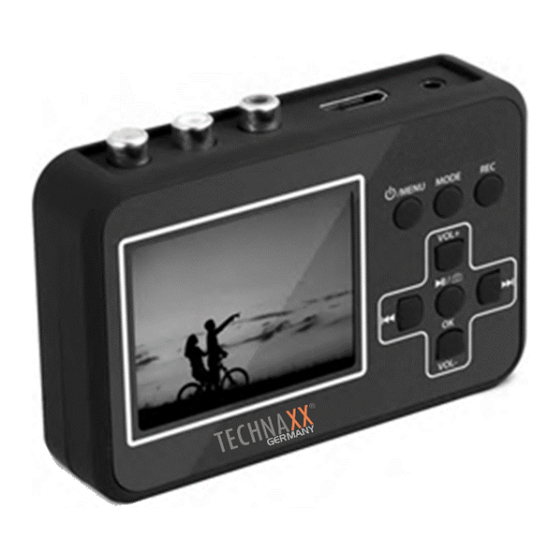
Page 6: Product Overview & Functions
The buttons within the cross perform different functions 18 VOL- - Lower the volume depending mode selected 13.1 Play mode Record without sound 13.2 Recording mode 20 OK Snapshot mode VOL+ - Increase the volume Model: TX-182 Article No. 4980, 01/2022... -
Page 7: Display Symbols
PC and be renamed. Charging the battery Charge the TX-182 for at least 1 hour before turning it on. Note: The device has no LED indicator to show whether the device is charging or is fully charged. -
Page 8: Installing The Memory Card
- When the battery is completely depleted, it will need approximately 5 hours for a full charge! Installing the Memory card Use a MicroSD card with max. 32GB. For optimal results, a memory card with speed class recommended. Note: Format FAT32 required. Model: TX-182 Article No. 4980, 01/2022... -
Page 9: Connecting A Video Source
Connecting a video source Connect the TX-182 to a video source like shown in one of the following ways: 1 Yellow (video) 4 RCA-cable 2 White (audio L) 5 Source (Video8, Hi8, SVHS, VHS, VCD, DVD, VCR, DV, camera) 3 Red (audio R) 6 AV-cable Model: TX-182 Article No. -
Page 10: First Start
On/Off Menu button for approx. 3 seconds to turn the TX-182 On or Off. Upon being powered up, the TX-182 starts in recording mode and the following information is shown on the display: 1 MicroSD card inserted 2 Recording mode... -
Page 11: Setting Date And Time
Note: You also can turn of the time stamp. Press the On/Off Menu button briefly to access the settings. Using the VOL- button, scroll down to: Date input - Enter Model: TX-182 Article No. 4980, 01/2022... - Page 12 Use the VOL-/VOL+ button to change the date format. Use the button, to scroll down to the year. Set the correct year by using the VOL- and VOL+ buttons. Then use the button to scroll further to the month etc. Model: TX-182 Article No. 4980, 01/2022...
-
Page 13: Settings
Set the date and time, refer to the chapter “Setting date Date input and time” Set independently the time in the TX-182. For instance, if the video was recorded in the summer of 2007, the date can be inserted here. -
Page 14: Recording
2. Turn on the video source. 3. Turn on the TX-182. 4. Make sure the video source image is shown on the TX-182 display. 5. Press the REC button to begin recording. The counter in the top right corner of the display turns red. -
Page 15: Play Mode Settings
Play mode settings How to set Press the Mode button to select the play mode. The TX-182 is now in play mode. Press the On/Off Menu button briefly to get to the settings. Scroll between the various menu alternatives by using the VOL+ and VOL- buttons. -
Page 16: Settings
Shows installed firmware version. Playback 1. Turn on your TX-182. 2. Use the Mode button to select the play mode. The TX-182 is now in play mode. 3. Select the desired recording using buttons. 4. Press OK to playback the recording. -
Page 17: Show Recordings On Tv
Show recordings on TV You can connect your TX-182 to a monitor (TV) via AV-cable or by using HDMI-cable. After connecting the TX-182 with either an AV-cable or a HDMI-cable the display turns black. You can see the recordings now on the monitor (TV). -
Page 18: Copy Recordings To Pc
PC itself. A drive routine will automatically be installed onto your PC the first time you connect the TX-182 to your PC. The TX- 182 then appears as a removable disc drive on the PC, so you can copy, rename or delete your recordings. -
Page 19: Edit/Convert Recordings
Edit/Convert recordings The TX-182 comes with a video edit software Arcsoft ShowBiz (Windows only), you can edit your recordings with it. Install it from CD (or download the software under www.technaxx.de/support) on PC and open it. 1. You can combine two or more video in one, just drag them into Arcsoft Showbiz. -
Page 20: Technical Specifications
This device is a high-precision optical instrument, so in order to avoid damage, please avoid the following practice: ●Use the device in ultra-high or ultra-low temperature. ●Keep it or use it in moist environment for long. ●Use it in rainfalls or in water. Model: TX-182 Article No. 4980, 01/2022... -
Page 21: Declaration Of Conformity
●Deliver or use it in strongly shocking environment. Declaration of Conformity The EU Declaration of Conformity can be requested at the following address: www.technaxx.de/ (in the lower bar "Declaration of Conformity"). Disposal Disposal of the packaging. Sort packaging materials by type upon disposal. - Page 22 US Warranty Thank you for your interest in the products and services of Technaxx Deutschland GmbH & Co.KG. This Limited Warranty applies to physical goods, and only for physical goods, purchased from Technaxx Deutschland GmbH & Co.KG.
Need help?
Do you have a question about the TX-182 and is the answer not in the manual?
Questions and answers