Advertisement
Quick Links
Advertisement

Related Manuals for Singer 3368


Summary of Contents for Singer 3368
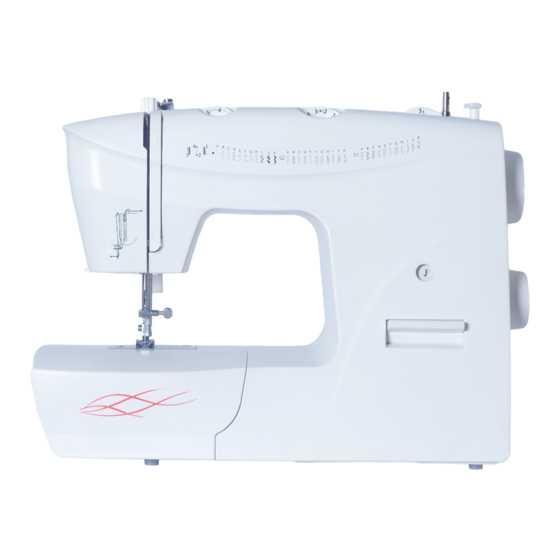
- Page 1 Instruction Manual Model 3368...
- Page 2 nearest authorized service center for eamination, repair, electrical or mechanical adjuestment.
-
Page 3: Table Of Contents
(optional) Overlock stitches How to sew 4-step buttonholes Zippers and piping Sewing with the narrow hem foot Free motion darning (optional) Twin needle (optional) Quilting (optional) Gathering (optional) - Page 4 4. Thread knife (optional) Built-in threader...
- Page 5 17. Bobbin winding spindle...
- Page 6 Accessories Standard accessories (1) Optional Accessories a. General purpose foot Button sewing foot Blind hem foot Zipper foot Edge/Quilting guide 4-step Buttonhole foot Darning plate Darning/Embroidery foot Seam ripper/brush Gathering foot Lubricate oil Cording foot Needle x 3pcs q. Hemmer foot Bobbin x 3pcs Quilting foot Screw driver (small)
- Page 8 Caution: Always make sure that the machine is unplugged from power source and the main switch is on "O". when the machine is not in use and before inserting or removing parts. - To start the machine,press the foot control (3).The speed of Attention: Consult a qualified electrician if in doubt as to connect machine to power source.
- Page 9 pressure,turn the presser foot pressure dial as shown left. For sewing very thin fabric,loosen the pressure by turning the dial counter clockwise,and for heavy...
- Page 10 Attention: Turn power switch to "O" before carrying out any of the operations below. Release the presser foot by raising lever (e) located at the distance as desired for hems, pleats, etc..(4)
- Page 11 Please Note: When the bobbin winder spindle is in "bobbin winding" position, the machine will not sew and the hand wheel will not turn. To start sewing, push the bobbin winder spindle to the left (sewing position). a. Spool pin...
- Page 12 Attention: Turn power switch to "O" before inserting or removing the bobbin.
- Page 13 Caution: Turn power switch to "O" before inserting or removing the needle. the hand wheel towards you until the needle is at highest position.
- Page 14 Caution: Before threading, turn power switch to "O". the numbered threading sequence illustrated below. If you skip a step or fail to properly...
- Page 15 Built-in needle threader (optional) Attention: Turn power switch to off ("O")!
- Page 16 Note: The bobbin thread tension has been adjusted at the factory and readjustment is usually not required.
- Page 18 down the reverse sewing lever and press the foot control...
- Page 19 serge, silk, muslin,interlocks, cotton knits, tricots, jerseys, crepes, woven polyester, shirt & blouse fabrics. Heavy duty thread, topstitch etc. Not recommended for double knits. Sweater knits, swimsuit fabric, elastic.
- Page 20 length dial to "S1",select the patterns on the third row, turn the stitch length dial to "S2",select the...
- Page 21 straight stitch position "A". from left position to right...
- Page 22 5 4 3 2 1 0...
- Page 23 * The blind hem foot is an optional accessories. "D" Blind hem/lingerie for firm fabrics.Position "E" or "F" on selection dial. Note: It takes practice to sew blind hems. Always make a sewing test first.
-
Page 24: Overlock Stitches
Overlock stitches (optional) Turn the stitch length dial to "S1". The stitch width can be adjusted to suit the fabric. Attention: Use new needles or ball point needles or stretch needle! - Page 25 Install the embroidering plate to the needle plate as illustrated.(1)
-
Page 26: How To Sew 4-Step Buttonholes
How to sew 4-step buttonholes Prepare 1. Take off the general purpose foot and attach the buttonhole Adjust the stitch length dial between "0.5-1" to set stitch density. 0.5~1 Note:... -
Page 28: Sewing With The Narrow Hem Foot
Sewing with the narrow hem foot * The narrow hem foot is an optional accessory not supplied with your... - Page 30 Turn the stitch length dial to "S1". Turn the stitch length dial to "S1".
- Page 31 Turn the stitch length dial to "S1".
-
Page 33: Free Motion Darning (Optional)
Free motion darning (optional) * The darning/embroidery foot is an optional accessory not supplied with your machine. Set the machine as illustrated. Install the darning plate.(1) Attach the darning/embroidery foot to the pressor foot bar. The lever (A) should be behind the needle clamp screw (B). Press the darning/embroidery foot on firmly from behind with your index finger and tighten the screw (C). - Page 35 For reverse sewing instructions,see page 16.
- Page 37 0.5~1...
-
Page 38: Twin Needle (Optional)
Twin needle (optional) 1.5~3.5 Please note: When sewing with twin needle, always proceed slowly, and make sure to maintain a low speed to insure quality stitching. When using twin needle on zig-zag make sure the stitch width dial is set between "0" and "2.5". Do not use twin needle at setting "... -
Page 39: Quilting (Optional)
Quilting (optional) Note: Presser foot shown is the optional quilting foot which does not come with your machine. If you have not purchased this foot substitute the general purpose foot. -
Page 40: Gathering (Optional)
Gathering (optional) Note: Presser foot shown is the optional gathering foot which does not come with your machine. If you have not purchased this foot substitute the all purpose foot and gather fabric by hand by lowering the tension setting to below 2 and pulling the lower thread to gather the material. - Page 41 "G". "S1".
- Page 42 Always make sure that the machine is unplugged from power source and the main switch is on "O" before inserting or removing any parts and before cleaning. Cleaning the feed teeth: hook retaining arms. Insert the bobbin case and intervals at an authorized SINGER service center.
- Page 44 170818...
Need help?
Do you have a question about the 3368 and is the answer not in the manual?
Questions and answers