Advertisement
Table of Contents
email: info@riverside-furniture.com
Components and Hardware List
Shelf Pin
Ø6.35xL11mm
A
16 pcs.
Spring Washer
Ø1/4" x 11mm
D
4 pcs.
Mending Bracket
G
2 pcs.
Step 1
Remove the screws and
discard the shipping rail.
Step 2
Attach the Hutch to the Credenza using the
mounting plates and bolts at the back.
F
C
Assembly Instructions
Glass
B
4 pcs.
Flat Washer
Ø1/4" x 16mm
E
4 pcs.
Furniture Tipping Restraint Kit
H
2 pcs.
G
D
E
Sloane
Home Office
Allen Head Bolt
Ø1/4" - 20 x 3/4"
C
Allen Key
F
Be sure to check all packing material carefully for small parts,
which may have come loose inside the carton during shipment.
To Wall Oulet
Made in Viet Nam
4 pcs.
4mm
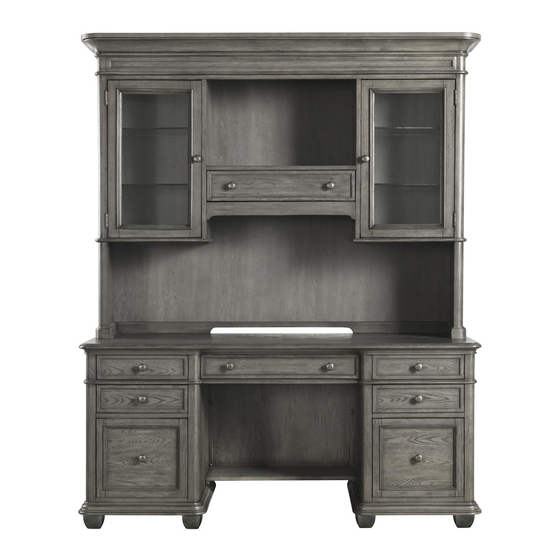
77836 Credenza Hutch
77833
Credenza
1 pc.
Back view
Page 1 of 2
Advertisement
Table of Contents

Related Manuals for Riverside Furniture Credenza Hutch 77836


Summary of Contents for Riverside Furniture Credenza Hutch 77836
- Page 1 Sloane Page 1 of 2 Home Office Made in Viet Nam Assembly Instructions email: info@riverside-furniture.com Components and Hardware List Shelf Pin Glass Allen Head Bolt Ø6.35xL11mm Ø1/4" - 20 x 3/4" 16 pcs. 4 pcs. 4 pcs. Spring Washer Flat Washer Allen Key Ø1/4"...
- Page 2 Sloane Page 2 of 2 Home Office Made in Viet Nam Assembly Instructions email: info@riverside-furniture.com Tipping Restraint Hardware Kit (H) (Inside White Plastic Bag) Step 3 Step 4 Note : The light in the top of the hutch is controlled by a touch switch connected to the top hinge of the right hand door. The levelers in the bottom of the Bun Feet can be adjusted if necessary to compensate for uneven flooring...
Need help?
Do you have a question about the Credenza Hutch 77836 and is the answer not in the manual?
Questions and answers