
Subscribe to Our Youtube Channel
Related Manuals for Kreg Pro Series

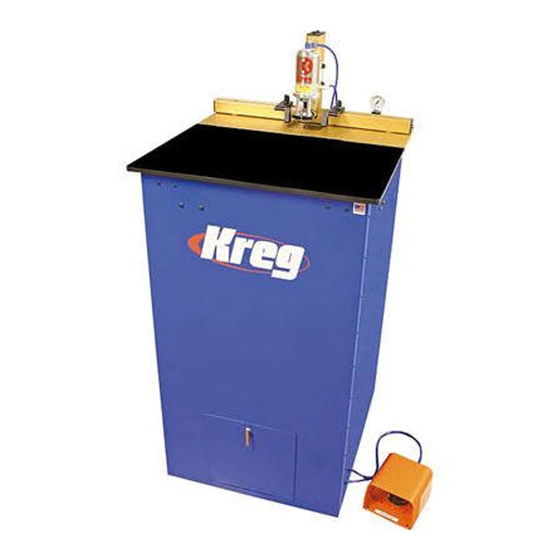
Summary of Contents for Kreg Pro Series
- Page 1 Pro Series INSTRUCTIONAL MANUAL DK1100 Electric and Pneumatic Models / DK3100 DK3100 DK1100 FP DK1100 FE DK1100 TP 5/2010 DK1149 Rev. C RECOMMENDED AIR PRESSURES: Electric Models: 90 psi • Pneumatic Models: 120 psi...
-
Page 2: Table Of Contents
Table of Contents Congratulations on choosing a Kreg Pro Series Pocket Hole Machine! Be sure to read the instructions and the safety warnings completely before using this machine. TABLE OF CONTENTS ..................1 WARRANTY ...................... 2 SAFETY INSTRUCTIONS ................. 3-6 DK1100 FE / DK3100 QUICK START GUIDE ........... -
Page 3: Warranty
This is Kreg Tool Company’s sole warranty. Any and all other warranties which may be implied by law, including any warranties for merchantability or fi tness for a particular purpose, are hereby limited to the duration of this warranty. Kreg Tool Company shall not be liable for any loss, damage or expense directly or indirectly related to the use of its products or from any other cause or for consequential damages (including without limitation, loss of time, inconvenience, and loss of production). -
Page 4: Safety Instructions
• This system was designed for certain applications only. Kreg strongly recommends that this system NOT be modifi ed and/or used for any application other than for which it was designed. If you have any questions relative to its application, DO NOT use the machine until you have written, phoned, or e-mailed Kreg Tool and have been advised accordingly. - Page 5 • Use recommended accessories only. Use of any additional accessories (add-ons) is strictly at your own risk. This machine was designed with only the use of Kreg certifi ed parts in mind. Use of uncertifi ed accessories may be hazardous.
- Page 6 à l’opérateur. • Ce système a été conçu pour certaines applications seulement. Il est fortement recommandé par Kreg de NE PAS modifi er et/ou utiliser ce système pour des applications autres que celles pour lesquelles il a été conçu. Si vous avez des questions concernant son application, N’UTILISEZ PAS la machine avant d’avoir écrit, appelé...
- Page 7 • Utilisez uniquement les accessoires recommandés. L’utilisation d’accessoires supplémentaires (extensions) est strictement à vos propres risques. Cette machine a été conçue uniquement en fonction de pièces certifi ées Kreg. L’emploie d’accessoires non certifi és peut s’avérer dangereux.
-
Page 8: Dk1100 Fe / Dk3100 Quick Start Guide
13. After the initial testing, test the belt for tightness at least once per day for one week, and make adjustments as necessary. After the break-in period, Kreg recommends you check the tightness of the belt and make adjustments as necessary, once per week. -
Page 9: Dk1100 Fe Parts Diagram
DK1100 FE / DK3100 DK1100 FE - Electric Model Parts Diagram... -
Page 10: Dk3100 Parts Diagram
DK1100 FE / DK3100 DK3100 - Electric Model Parts Diagram... -
Page 11: Acrylic Top /20 Amp Outlet / Changing Drill Bits
DK1100 FE / DK3100 Acrylic Top Must Be Secured Changing Drill Bits Do not operate this machine without the acrylic top positioned You can expect to drill between 4000 and 5000 holes in Oak correctly and secured with the two provided lock-down screws with your #DKDB drill bit before the bit will need to be sharp- (1/8”... -
Page 12: Swing Stops / Adjusting The Machine For Stock Thickness
DK1100 FE / DK3100 Swing Stops Two Swing Stops are provided to assist in drilling pocket holes Head in the same location on multiple work pieces of the same dimension. When the Swing Stop is not used, it will pivot out of the way to allow the work piece to slide underneath and rest Depth Control against the fence. -
Page 13: Clamping Cyclinder Height / Feed Rate / Clamping Duration
DK1100 FE / DK3100 Adjusting the Clamping Cylinder Height Feed Rate Flow Control The Feed Rate Control Valve allows the user to adjust the The Clamping Cylinder can be adjusted for material of different speed at which the drill bit advances into the material. The thicknesses. -
Page 14: Belt Tension
DK1100 FE / DK3100 Belt Tension Proper belt tension is necessary to maximize the effi ciency of the Drill Bit. A simple adjustment has been provided to allow the user to properly maintain belt tension. Remember to check the belt tension often on the machine, especially in the fi... -
Page 15: Dk1100 Tp / Fp (Pnuematic Models)
Kreg Pocket Hole Machine, it is important to understand that maintaining a short distance between your air compressor and the machine will help ensure adequate air fl ow. Kreg does not recommend the use of a long extension hose for use with this product. -
Page 16: Dk1100 Tp / Fp Parts Diagram
DK1100 TP/FP DK1100 TP/FP - Pnuematic Model Parts Diagram... -
Page 17: Acrylic Top / Swing Stops / Changing Drill Bits
DK1100 TP/FP Acrylic Top Must Be Secured Changing Drill Bits Do not operate this machine without the acrylic top positioned You can expect to drill between 4000 and 5000 holes in correctly and secured with the two provided lock-down screws Oak with your #DKDB drill bit before the bit will need to be (1/8”... -
Page 18: Adjusting The Machine For Stock Thickness
DK1100 TP/FP Adjusting the Machine For Stock Thickness A) Adjusting the Fence Setting Head The Fence can be adjusted to align the pocket hole to the center of material of different thicknesses. When adjusting the Fence make sure that the Fence remains perpendicular to the Depth Control Guide Plate. -
Page 19: Clamping Cyclinder Height / Feed Rate / Clamping Duration
DK1100 TP/FP Adjusting the Clamping Cylinder Height Feed Rate Flow Control The Clamping Cylinder can be adjusted for material of different The Feed Rate Control Valve allows the user to adjust the speed at thicknesses. The factory setting will clamp materials of which the drill bit advances into the material. -
Page 20: Air System Prefi Lter / Air System Lubricator
DK1100 TP/FP Air System Prefi lter An Air System Prefi lter is provided to maintain a clean, moisture-free supply of compressed air to the machine. The Air System Prefi lter reservoir should be routinely drained of moisture. To drain moisture from the reservoir either push the drain valve up toward the reservoir or to the side to use system air pressure to drain the collected fl... -
Page 21: Notes
NOTES... - Page 22 NOTES...
- Page 23 NOTES...
- Page 24 Kreg Tool Company, 201 Campus Drive, Huxley, IA 50124 800.447.8638 • www.kregtool.com...
Need help?
Do you have a question about the Pro Series and is the answer not in the manual?
Questions and answers
I have a DK3100 , I bent the left hand drill bit chuck, just the end that is removable. I can not find a part number. is this item available?