Advertisement
Quick Links
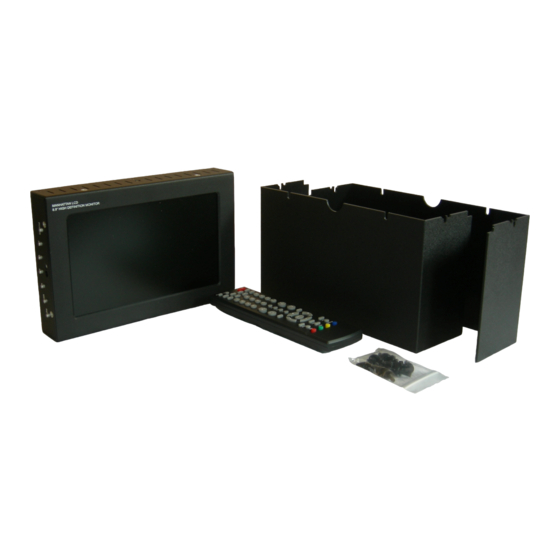
HD071A & HD089B
User Manual
Updated 6/15/2010 for new firmware
Contents
Page 1---------- Contents
Page 2---------- Features & Specifications
Page 3---------- HD071A Monitor Schematic
Page 4---------- HD089B Monitor Schematic
Page 5---------- Remote Control
Page 6-7------- Basic Monitor Adjustments
Page 8---------- Advanced Monitor Adjustments
Page 9---------- Sun Hood
Page 10-------- Power Options
Page 11-------- Warranty
1
© 2009 Imägo Metrics LLC for Manhattan LCD Inc. - All Rights Reserved
Advertisement

Related Manuals for Manhattan HD071A

Summary of Contents for Manhattan HD071A
- Page 1 Page 5---------- Remote Control Page 6-7------- Basic Monitor Adjustments Page 8---------- Advanced Monitor Adjustments Page 9---------- Sun Hood Page 10-------- Power Options Page 11-------- Warranty 1 © 2009 Imägo Metrics LLC for Manhattan LCD Inc. - All Rights Reserved...
- Page 2 Screen Size: 8.9” Diagonal Screen Architecture: WXGA (1024X600 Pixels) Contrast Ratio: 500:1 Brightness: 300 nits HDCP: YES Compatible Frame Rates 24,50,60 HDMI: 1 Input, Supports 1080p, 1080i, 720p, 576p, 576i, 480p, 480i VGA: 1 Input. Support For Following Image Resolutions: 640x480/800x600/1024x768/1280x720/1280x768/1280x1024/1366x768/1920x1080 Component: 1 Input, Supports 1080p, 1080i, 720p, 576p, 576i, 480p, 480i Composite (Video Only): 1 Input 480p, 480i Power: 12v DC Power Consumption: < 20 Watts 2 © 2009 Imägo Metrics LLC for Manhattan LCD Inc. - All Rights Reserved...
- Page 3 3 © 2009 Imägo Metrics LLC for Manhattan LCD Inc. - All Rights Reserved...
- Page 4 4 © 2009 Imägo Metrics LLC for Manhattan LCD Inc. - All Rights Reserved...
- Page 5 The remote requires 2 AAA batteries (not included) Sections highlighted in Blue hare not available with new code as of 4/1/2010. Sections Highlighted in Red are new features added 4/1/2010. 5 © 2009 Imägo Metrics LLC for Manhattan LCD Inc. - All Rights Reserved...
- Page 6 Up & Down arrows to scroll to the appropriate input and the enter key to select the input. Navigating the menu system: ***NOTE*** you must be on an input that is receiving a video signal to make any changes to any options. Using the Control console located on the left side of the monitor press the Menu button. To scroll between Picture, Img.Adj, & Setup tabs use the >< buttons located above the MENU key. Use the ^ v buttons located just under the POWER button to scroll within a menu tab. To adjust a specific field use the >< buttons located above the MENU key to apply your changes and go up a level press the MENU button again to save your changes and go up a level and MENU button once more to exit the menu. Using the I/R remote control unit with two AAA batteries installed, point the remote at the Monitor Console’s IR port (beneath LED indicator) and press the MENU Button use the up & down arrows to scroll to the appropriate input and the enter key to select the input. To scroll between Picture, Img.Adj, & Setup tabs use the Left & Right arrow buttons located under the MENU key. Use the Up & Down arrow buttons located just under the Menu button to scroll within a menu tab. To adjust a specific field use the Left & Right arrow buttons located below the MENU key to make changes to a certain field. Press the MENU button again to save your changes and go up a level Use the UP arrow to get back to the menu tabs and MENU button once more to exit the menu. 6 © 2009 Imägo Metrics LLC for Manhattan LCD Inc. - All Rights Reserved...
- Page 7 Component: Brightness, Contrast, Phase, Sharpness, Color, Tint & Color Temp Img.Adj Tab: The image Adjust tab will allow the user to adjust the images position and aspect ratio on the monitor. Image size: Adjusts aspect ratio. AUTO, 1:1, Fill Aspect, 4:3, 16:10, 15:9, 16:9, 1.85:1, 2.35:1 & Fill All H position: Horizontal position of the picture V position: Vertical position of the picture Auto: Auto centers the position the picture on the screen. Freeze Frame: Freezes a specific image on the screen The Img. Adj Tab options for each input are: VGA: Image Size H. Position, V. Position, AUTO Composite: Image Size, H. Position, V. Position, Freeze Frame HDMI 1&2: Image Size, Freeze Frame Component: Image Size H. Position, V. Position, AUTO, Freeze Frame Setup Tab: The setup tab allows the user to customize OSD settings as well as the HDMI Color Space OSD Settings: Transparency: Sets how visible the background of the OSD menu system OSD Timeout: sets the length of time for the OSD to be displayed after the last keystroke. HDMI Video Color space: Changes the color space for the HDMI input (HDMI ONLY) 7 © 2009 Imägo Metrics LLC for Manhattan LCD Inc. - All Rights Reserved...
- Page 8 Quick Access Menu Options: Root Menu: Brightness, Contrast, Sharpness & Image size. Picture Menu: Color Saturation, Tint (Hue), H Position ADC, V Position ADC, 7.5 IRE Setup, Phase, Gamma Select & Horizontal De‐blocking. Tweaking Menu: This sub‐menu will allow you to change any of the following options. Show Motion Level, Manual XC/XL, VEH CONTROL, Sync Monitor, H Filter, V Filter, Cuec/ICP, FRMEC, Film Mode 3:2, SP Noise, Luma Noise, Chroma Noise, UV5 Blue, UV5 Green, UV5 Fleshtone, UV5 Red, UV5 Yellow, DLTI Gain, DCTI Gain, DLTI Frequency, DCTI Frequency, Coring Level, Peaking Gain, LAI, Gamma Select, Horizontal De‐blocking & Indicate Film Mode. BWE Menu: BWE Enable, BW Gain, BW Offset, BWE Mid Gain, BWe Mid Offset, BWE Time. 2D Peaking Menu: Peaking filters increase the gain for higher frequencies, resulting in steeper transitions and higher local contrast. 2D Peaking filter options High Pass, Low Pass, Band Pass, Un‐ sharp, 2D Peaking Gain, 2D Peak Limiting, 2D Peak Coring. 3d Ctrl Menu: Modifies advanced 3d color mapping technology. 3D Comb settings HW 3D, SW Adaptive 3D, Off, 3D Speed fast to slow, 3d Adv Ctrl Menu: Adjusts the 3D Comb noise filters. Min Noise 3D Adaptive 3D LM Min. Noise, Adaptive 3D MM Min. Noise, Adaptive 3D HM Min. Noise. 8 © 2009 Imägo Metrics LLC for Manhattan LCD Inc. - All Rights Reserved...
- Page 9 Section: Sun‐Hood Installation There are 8 treaded holes on the monitor 2 on each side the sun hood is a 2 piece design 1 piece fits on the top the second on the bottom they are made to fit on either side. The sun hood mounts to the monitor with supplied thumbscrews in 2 easy steps. 1. Thread in the thumbscrews about half way 2. Then slide the groves in the sun hood around the shaft of the thumbscrews and Snug the thumbscrews. (Do not over tighten or you may strip the thumbscrews) \ 9 © 2009 Imägo Metrics LLC for Manhattan LCD Inc. - All Rights Reserved...
- Page 10 Our HD071A & HD089B model monitors may use any 12V regulated power source. All monitors ship with a supplied 12V regulated AC adapter. The input connector is a standard 2.1x5.5mm barrel connector the center pin being + positive outer shell is ‐ negative. You may use any power source as long as it is regulated. If the polarity is reversed it will void your warranty, if you overpower the monitor with a higher voltage than 12.5 volts it will blow a fuse and void the warranty. We currently offer optional battery packs with Velcro strips for mounting & battery plates for Panasonic Cannon & Sony Batteries that include a built in power regulator to ensure proper operation. The Battery plates are mounted to the monitor at the factory and are mounted in a sideways position to allow the monitor to be flipped upside‐ down on cameras with 35mm lens adapters. Note the green status indicator it will turn on when the battery is charged and flash when the battery is low. The power wire connects to the 12V dc jack when the monitor is being powered by the plate. 10 © 2009 Imägo Metrics LLC for Manhattan LCD Inc. - All Rights Reserved...
- Page 11 Claims: Claims for damages must be preceded by a Return Merchandise Authorization (RMA). RMA’s may be requested directly from the manufacturer or authorized distributors. Manhattan LCD reserves the right to refuse to repair or replace any monitor that it deems is in need of repair due to customer negligence or damage was caused by use other than the normal intended purpose of the product. Contact: Manhattan LCD High Definition Monitors Contact Info: John Reed ‐ Sales / Engineering, jreed@manhattanlcd.com Tel: 407‐247‐8338 Vincent Falcone ‐ Tech Support / Shipping, vfalcone@manhattanlcd.com Tel: 407‐443‐5235 Sales sales@manhattanlcd.com Support support@manhattanlcd.com Address: Manhattan LCD 3328 Spotted Fawn Dr Orlando FL 32817 USA 11 © 2009 Imägo Metrics LLC for Manhattan LCD Inc. - All Rights Reserved...
Need help?
Do you have a question about the HD071A and is the answer not in the manual?
Questions and answers