Advertisement
Quick Links
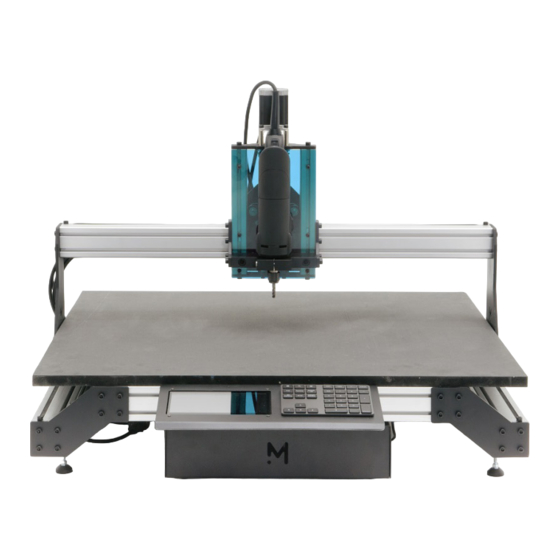
Advertisement

Related Manuals for MEKANIKA EVO

Summary of Contents for MEKANIKA EVO
- Page 1 CALIBRATION METHODOLOGY...
- Page 2 Calibration is the comparison of measurement values delivered by a machine under test with those of a standard value of known accuracy. In our case, since Evo comes as a kit and can be assembled with minor misalignments, the point of calibrating the machine is to make sure that it can achieve the accuracy it was designed for.
- Page 3 1. MEASUREMENTS STEP #01 : SQUARING THE MACHINE 1. Switch on the control unit of the CNC router 2. Move manually the machine to the front 3. Press the “Square Gantry” button...
- Page 4 1. MEASUREMENTS STEP #02 : HOMING THE MACHINE 1. Press the “Home” button...
- Page 5 1. MEASUREMENTS STEP #03 : DEFINING THE WORKING COORDINATES 1. Press the “XY” button to define the current position as the X0 Y0 working coordinates...
- Page 6 1. MEASUREMENTS STEP #04 : CHANGING THE ENDMILL 1. Install the 8mm endmill (included in the EVO kit)
- Page 7 1. MEASUREMENTS STEP #05 : MEASURING THE TOOL LENGTH 1. Place the crocodile clip on the endmill 2. Place the probing device underneath the endmill 3. Press on the “Tool measure length” button...
- Page 8 1. MEASUREMENTS STEP #06 : LOADING THE GCODE 1. Download the Calibration G-codes on our support page 2. Load them on your control unit with a USB key or using the Shared folder of the Raspberry Pi 3. Press the “Open Gcode” button 4.
- Page 9 1. MEASUREMENTS STEP #07 : SWITCHING ON THE SPINDLE 1. Set the rotation speed on “4” 2. Switch on the spindle WEAR SOME SECURITY GLASSES AND EAR PROTECTIONS NO NEED TO INSTALL THE DUST SHOE FOR THIS OPERATION...
- Page 10 1. MEASUREMENTS STEP #08 : MILLING 1. Press the “Play” button WEAR SOME SECURITY GLASSES AND EAR PROTECTIONS...
- Page 11 1. MEASUREMENTS STEP #09: PREPARING FOR THE NEXT STEP 1. Once the work is finished, press the “Stop” button 2. Switch off the spindle 3. Bring the machine to the back with the “Y+ arrow” button...
- Page 12 1. MEASUREMENTS STEP #10 : MEASURING THE “X” LENGTH 1. Use a measuring tape or a ruler to measure the “X” length TAKE YOUR TIME TO TAKE ACCURATE MEASUREMENTS, AS THEY WILL STRONGLY INFLUENCE THE CALIBRATION PAY ATTENTION TO MEASURE THE INNER DIMENSION AS SHOWN ON THE DRAWING...
- Page 13 1. MEASUREMENTS STEP #11 : MEASURING THE “Y” LENGTH 1. Use a measuring tape or a ruler to measure the “Y” length PAY ATTENTION TO MEASURE THE INNER DIMENSION AS SHOWN ON THE DRAWING...
- Page 14 1. MEASUREMENTS STEP #12 : MEASURING THE DIAGONAL 1 1. Use a measuring tape or a ruler to measure the diagonal 1 PAY ATTENTION TO MEASURE THE INNER DIMENSION AS SHOWN ON THE DRAWING...
- Page 15 1. MEASUREMENTS STEP #13 : MEASURING THE DIAGONAL 2 1. Use a measuring tape or a ruler to measure the diagonal 2 PAY ATTENTION TO MEASURE THE INNER DIMENSION AS SHOWN ON THE DRAWING...
- Page 16 1. MEASUREMENTS STEP #14 : DRAWING THE REAL GEOMETRY 1. Write down all the measured dimensions 2. Draw the real geometry of the machine and exaggerate the shape to emphasis the lengths and angles ≈500 ≈499,2...
- Page 17 2. CALIBRATION STEP #01 : FROM A PARALLELOGRAM TO A RECTANGLE 1. In this case, the first thing to do is to rectify the shape to obtain a rectangle IF YOU MEASURED IDENTICAL DIAGONALS ON THE PREVIOUS STEP, GO STRAIGHT TO STEP#05...
- Page 18 2. CALIBRATION STEP #02 : MEASURING THE ANGLE 1. To be able to square this shape, we need to know its actual angles 2. Refer to the drawing and use this online angle calculator In our case: α = 89,82° α...
- Page 19 1. To rectify the angle, we need to know the offset distance 2. Refer to the drawing and use this online calculator In our case: = 2,2 mm (if EVO-S or -M) = 3,5 mm (if EVO-L) 89,82° α = 0,18°...
- Page 20 2. CALIBRATION STEP #04 : MOVING THE LIMIT SWITCH SUPPORT 1. In this case, we need to move the Y1 limit switch support by 2,2mm 2. Take the 3mm hex key to unscrew the M4 screws and slide the acrylic plate easily 2.2mm...
- Page 21 2. CALIBRATION STEP #05 : FROM A RECTANGLE TO A SQUARE 1. The second thing to do is to rectify the shape to obtain a square IF YOU MEASURED EXACTLY 500MM LENGTHS FOR X AND Y, GO STRAIGHT TO STEP#01 FROM CHAPTER 3...
- Page 22 2. CALIBRATION STEP #06 : CALCULATING A NEW STEPS/UNIT VALUE During the assembly, you had to firmly tighten the belts to make sure that the they wouldn’t slip while the machine is mov- ing. Although that is very important for the machine to work properly, it can have a small negative effect on accuracy. Indeed, as you stretch the belt to tighten it, its real pitch becomes larger than the theoretical one.
- Page 23 2. CALIBRATION STEP #07 : MODIFICATION OF THE STEPS/UNIT VALUE 1. In PlanetCNC, navigate to File -> Settings -> Motors -> StepsPerUnit 2. Change the value of Motor X and Motor Y with the values that you found.
- Page 24 2. CALIBRATION STEP #08 : VERIFICATIONS 1. Move the machine to the front 2. Press the “Square Gantry” button...
- Page 25 2. CALIBRATION STEP #09 : OFFSET OF THE WORKING COORDINATES 1. Type “G0 X20 Y20” in the Planet CNC console and press “Enter” 2. Press the “XY”button...
- Page 26 2. CALIBRATION STEP #10 : MILLING 1. Switch on the spindle 2. Press the “Play” button...
- Page 27 2. CALIBRATION STEP #11 :MEASUREMENTS VERIFICATIONS 1. Measure the lengths “X” and “Y” 2. Measure the diagonals 3. According to the measurements, go back to STEP#01 or go to the next chapter “Tramming the spindle” 4. Repeat until you find the right values in the end...
- Page 28 3.TRAMMING THE SPINDLE STEP #01 : LOADING THE G-CODE 1. Press the “Open G-code” button 2. Open the “Spindle test”...
- Page 29 3.TRAMMING THE SPINDLE STEP #02 : MILLING 1. Switch on the spindle 2. Press the “Play” button...
- Page 30 3.TRAMMING THE SPINDLE STEP #03 : ANGLE VERIFICATION 1. With your finger tip, identify if the surface is flat or bumpy. 2. Refer to the table to identify in which direction you have to tram your spindle (we purposely exaggerated the tilt for more clarity) TILTED RIGHT/FRONT TILTED LEFT/BACK STRAIGHT...
- Page 31 3.TRAMMING THE SPINDLE STEP #04 : TRAMMING THE SPINDLE ACCORDING TO THE X AXIS There are three possibilities to tram the spindle according to the X axis, try them in the following order: 1. Play with the screws of the AMB support 2.
- Page 32 3.TRAMMING THE SPINDLE STEP #05 : TRAMMING THE SPINDLE ACCORDING TO THE Y AXIS There is one possibility to tram the spindle according to the Y axis : 1. Play with the screws of the specific part “spindle support”...
- Page 33 3.TRAMMING THE SPINDLE STEP #06 : OFFSET OF THE WORKING COORDINATES 1. Type “G0 X20 Y20” in the Planet CNC console and press “Enter” 2. Press the “XY”button...
- Page 34 3.TRAMMING THE SPINDLE STEP #07 : MILLING 1. Switch on the spindle 2. Press the “Play” button...
- Page 35 3.TRAMMING THE SPINDLE STEP #08 : ANGLE VERIFICATION 1. With your finger tip, identify if the surface is flat or bumpy. 2. According to the surface, go back to STEP#01...
Need help?
Do you have a question about the EVO and is the answer not in the manual?
Questions and answers