Table of Contents
Advertisement
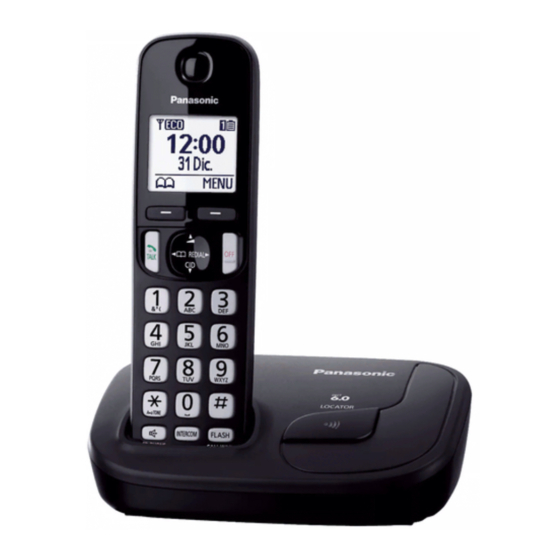
R Model shown is KX-TGD210.
Before initial use, see "Getting Started"
on page 10.
Thank you for purchasing a Panasonic product.
Please read these operating instructions before using the unit and save them for
future reference.
For assistance, please visit our support page on: www.panasonic.ca
Operating Instructions
Digital Cordless Answering System
Digital Cordless Phone
Model No.
KX-TGD210C
KX-TGD212C
KX-TGD213C
KX-TGD214C
Model No.
KX-TGD220C
KX-TGD222C
KX-TGD223C
KX-TGD224C
KX-TGD225C
KX-TG443CSK
Advertisement
Table of Contents

Related Manuals for Panasonic KX-TGD223C


Summary of Contents for Panasonic KX-TGD223C
- Page 1 Before initial use, see “Getting Started” on page 10. Thank you for purchasing a Panasonic product. Please read these operating instructions before using the unit and save them for future reference. For assistance, please visit our support page on: www.panasonic.ca...
-
Page 2: Table Of Contents
Table of Contents Introduction Useful Information Model composition ........3 Voice Mail service ........36 Accessory information ........3 Wall mounting ..........37 Error messages ..........39 Important Information Troubleshooting .........40 For your safety ..........6 Industry Canada Notices and other Important safety instructions ......7 information ..........45 For best performance ........7 Warranty .............46 Other information .........8... -
Page 3: Introduction
Introduction Model composition n KX-TGD210 series n KX-TGD220 series R Model shown is KX-TGD212. R Model shown is KX-TGD222. Base unit Handset Series Model No. Part No. Part No. Quantity KX-TGD210 KX-TGD210 KX-TGD210 KX-TGDA20 series KX-TGD212 KX-TGD210 KX-TGDA20 KX-TGD213 KX-TGD210 KX-TGDA20 KX-TGD214 KX-TGD210... - Page 4 Introduction Supplied handset qty. 1 unit 2 units 3 units 4 units 5 units Accessory item/ Accessory quantity Part number Belt clip Charger – KX-TGD210/KX-TGD220 KX-TGD212/KX-TGD222 KX-TGD213/KX-TGD223/KX-TG443SK KX-TGD214/KX-TGD224 KX-TGD225 See page 5 for replacement battery information. The handset cover comes attached to the handset.
- Page 5 Introduction Additional/replacement accessories Please contact your nearest Panasonic dealer for sales information. Accessory item Order number Rechargeable HHR-4DPA or HHR-4MYA batteries Battery type: – Nickel metal hydride (Ni-MH) – 2 x AAA (R03) size for each handset Range extender KX-TGA405 Replacement batteries may have a different capacity from that of the supplied batteries.
-
Page 6: Important Information
Confirm that external RF energy. smoke has stopped emitting and contact us by visiting our support page on: www.panasonic.ca CAUTION R Unplug from power outlets and never touch the inside of the product if its casing has Installation and location been broken open. -
Page 7: Important Safety Instructions
Failure to follow these instructions may Base unit location/avoiding noise cause the batteries to swell or explode. Attention: The base unit and other compatible Panasonic units use radio waves to communicate with each other. R For maximum coverage and noise-free communications, place your base unit: –... -
Page 8: Other Information
R The product should not be exposed to direct sunlight. ® As an ENERGY STAR Partner, Panasonic R Do not place heavy objects on top of the has determined that this product meets the product. ENERGY STAR guidelines for energy R When you leave the product unused for a efficiency. -
Page 9: Specifications
Important Information Specifications R Standard: DECT 6.0 (Digital Enhanced Cordless Telecommunications 6.0) R Frequency range: 1.92 GHz to 1.93 GHz R RF transmission power: 115 mW (max.) R Power source: 120 V AC, 60 Hz R Power consumption: Base unit Standby: Approx. -
Page 10: Getting Started
R Do NOT use Alkaline/Manganese/Ni-Cd required if you have a DSL/ADSL service. batteries. Note: R Confirm correct polarities ( R Use only the supplied Panasonic AC adaptor PNLV226. R Follow the directions on the display to set up the unit. - Page 11 R Eco mode is turned off when the clarity R Use the supplied rechargeable batteries. booster is activated (page 16). For replacement, we recommend using the Panasonic rechargeable batteries noted on page 5, 7. Note for battery charging R It is normal for the handset to feel warm...
-
Page 12: Controls
Getting Started n Control type Soft keys Controls The handset features 2 soft keys. By pressing a soft key, you can select the Handset feature shown directly above it on the display. Navigator key – MDN, MCN, MFN, or MEN: Scroll through various lists and items. -
Page 13: Display Icons
Getting Started Speaker Item Meaning MLOCATORN Line in Someone is using the line. R You can locate a misplaced handset by pressing MLOCATORN. MjN/MkN (VOL.: Volume up/down) KX-TGD220 series: page 3 MANSWER ON/OFFN ANSWER ON/OFF indicator N (PLAY/STOP) Message indicator Language settings N (Repeat) N (Skip) -
Page 14: Recording Your Greeting Message
Getting Started Enter the current hour and minute (12-hour clock format) by selecting 2 digits for each. Example: 9:30 09 30 *: Select “AM” or “PM”. MSAVEN a MOFFN Note: R When English is selected as the display language, 12-hour clock format is used. When French is selected, 24-hour clock format is used. -
Page 15: Making/Answering Calls
Making/Answering Calls Example: If you need to dial the line access number “9” when making outside calls with a Making calls PBX: 9 a MDN (Pause) Lift the handset and dial the phone number. Dial the phone number. a M R To correct a digit, press MCLEARN. -
Page 16: Useful Features During A Call
Making/Answering Calls To switch between calls, press MCALL Useful features during a WAITN. Note: call R Please contact your service provider/ telephone company for details and Hold availability of this service in your area. Press MMENUN during an outside call. Temporary tone dialing (for MbN: “Hold”... -
Page 17: Intercom
Making/Answering Calls Wait for the paged party to answer. R If the paged party does not answer, press M N to return to the outside call. To complete the transfer: Press MOFFN. To establish a conference call: MMENUN a MbN: “Conf.” a MSELECTN R To leave the conference, press MOFFN. -
Page 18: Phonebook
Phonebook Character Phonebook You can add 100 names (16 characters max.) and phone numbers (24 digits max.) to the phonebook, and assign each phonebook entry to the desired group. Important: R All entries can be shared by any registered handset. R To enter another character that is located on the same dial key, first press MEN to Adding phonebook entries... - Page 19 Phonebook MbN: “Save CID” a MSELECTN To search by group MGROUPN MbN: “Phonebook” a MSELECTN MbN: Select the desired group. a Continue from step 3, “Editing entries”, MSELECTN page 19. MbN: Scroll through the phonebook if necessary. Groups Groups can help you find entries in the Editing entries phonebook quickly and easily.
-
Page 20: Speed Dial
Phonebook Note: MbN: “Phonebook” a MSELECTN R If you edit a phonebook entry which is MbN: Select the desired entry. assigned to a speed dial key, the edited Press MCALLN to dial the number. entry does not transfer to the speed dial key. -
Page 21: Programming
Programming Menu list To access the features, there are 2 methods. n Scrolling through the display menus MMENUN Press MCN or MDN to select the desired main menu. a MSELECTN Press MCN or MDN to select the desired item from the next sub-menus. a MSELECTN Press MCN or MDN to select the desired setting. - Page 22 Programming Sub-menu 1 Sub-menu 2 Settings Code Settings 2-7 rings #211 Ring count <4 rings> Toll saver 1 min #305 Recording time <3 min> Greeting only <111> #306 Remote code Screen call <On> #310 – – #327 Answer on – –...
- Page 23 Programming Sub-menu 1 Sub-menu 2 Settings Code Set date & time Date and time – #101 Alarm Once #720 Daily <Off> *2, *4 <Caller ID auto> #226 – Time adjustment Manual Talking Caller Handset <On> #162 (Talking Call #G162 Base unit Display) <Off>...
- Page 24 Programming Sub-menu 1 Sub-menu 2 Settings Code Set tel line #120 Pulse Set dial mode <Tone> #121 *2, *8 900 ms Set flash time <700 ms> 600 ms 400 ms 300 ms 250 ms 200 ms 160 ms 110 ms 100 ms 90 ms 80 ms...
-
Page 25: Alarm
Programming The preset melodies in this product (“Tone 3” - “Tone 5”, “Melody 1” - “Melody 10”) are used with permission of © 2012 Copyrights Vision Inc. If you subscribe to a Call Display service and want to view the caller’s information after lifting up the handset to answer a call, turn off this feature. -
Page 26: Call Block
Programming MMENUN Changing the start and end time MbN: “Save CID” a MSELECTN MMENUN#237 MbN: “Call block” a MSELECTN Continue from step 3, “Turning night MbN: “Yes” a MSELECTN mode on/off”, page 25. Edit the phone number if necessary (24 digits max.). -
Page 27: Other Programming
Programming MERASEN a MbN: “Yes” a MSELECTN Registering a handset to the a MOFFN base unit Note: The supplied handset and base unit are R When editing, press the desired dial key to pre-registered. If for some reason the handset add, MCLEARN to erase. -
Page 28: Call Display Service
Call Display Service Talking Call Display Using Call Display service Available for: Important: KX-TGD220 series (page 3) R This unit is Call Display compatible. To use Call Display features, you must subscribe This feature lets you know who is calling to a Call Display service. -
Page 29: Caller List
Call Display Service Displayed To turn Call Waiting Deluxe on/off Function option To use Call Waiting Deluxe, you must turn this Conference Answers the waiting call feature on. The default setting is “Off”. and combines it with the MMENUN#215 current call to make a conference call (3-party MbN: Select the desired setting. - Page 30 Call Display Service To call back, press M To exit, press MOFFN. Note: R If the entry has already been viewed or answered, “ ” is displayed. Editing a caller’s phone number You can edit a phone number in the caller list by adding the long distance code “1”...
-
Page 31: Answering System
Answering System Handset Answering system To turn on: MMENUN#327 Available for: To turn off: KX-TGD220 series (page 3) MMENUN#328 MOFFN The answering system can answer and record calls for you when you are unavailable to Note for base unit and handset: answer the phone. -
Page 32: Listening To Messages
Answering System Resetting to a pre-recorded greeting Erasing all messages message Press MERASEN 2 times while the unit is not in use. If you want to use a pre-recorded greeting message once you record your own greeting message, you need to erase your own Using the handset greeting message. -
Page 33: Remote Operation
Answering System Important: Operation R To prevent unauthorized access to this Reset to a pre-recorded product, we recommend that you regularly greeting message change the remote code. If pressed within the first 5 seconds of a MMENUN#306 message, the previous message is Enter the desired 3-digit remote access played. -
Page 34: Answering System Settings
Answering System Operation MOFFN Skip message (during playback) Number of rings before the unit Play new messages answers a call Play all messages Stop playback You can change the number of times the phone rings “Ring count” before the unit Turn answering system off answers calls. - Page 35 Answering System – Change the number of rings of the Voice Mail service so that the answering system can answer the call first. To do so, contact your service provider/ telephone company. Caller’s recording time You can change the maximum message recording time allowed for each caller.
-
Page 36: Useful Information
Useful Information To erase the Voice Mail access Voice Mail service number Voice Mail is an automatic answering service MMENUN#331 offered by your service provider/telephone Press and hold MCLEARN until all digits company. After you subscribe to this service, are erased. a MSAVEN a MOFFN your service provider/telephone company’s Voice Mail system answers calls for you when you are unavailable to answer the phone or... -
Page 37: Wall Mounting
Useful Information Note: Insert the hooks on the wall mounting adaptor into holes on the base R If the handset still indicate there are new unit. messages even after you have listened to all new messages, turn it off by pressing and holding # until the handset beeps. - Page 38 Useful Information Fit the slots of the unit onto the corresponding wall phone plate tabs for ( ) and ( ) respectively. To remove the wall mounting adaptor While pushing down the release levers (A), remove the adaptor (B). Charger Drive the screws ( ) (not supplied) into the wall.
-
Page 39: Error Messages
Useful Information Error messages Display message Cause/solution Access # to VM service is R You have not stored the Voice Mail access number. not stored Store the number (page 36). Base no power R The handset has lost communication with the base unit. -
Page 40: Troubleshooting
Useful Information Troubleshooting If you still have difficulties after following the instructions in this section, disconnect the base unit’s AC adaptor, then reconnect the base unit’s AC adaptor. Remove the batteries from the handset, and then insert the batteries into the handset again. General use Problem Cause/solution... - Page 41 Useful Information Problem Cause/solution I fully charged the batteries, but R Clean the battery ends ( ) and the charge contacts – still flashes, with a dry cloth and charge again. – is displayed, or R It is time to replace the batteries (page 10). –...
- Page 42 Useful Information Call Display/Talking Call Display Problem Cause/solution Caller information is not R You must subscribe to Call Display service. Contact your displayed. service provider/telephone company for details. R If your unit is connected to any additional telephone equipment such as a Call Display box or cordless telephone line jack, plug the unit directly into the wall jack.
- Page 43 Useful Information Answering system Problem Cause/solution The unit does not record new R The answering system is turned off. Turn it on (page 31). messages. R The message memory is full. Erase unnecessary messages (page 32). R The recording time is set to “Greeting only”. Change the setting (page 35).
- Page 44 Useful Information Liquid damage Problem Cause/solution Liquid or other form of moisture R Disconnect the AC adaptor and telephone line cord from has entered the handset/base the base unit. Remove the batteries from the handset and unit. leave to dry for at least 3 days. After the handset/base unit are completely dry, reconnect the AC adaptor and telephone line cord.
-
Page 45: Industry Canada Notices And Other Information
Useful Information Industry Canada Notices and other information NOTICE: near, or on top of, a TV or VCR. If interference is experienced, move the This equipment meets the applicable cordless telephone further away from the TV Industry Canada Terminal Equipment or VCR. -
Page 46: Warranty
The warranty ALSO DOES NOT COVER damages which occurred in shipment, or failures which are caused by products not supplied by Panasonic Canada Inc., or failures which result from accidents, misuse, abuse, neglect, mishandling, misapplication, alteration, faulty... -
Page 47: Index
Index Hold: 16 Intercom: 17 Index Key tone: 23 3-way conference: 16 Line mode: 24 Additional handset: 27 Making calls: 15 Alarm: 25 Missed calls: 28 Answering calls: 15 Mute: 16 Answering system Night mode: 25 Call screening: 34 Pause: 15 Erasing messages: 32, 33, 34 Phonebook: 18 Greeting message: 31... - Page 48 Date of purchase (found on the bottom of the base unit) Name and address of dealer Attach your purchase receipt here. 5770 Ambler Drive, Mississauga, Ontario L4W 2T3 © Panasonic System Networks Co., Ltd. 2013 Printed in China *PNQX6492ZA* *PNQX6492ZA* PNQX6492ZA...
Need help?
Do you have a question about the KX-TGD223C and is the answer not in the manual?
Questions and answers