Table of Contents
Advertisement
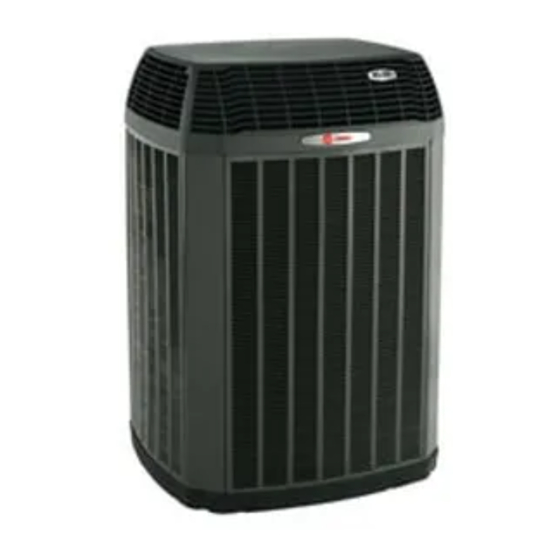
Service Facts
ComfortLink
™
Heat Pump
4TWZ0060A1000A
IMPORTANT — This document contains a wiring diagram, a parts list, and service information. This is customer prop-
erty and is to remain with this unit. Please return to service information pack upon completion of work.
WARNING:
PROduCT SPeCIFICATIONS
OuTdOOR uNIT 12
POWeR CONNS. — V/PH/HZ 3
MIN. BRCH. CIR. AMPACITY
BR. CIR.
}
MAX. (AMPS)
PROT. RTG.
MIN. (AMPS)
COMPReSSOR
NO. USED - NO. SPEEDS
VOLTS/PH/HZ
R.L. AMPS 7 - L.R. AMPS
FACTORY INSTALLED
START COMPONENTS 8
INSULATION/SOUND BLANKET
COMPRESSOR HEAT
OuTdOOR FAN
DIA. (IN.) - NO. USED
TYPE DRIVE - NO. SPEEDS
CFM @ 0.0 IN. W.G. 4 (HIGH/LOW)
NO. MOTORS - HP
MOTOR R.P.M. (HIGH/LOW)
VOLTS/PH/HZ
F.L. AMPS
OuTdOOR COIL — TYPE
ROWS - F.P.I.
FACE AREA (SQ. FT.)
TUBE SIZE (IN.)
REFRIGERANT CONTROL
ReFRIGeRANT
LBS. — R-410A (O.D. UNIT) 5
FACTORY SUPPLIED
LINE SIZE - IN. O.D. GAS 6
LINE SIZE - IN. O.D. LIQ. 6
CHARGING SPeCIFICATION
SUBCOOLING
dIMeNSIONS
CRATED (IN.)
WeIGHT
SHIPPING (LBS.)
NET (LBS.)
WARNING
!
THIS INFORMATION IS INTENDED FOR USE BY INDIVIDUALS POS SES-
S ING ADEQUATE BACKGROUNDS OF ELECTRICAL AND MECHANICAL
EXPERIENCE. ANY ATTEMPT TO REPAIR A CENTRAL AIR CONDITION-
ING PRODUCT MAY RESULT IN PERSONAL INJURY AND OR PROPERTY
DAMAGE. THE MANUFACTURER OR SELLER CANNOT BE RESPON-
SIBLE FOR THE INTERPRETATION OF THIS INFORMATION, NOR CAN IT
ASSUME ANY LIABILITY IN CONNECTION WITH ITS USE.
NOTICe: The manufacturer has a policy of continuous product and product data improvement
and reserves the right to change design and specifications without notice.
© 2009 Trane
II System
HAZARdOuS VOLTAGe - dISCONNeCT POWeR and dISCHARGe
4TWZ0060A1000A
200/230/1/60
31
50
50
CLIMATUFF
®
2 - 1
200/230/1/60
23.4 - 128.7
YES
YES
YES
PROPELLER
26.6 - 1
DIRECT - 2
4630/3330
1 - 1/3
971/652
200/230/1/60
2.80
SPINE FIN™
2 - 24
29.15
3/8
EEV
R-410A
15 LBS.- 13 OZ.
YES
3/4
3/8
See Charging Chart (page 3)
H X W X D
57.4 X 35.1 X 38.7
480
430
4TWZ0060-SF-1B
CAuTION
!
uNIT CONTAINS R-410A ReFRIGeRANT!
R-410A OPERATING PRESSURE EXCEEDS THE
LIMIT OF R-22. PROPER SERVICE EQUIPMENT IS
REQUIRED. FAILURE TO USE PROPER SERVICE
TOOLS MAY RESULT IN EQUIPMENT DAMAGE OR
PERSONAL INJURY.
SeRVICe
USE ONLY R-410A REFRIGERANT AND
APPROVED POE/AB COMPRESSOR OIL.
CAPACITORS BeFORe SeRVICING
TuBING INFORMATION
Tubing Sizes
Suction
Liquid
3/4"
3/8"
3/4"
3/8"
3/4"
3/8"
3/4"
3/8"
3/4"
3/8"
3/4"
3/8"
3/4"
3/8"
Tubing lengths in excess of eighty (80) feet see application software.
1 Certified in accordance with the Air-Source Unitary Air-conditioner Equipment certi-
fication program, which is based on ARI standard 210/240. In order to achieve ARI
standard rating, the indoor fan time delay on the comfort control must be enabled.
2 Rated in accordance with ARI standard 270.
3 Calculated in accordance with Natl. Elec. Codes. Use only HACR circuit breakers or
fuses.
4 Standard Air — Dry Coil — Outdoor
5 This value approximate. For more precise value see unit nameplate.
6 Max. linear length 80 ft.; Max. lift - Suction 25 ft.; Max lift - Liquid 25 ft.
For greater length consult refrigerant piping software Pub. No. 32-3312-0*
(* denotes latest revision).
7 This value shown for compressor RLA on the unit nameplate and on this specification
sheet is used to compute minimum branch circuit ampacity and max. fuse size. The
value shown is the branch circuit selection current.
8 NO means no start components. YES means quick start kit components. PTC means
positive temperature coefficient starter.
CAuTION
!
CONTAINS ReFRIGeRANT!
SySTeM CONTAINS OIL ANd ReFRIGeRANT uNdeR
HIGH PReSSuRe. ReCOVeR ReFRIGeRANT TO ReLIeVe
PReSSuRe BeFORe OPeNING SySTeM.
Failure to follow proper procedures can result in personal
illness or injury or severe equipment damage.
CAuTION
!
RECONNECT ALL GROUNDING DEVICES.
ALL PARTS OF THIS PRODUCT CAPABLE OF CONDUCTING
ELECTRICAL CURRENT ARE GROUNDED. IF GROUNDING WIRES,
SCREWS, STRAPS, CLIPS, NUTS OR WASHERS USED TO COMPLETE
A PATH TO GROUND ARE REMOVED FOR SERVICE, THEY MUST
BE RETURNED TO THEIR ORIGINAL POSITION AND PROPERLY
FASTENED.
Tubing
Additional
Length
Refrigerant
20'
3 oz.
30'
9 oz.
40'
15 oz.
50'
21 oz.
60'
27 oz.
70'
32 oz.
80'
38 oz.
02/09
Advertisement
Table of Contents

Subscribe to Our Youtube Channel
Related Manuals for Trane ComfortLink 4TWZ0060A1000A


Summary of Contents for Trane ComfortLink 4TWZ0060A1000A
- Page 1 BE RETURNED TO THEIR ORIGINAL POSITION AND PROPERLY ASSUME ANY LIABILITY IN CONNECTION WITH ITS USE. FASTENED. NOTICe: The manufacturer has a policy of continuous product and product data improvement and reserves the right to change design and specifications without notice. © 2009 Trane 02/09...
-
Page 2: Schematic Diagram
4TWZ0060A1000A SCHeMATIC dIAGRAM CHARGING MeTHOd MANuAL CHARGING BeLOW 55°F Od AMBIeNT – IN Heating MOde (HP MOdeLS ONLy) This model has ComfortLink™ II and Charge Assist™ features. Charge Assist™ can be used in cooling mode 1. The only recommended method of charging at outdoor only. -
Page 3: Wiring Diagram
dWG. NO. 4TWZ0060-SF-1B WIRING dIAGRAM 5 TON HP R410A REFRIGERANT CHARGING CHART MANuAL CHARGING OR CHARGe ASSIST MeTHOd IN LIQUID GAGE PRESSURE (PSIG) COOLing BeTWeeN 55°F ANd 120°F Od AMBIeNT ONLY DIPSWITCH ONLY DIPSWITCH ONLY DIPSWITCH 1 ON 2 ON 3 ON It is recommended to install manufacturer approved matched indoor and outdoor systems. - Page 4 Charge Assist™ (CA) Procedure with a Communicating Comfort Control WARNING CAuTION Live electrical Components! CONTAINS ReFRIGeRANT! during installation, testing, servicing and troubleshooting of SySTeM CONTAINS OIL ANd ReFRIGeRANT uNdeR this product, it may be necessary to work with live electrical HIGH PReSSuRe.
- Page 5 CHARGING Routine Charge Assist™ will follow one of the following routines. Charge Assist™ Solenoid Kit STeP 4: BAyCAKT001 STABILIZING CHARGED CHARGED Routine (See Step 4) Routine Flashing (See Step 5) RECOVER Routine (See Step 6) use for Auto Charging (See Installer’s Guide 18-HH15d1-*) CHARGed Routine IF the CA control determines the system is correctly ReCOVeR Routine...
- Page 6 Charge Assist™ (CA) Procedure for a NON-Communicating 24VAC Control System STeP 1: STeP 3: Outdoor units coupled with 24 volt indoor units (outdoor Press the mode button on the CA board and follow the CA procedures starting with STeP 1 in the Communicating units require BAYACHP024* for 24V operation) require the technician to set up the Variable Speed (VS) Air Handler Comfort Control Section above.
- Page 7 SuMMARy OF ALeRT COde & CHARGe ASSIST LedS (CONTINued) The Comfort Control Wait icon A working Ambient Temperature Sensor NOTES: is needed for the following: will be ON for the following: LPCO Monitor Minimum equipment off time (5 min.) Charge Assist (Use Ambient Sensor only) Do not revert to During Low or High Pressure monitor External ODT Sensor if present and Ambient Sensor has failed.
- Page 8 PRESSURE CURVES FOR 4TWZ0060A1000A Cooling with Thermal Expansion Valve Heating with Thermal Expansion Valve INDOOR ENTERING WET BULB CURVES TOP TO BOTTOM INDOOR ENTERING DRY BULB CURVES TOP TO BOTTOM 71, 67, 63 AND 59 DEG F. 80, 70, AND 60 DEG F. 2ND STAGE 1ST STAGE 2ND STAGE...
-
Page 9: Refrigeration Circuits
ReFRIGeRATION CIRCuITS Heating Refrigeration Cycle Cooling Refrigeration Cycle Printed from D155711P01 Rev02... -
Page 10: Control Board Test Points
CONTROL BOARd TeST POINTS Test DC voltages at the locations shown below. Corresponding tables show proper values or ranges. See Table 3 See Table 4 See Table 5 DCV Test Point (+VP) See Table 1 See Table 2 24VAC to SHR-1 for sump heat Test Point Low Pressure Cut Out... - Page 11 TABLE 3 Ambient and Coil Sensors - J6, J7 Volts DC at plug THERMISTOR Temp Temp J6 & J7 Only RESISTANCE °F °C (OHMS) (pin to pin) -17.8 83247 3.29 -15.0 71108 3.11 -12.2 60916 2.93 Ambient Sensor Coil Sensor -9.4 52333 2.74...
-
Page 12: Status Led (Green)
eLeCTRONIC exPANSION VALVe (eeV) CONTROL BOARd Status LeD (green) On - Control has power OPEN STATUS LED Flashing Fast - Control is driving valve (5 seconds max drive time) (Green) CLOSE Flashing Pattern - See Table 6. Fault LED (Red) TABLE 6 Control Input and Status LED - J6 EEV control... - Page 13 TROuBLeSHOOTING THe eeV The Electronic Expansion Valve (EEV) installed in this heat pump is designed to control superheat entering the compressor when the system is running in mechanical heating mode. During cooling mode, refrigerant flow bypasses the EEV via a check valve and is controlled by the expansion device in the indoor unit.
-
Page 14: Exit Test Mode
eeV CONTROL BOARd TeST POINTS To Coil on Test Pins OPEN CLOSE TEST OPEN STATUS LED CLOSE (Green) Fault LED (Red) See Table 8 Suction Line Pressure Transducer Input See Table 7 Suction Line DC V TEST See Table 6 Temperature Control Input Sensor Input... - Page 15 TABLE 7 TABLE 8 Suction Line Temperature Sensor - J10 Suction Line Pressure Transducer - J7 THERMISTOR Volts DC at Plug J10 Voltage to pressure reference Chart Temp °F Temp °C RESISTANCE (pin to pin) (OHMS) Pressure Volts DC at plug J7 -17.8 83247 3.87...
- Page 16 notice.
Need help?
Do you have a question about the ComfortLink 4TWZ0060A1000A and is the answer not in the manual?
Questions and answers