Table of Contents
Advertisement
Quick Links
RESCUE
Select Pro
®
™
Motor Installation
and Configuration Guide
For technical assistance or questions
related to your RESCUE
Select Pro™ Motor
®
call the Technical Hotline:
1-888-540-5540
Read the entire manual prior to installation and operation
of the RESCUE
Select Pro™ Motor.
®
Follow all instructions contained herein.
Advertisement
Table of Contents

Related Manuals for Nidec RESCUE Select Pro


Summary of Contents for Nidec RESCUE Select Pro
- Page 1 RESCUE Select Pro ® ™ Motor Installation and Configuration Guide For technical assistance or questions related to your RESCUE Select Pro™ Motor ® call the Technical Hotline: 1-888-540-5540 Read the entire manual prior to installation and operation of the RESCUE Select Pro™...
-
Page 2: Table Of Contents
Table of Contents Important Safety Information ........................1 Product Overview ...........................3 Key Features and Benefits ......................3 Specifications ..........................3 Motor Dimensions ........................3 General Information ........................4 Materials Enclosed ......................4 Initial Inspection ........................4 Installing the Motor ........................5 STEP 1: Turn OFF Electrical Power .................5 STEP 2: Remove the Blower Housing from the HVAC Equipment ........5 STEP 3: Locate and Verify the Connector ................6 STEP 4: Remove the Original ECM Motor ...............6 STEP 5: Install the Replacement Motor ................7... -
Page 3: Important Safety Information
Important Safety Information Read all instructions thoroughly and be familiar with the equipment before installing or working on it. ® Only trained and qualified professionals familiar with RESCUE Select Pro motors should service the motor and control unit. Before connecting or disconnecting cables or other electrical connections, verify that the electrical power to the system is removed. - Page 4 Always disconnect electrical power at the fuse box or circuit breaker panel before handling electrical connections or performing maintenance on this unit. Allow the motor to come to a complete stop and wait four (4) minutes. This allows the capacitors to discharge any residual voltage for safety. Double-check to make sure that electrical power is removed and that it cannot be turned on while you are working on the equipment.
-
Page 5: Product Overview
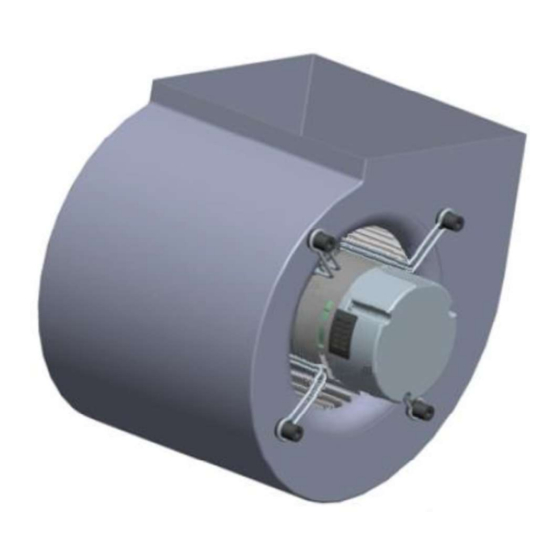
Product Overview The RESCUE ® Select Pro is a high efficiency variable speed, pre-programmed replacement motor for HVAC applications. This motor enables the homeowner to enjoy many of the benefits of variable speed motors. Key Features and Benefits Ready to install Auto rotation sensing technology Dual voltage Multi-speed operations with five programmable 24 volt taps... -
Page 6: General Information
General Information Materials Enclosed ® RESCUE Select Pro Motor ® RESCUE Select Pro Motor and Programming App Installation and Configuration Guide RESCUE ® Select Pro Wiring Harness Voltage Change Connector (115V) Motor Labels for recording a customized Motor ID Initial Inspection ®... -
Page 7: Installing The Motor
Installing the Motor Always disconnect electrical power at the fuse box or circuit breaker panel before handling electrical connections or performing maintenance on this unit. Allow the motor to come to a complete stop and wait four (4) minutes. This allows the capacitors to discharge any residual voltage for safety. Double-check to make sure that electrical power is removed and that it cannot be turned on while you are working on the equipment. -
Page 8: Step 3: Locate And Verify The Connector
STEP 3: Locate and Verify the Connector ® 1. Connect the furnace wiring harness to the RESCUE Select Pro replacement motor to ensure proper fit. 2. Disconnect the furnace wiring harness from the new motor and set it aside. STEP 4: Remove the Original ECM Motor 1. -
Page 9: Step 5: Install The Replacement Motor
STEP 5: Install the Replacement Motor ® 1. Make sure that the nameplate voltage on the RESCUE Select Pro matches the OEM motor. The RESCUE ® Select Pro ships connected for 208-230 Vac systems. No action is needed in the case of a 208-230 Vac requirement. -
Page 10: Step 6: Install The Replacement Motor In The Air Handling Unit
4. Secure the bracket to the motor by tightening the bracket mounting screw. The motor must be securely fastened to minimize noise and prevent vibration. Ensure the belly-band legs cannot be moved. For secure mounting, use high-quality bolts of the largest possible diameter. STEP 6: Install the Replacement Motor in the Air Handling Unit 1. -
Page 11: Step 8: The Motor Is Ready For Operation
STEP 8: The Motor Is Ready for Operation! The RESCUE ® is pre-programmed with default settings. The motor is ready to perform. (Optional) You can customize the motor, if you want to. Interested in Advance Configuration and Programming? Download the App! Refer to the download and programing instructions beginning on page 11. Advance features allow you to: Access direct OEM Profiles. -
Page 12: Operating Mode Checklist
Operating Mode Checklist For air moving applications, all enclosure covers and panels must be in place before measuring the amperage. Voltage and moving parts around motors and motor driven equipment can cause serious or fatal injuries. Turn OFF electrical power before connecting or servicing the motor. After installation, motor operation should be tested in all system modes for the following: Check # System Test... -
Page 13: Maintenance
Maintenance Before performing any maintenance on the motor, disconnect electrical power and allow the motor to come to a complete stop. For safety, wait four (4) minutes. This allows sufficient time for the capacitors to discharge any residual voltage. Periodically inspect the installation. Check for dirt accumulation, unusual noises or vibration, overheating, worn or loose couplings, high motor amps, poor wiring or overheated connections, loose mounting bolts or guards, and worn motor starter contacts. -
Page 14: Troubleshooting
Troubleshooting Symptom Possible Cause Corrective Action Username and password are case- Incorrect Username and/or sensitive. Double-check and retry. If Password the problem continues, call the Motor Cannot log into App. Hotline. No data connection, Wi-Fi or Establish a Wi-Fi or cellular cellular connection and retry. -
Page 15: Fcc Certification / Digital Modulation
FCC Certification / Digital Modulation The BM78 module has received Federal Communications Commission (FCC) CFR47 Telecommunications, Part 15 Subpart C "Intentional Radiators" modular approval in accordance with Part 15.212 Modular Transmitter approval. In addition, The BM78 module has been certified for use in Canada under Industry Canada (IC) Radio Standards Specification (RSS) RSS-247 and RSS-Gen. -
Page 16: Warranty Information
Warranty Information LIMITED WARRANTY Nidec Motor Corporation (NMC) extends the following LIMITED WARRANTY to the purchaser and to its customers (collectively referred to as the Purchaser ) of the enclosed motor and components: the motor and components are free from defects in materials and workmanship under normal use, service and... - Page 17 For more information © 2019 Nidec Motor Corporation. All rights reserved. U.S. Visit us at www.nidec-motor.com ® ®, ® Motors , SelecTech and RESCUE Select Pro are registered trademarks of Nidec Motor Corporation. Nidec Motor Corporation 8050 W. Florissant Avenue PO Box 36912 St.
Need help?
Do you have a question about the RESCUE Select Pro and is the answer not in the manual?
Questions and answers