
Related Manuals for Nitroset NTS805 Series


Summary of Contents for Nitroset NTS805 Series
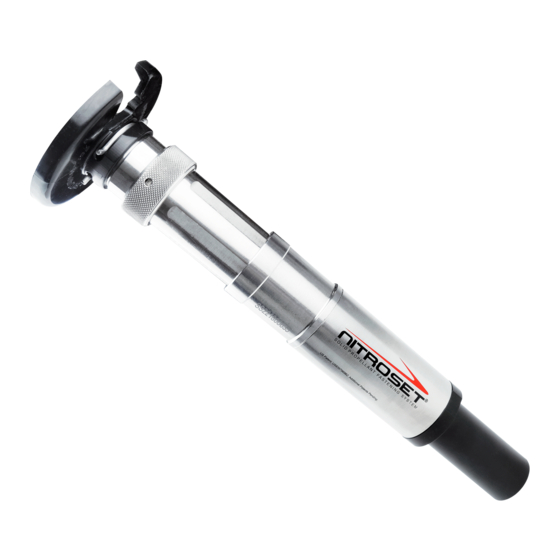
- Page 1 NTS805 Series Operation & Safety Manual US Patent: US8397969B2 Additional Patents Pending VER 22.06...
-
Page 2: Table Of Contents
Inappropriate Base Materials Check Before Fastening Adapter Usage Guide Adapter Usage Table Operating Instructions Loading and Actuating Instructions 9, 10 Using NITROSET® Tool with a NITROSET® Pole DOs and DON’Ts DO NOTs Troubleshooting Guide 13, 14 Replacing the Firing Pin Tool Disassembly... - Page 3 WARNING DO NOT OPERATE THE NITROSET TOOL UNLESS YOU HAVE COMPLETELY READ AND UNDERSTOOD THE OPERATION AND SAFETY MANUAL Training is required for use of this tool.* *Please contact your local distributor or visit www.nitroset.com for more information.
-
Page 4: Basic Instructions
Use only genuine NITROSET® Fasteners with the NITROSET® system. Use of incorrect fasteners may lead to injury or damage to the tool. *According to ANSI A10.3 and DOT (ref: EX2009040168) NITROSET® tools are not classified as a powder actuated tool, thus no licensing is required. -
Page 5: General Safety Precautions
Fasteners that do not completely insert into the muzzle should not be used and should be disposed of appropriately. The NITROSET® tool should be reset after every actuation to clear any debris from the nosepiece (muzzle+debris cup) of the tool. -
Page 6: Worksite Preparation
Worksite Preparation Acceptable Base Materials The NITROSET® tool is for fastening into the following base materials only: Concrete Structural Steel Never attempt to fasten into any material other than those listed above. Inappropriate Base Materials The NITROSET® tool is NOT for fastening into the following base materials:... -
Page 7: Adapter Usage Guide
Adapter Usage Guide Nosepiece Muzzle Debris Cup Debris Cup Adapter Gasket Gasket Note: As illustrated above, Nosepiece Gasket is inserted in the groove of the Muzzle. Debris Cup Gasket goes between the Muzzle and Debris cup. The Red Adapter is installed between the Muzzle and Reset Sleeve. NTS805 vs NTS805-S 805-S Reset Sleeve of NTS805 Tool... -
Page 8: Adapter Usage Table
Adapter Usage Guide Adapter Usage Table (With NTS805-10 Reset Sleeve) NTS805 Tool is assembled with the NTS805-10 Reset Sleeve. The new threadless Muzzle can use various pin and clip assemblies with the proper Red Adapter. Fastener Type Pin & Clip Assembly Adapter Requirement CLAS525... - Page 9 Adapter Usage Guide Adapter Usage Table (With NTS805-10-S Reset Sleeve) 805-S NTS805-S Tool is assembled with the NTS805-10-S Reset Sleeve. The new threadless Muzzle can use various pin and clip assemblies with the proper Red Adapter. Fastener Type Pin & Clip Assembly Adapter Requirement PIK313...
-
Page 10: Operating Instructions
In case of jammed fasteners – Refer to the Troubleshooting Guide (Page 11) for proper removal of all jammed fasteners. Place the NITROSET® tool perpendicular against the fastening surface. Cracked concrete may actuate loudly when using the tool. Fasteners should not be driven close to the edge of the base substrate. -
Page 11: Using Nitroset® Tool With A Nitroset® Pole
Using NITROSET® Tool with a NITROSET® Pole The use of NITROSET® pole is recommended for maximum e ciency on ceiling fastening applications. The end of the wire assembly should be placed inside the pole for better control. -
Page 12: Dos And Don'ts
DO remove defective tools, parts and/or accessories from service immediately. DO only use the correct tools to disassemble the NITROSET® Tool. Use of pipe wrenches or vise grips can damage the tool. -
Page 13: Do Nots
DOs and DON’Ts DO NOTs DO NOT use NITROSET® tools to fasten into brittle materials such as brick, tile, rock or glazed material. DO NOT attempt to drive fasteners into soft materials such as wood or drywall or light gauge metal. -
Page 14: Troubleshooting Guide
The tool is not designed to fasten at other angles. F) Check if the firing pin is piercing the NITROSET pill. If it's piercing the pill and not firing, then check for damage to the firing pin. Replace firing pin if damaged. - Page 15 Troubleshooting Guide III. The tool fires loudly. A) Check if you are fastening to the appropriate substrate material. B) Check if the correct adapter is being used. C) Before firing, ensure the nosepiece is perpendicular to the material surface. The tool is not designed to fasten properly at other angles. D) Check and clean the debris cup.
-
Page 16: Replacing The Firing Pin
Replacing the Firing Pin REMEMBER When removing the firing pin, depress the trigger ball release, and guide the pin out. Keep the trigger ball release depressed until the pin exits the guide, otherwise the spring will propel the trigger ball away. Use the provided roll pin punch to knock out the 1/8"... -
Page 17: Tool Disassembly
Tool Disassembly Remove Spall Guard. Remove Debris Cup from the Reset Sleeve. Use the included wrenches for assistance as necessary. Remove Muzzle and the Adapter from the Reset Sleeve. Slide the Adapter off the Muzzle as necessary. Remove the End Cap from the tool. Slide the Firing Spring off the tool. -
Page 18: Tool Assembly
Tool Assembly Assemble Firing Pin into Firing Pin Holder using the 1/8" Roll Pin. Insert Trigger Ball Spring into Trigger Ball Release and place into the Firing Pin Holder. Slide complete Firing Assembly into the Guide while depressing the Trigger Ball Release until it clicks into the Guide. -
Page 19: Cleaning Procedure
Cleaning Procedure NITROSET® Tool Full Cleaning Procedure It is recommended that the NITROSET® tool be cleaned every day after use. Proper maintenance and cleaning of the tool enables the tool to operate at peak performance. First, be sure all fastener assemblies and debris are ejected from the tool by resetting it pointed away from yourself or any bystanders. -
Page 20: Parts List
Parts List NTS805 1 NTS805 2 NTS805 3 TOPF MF14 NTS805 10 S These parts are included in the NTS805X-S-TP tool kit. Some tools may have this part permanently fixed in the Trigger Body. W W W . N I T R O S E T . C O M... -
Page 21: Parts Diagram
Parts Diagram NTS805 2 NTS805 3 NTS101 30 NTS805 1 NTS101 9S OTCS NTS101 29 TRIGGER BODY NTS101 17 14 NTS101 4 NTS101 16 NTS101 8 NTS101 7 NTS101 5 NTS5X 12 NTS805 10 S NTS101 6 NTS8X 15 NTS8X 14 NTS5X 11 * Parts in this diagram are to scale W W W . - Page 22 All warranty returns for repair must include a Return Merchandise Authorization (RMA) number obtained from a Nitroset representative. The claim product must be sent at the customer’s expense to Nitroset, LLC. for evaluation. Unauthorized returns without an RMA number will not...