
Related Manuals for Cypress S6SAE101A00SA1002


Summary of Contents for Cypress S6SAE101A00SA1002
- Page 1 S6SAE101A00SA1002 Solar-Powered Internet of Things (IoT) Device Kit Operation Manual Publication Number S6SAE101A00SA1002_SS901-00041 Revision 1.0 Issue Date August 24, 2015...
- Page 2 O P E R A T I O N M A N U A L Preface This manual explains how to use the evaluation board. Be sure to read this manual before using the product. For this product, please consult with sales representatives or support representatives. Handling and Use Handling and use of this product and notes regarding its safe use are described in the manuals.
- Page 3 O P E R A T I O N M A N U A L Caution of the Products Described in This Document The following precautions apply to the product described in this manual. Indicates a potentially hazardous situation which could result in death or serious injury and/or a WARNING fault in the user’s system if the product is not used correctly.
-
Page 4: Table Of Contents
O P E R A T I O N M A N U A L Table of Contents Description ............................. 6 Features ............................7 Applications ............................ 7 Kit Introduction..........................8 Contents ........................... 8 Software Installation ........................8 Install Software ........................8 Uninstall Software ...................... - Page 5 O P E R A T I O N M A N U A L 10.2.5 Circuit ....................... 74 10.2.6 BOM List ......................78 11. Appendix ............................80 11.1 Other Sample Project ......................80 11.1.1 LED ONOFF Project ..................80 11.1.2 Simple BLE Project ..................
-
Page 6: Description
IoT device. Also included in the kit is Cypress' EZ-BLE™ PRoC™ Module (CYBLE-022001-00), a fully integrated Bluetooth Low Energy (BLE) module solution that offers high flexibility for a wide variety of IoT device uses. A USB port is provided by Cypress' USB-UART LP Bridge Controller device (CY7C65213). -
Page 7: Features
DIP switch for future expansion (Not mounted) − LEDs for USB power and status Includes reference schematic, BOM list, and layout data for easy design Uses the following Cypress Devices: − S6AE101A ultra low power Energy Harvesting PMIC − CYBLE-022001-00 EZ-BLE PRoC Module −... -
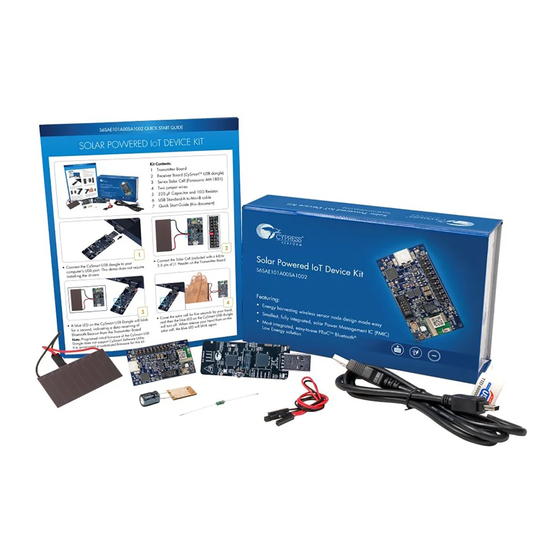
Page 8: Kit Introduction
Components" for detailed information. 5. Software Installation Install Software Follow these steps to install the S6SAE101A00SA1002 Solar-Powered IoT Device Kit software: Download and install the Solar-Powered IoT Device Kit software from www.cypress.com/energy-harvesting. The Solar-Powered IoT Device Kit software is available in two different formats for download: a. - Page 9 O P E R A T I O N M A N U A L Run Install Solar-Powered IoT Device Kit to start the installation, as shown below. Select the folder to install the Solar-Powered IoT Device Kit -related files. Choose the directory and click Next.
- Page 10 O P E R A T I O N M A N U A L Read the Cypress License Agreement and make a selection based on the terms of the license agreement. Click Next to continue the installation. When the installation begins, a list of packages appears on the installation page. A green check mark appears next to each package after successful installation.
-
Page 11: Uninstall Software
You can uninstall the Solar-Powered IoT Device Kit software using one of the following methods: Example. Windows 7 ■ Go to Start > All Programs > Cypress > Cypress Update Manager; click the Uninstall button. ■ Go to Start > Control Panel > Programs and Features. Select the Solar-Powered IoT Device Kit program from the list and click the Uninstall/Change button. -
Page 12: Getting Started
O P E R A T I O N M A N U A L 6. Getting Started You will become familiar with the different components of the Solar-Powered IoT Device Kit by successfully establishing a BLE Beacon connection between the Energy Harvesting Motherboard operating as a WSN, and a PC with the BLE-USB Bridge. - Page 13 O P E R A T I O N M A N U A L Confirm that the device driver installation has successfully completed (all components will be "Ready to use"). If the installation fails, do installation manually using a file in the "USB drivers" folder. Refer “6.1.2 USB Driver Installation failed”...
-
Page 14: Usb Driver Installation Failed
O P E R A T I O N M A N U A L 6.1.2 USB Driver Installation failed If the device driver installation fails, confirm that an unconfigured KitProg USB-UART appears in the device manager: a. Open the Device Manager: Windows 7 Start Menu >... - Page 15 O P E R A T I O N M A N U A L Search for USB driver in the Lab files. a. Check the “Include subfolders” box b. Push the “Browse my computer for driver software” button c. Select the “USB drivers” folder in the kit files <Install directory>/Solar-Powered IoT Device Kit/1.0/USB drivers d.
-
Page 16: Usb Driver Installation For The Motherboard
O P E R A T I O N M A N U A L After successful device driver installation, confirm that a new COM port called KitProg USB-UART was added: a. Open the Device Manager. b. Under Ports (COM & LPT), confirm that a COM port called KitProg USB-UART was added. Note the COM number (COMxx). - Page 17 O P E R A T I O N M A N U A L Push the “I Agree” button. Push the “Install” button. Use the “Browse…” button if you want to change the Destination Folder. Push the “Finish” button when the driver installation for the Motherboard finishes. August 24, 2015, S6SAE101A00SA1002_SS901-00041-1v0-E CONFIDENTIAL...
- Page 18 O P E R A T I O N M A N U A L Configure the Motherboard to receive power from the USB port. Change jumper J4 to "USB" from "EH". Connect the Motherboard to your computer using a USB cable. USB Cable The driver Installation starts automatically and the following message window will appear.
-
Page 19: Establishing Ble Connection
O P E R A T I O N M A N U A L 11. Finally, disconnect the USB cable, then reset the jumper J4 set in step 6 back to "EH" from "USB" to supply power from the Solar Module. 6.1.4 Establishing BLE Connection Connect the Solar Module (AM-1801, included in the kit) to the Energy Harvesting Motherboard. - Page 20 O P E R A T I O N M A N U A L Plug in the BLE-USB Bridge into your computer's USB port. Run PMIC.exe, which is in the Windows application used to view data received from the Motherboard.
-
Page 21: Vibration Energies Connection (Optional)
O P E R A T I O N M A N U A L 6.1.5 Vibration Energies Connection (Optional) The Energy Harvesting Motherboard supports receiving AC voltage from piezoelectric or electro-magnetic Energy Harvesting Devices (EHDs) that harvest vibration energy. To confirm this operation, a piezoelectric or electro-magnetic EHD is required (not supplied with Kit). -
Page 22: Solar-Powered Wireless Sensor Node (Wsn) With Ble Beacon
O P E R A T I O N M A N U A L Solar-Powered Wireless Sensor Node (WSN) with BLE Beacon You will configure the Motherboard as a WSN by turning on the temperature and humidity sensor. You will do this using a serial USB connection from your PC to send configuration commands to the Motherboard. - Page 23 O P E R A T I O N M A N U A L Configure Terminal setting (Setup > Terminal) as shown below, click OK. Receive: AUTO Transmit: CR+LF Local echo: Check Other settings: Default Configure Serial Port setting (Setup > Serial Port) as shown below, click OK. Baund rate: 115200 Other settings: Default August 24, 2015, S6SAE101A00SA1002_SS901-00041-1v0-E...
- Page 24 O P E R A T I O N M A N U A L Enable the sensor on the Motherboard by putting the Motherboard into command mode and sending it a command from the PC: a. Push and release the XRES button on the Motherboard. Note that when the Motherboard is in this mode, it stops transmitting BLE WSN data.
- Page 25 O P E R A T I O N M A N U A L e. To finish the command waiting mode, type “exit⏎”, then the board will acknowledge the command by responding with “exit”. The board will retransmit the Bluetooth Beacon data. 10.
-
Page 26: Confirm That Your Wsn Is Operating
O P E R A T I O N M A N U A L 6.2.2 Confirm that your WSN is Operating Connect the BLE-USB Bridge to your computer's USB port. Run PMIC.exe (<Install directory>/Solar-Powered IoT Device Kit/1.0/PMIC Software). A dialog box will appear. Select KitProg USB-UART (COMxx) in the drop down menu under Port #1, where COMxx corresponds to the port that was confirmed earlier. -
Page 27: Serial Command List
1500 ms (Note: time interval is fixed at six seconds when the ITRVL Read/Write of Advertise Interval for Beacon SENSOR command is on) 0x0131 (Cypress Semiconductor Corporation) COID Read/Write of Bluetooth Company Overwrite sensor information in MINOR SENSOR packet region and send it... - Page 28 O P E R A T I O N M A N U A L [2] Read/Write of MAJOR [2-1] Read Read MAJOR. Default: 0x0001 <Example> MAJOR⏎ (echo) MAJOR (output) -> MAJOR: 0001 [2-2] Write Write MAJOR. <Example> MAJOR 1A2F⏎ <- Input HEX data (echo) MAJOR 1A2F (output) ->...
- Page 29 ITRVL 10240⏎ (echo) ITRVL 10240 (output) -> New Advertise Interval in msec: 10240 [7] Read/Write of Bluetooth Company [7-1] Read Read Bluetooth Company. Default: 0x0131 (Cypress Semiconductor Corporation) <Example> COID⏎ (echo) COID (output) -> Company ID: 0059 [7-2] Write Write Bluetooth Company.
- Page 30 <Example> EXIT⏎ (echo) EXIT (output) --- [11] VER Display Firmware Version. <Example> VER⏎ (echo) VER (output) -> S6SAE101A00SA1002 Sample Firmware, Version 1.0 [*] Input another command (Error Handling) TEST (echo) TEST (output) Command format error!! S6SAE101A00SA1002_SS901-00041-1v0-E, August 24, 2015 CONFIDENTIAL...
-
Page 31: Program And Debug
O P E R A T I O N M A N U A L 7. Program and Debug The Solar-Powered IoT Device Kit can be programmed using UART Bootloader, and it can be programmed and debugged using PSoC Creater with MiniProg3. Before debugging the device, ensure that PSoC Creator is installed on the computer. - Page 32 O P E R A T I O N M A N U A L Run UARTBootloaderHost.exe. It is located in the PMIC Software folder that you installed earlier <Install directory>/Solar-Powered IoT Device Kit/1.0/PMIC Software/Bootloader_Host_GUI_exe. Select USB serial port where COMxx corresponds to the port that was confirmed in step 3 and select 115200 Baud Rate.
- Page 33 O P E R A T I O N M A N U A L Push the Browse button, then open "LED_ONOFF.cyacd" in the Bootloader_Host_GUI_exe folder <Install directory>/Solar-Powered IoT Device Kit/1.0/PMIC Software/Bootloader_Host_GUI_exe. If you have already developed your own firmware using PSoC Creator, the .cyacd file is generated in the project folder as shown below.
- Page 34 O P E R A T I O N M A N U A L A "Bootload Started at X:XX:XX" message will appear in the Status Log window, and then an indicator will advance. The programing is completed when a "Bootload in successful !!" message appears in the Status Log window.
- Page 35 O P E R A T I O N M A N U A L 10. Disconnect and re-connect the USB cable, and then the status LED will blink at 1 sec interval. This sample firmware only supports LED blinking control as a demonstration (Refer to "11.1.1 LED ONOFF Project"...
-
Page 36: Psoc Creator With Miniprog3 (Program And Debug)
(Not included in this kit) is the hardware/firmware block for onboard programming, debugging, and bridge functionality. It is a common reusable hardware/firmware block used across many Cypress kit platforms. The MiniProg3 communicates with PSoC Creator software to program/debug the target EZ-BLE PRoC Module over the SWD interface. - Page 37 O P E R A T I O N M A N U A L Open the sample project EH_Motherboard.cypj for this kit. <Install directory>/Solar-Powered IoT Device Kit/1.0/Firmware/EH_Motherboard /EH_Motherboard.cydsn/EH_Motherboard.cyprj Select the "Menu>Build>Clean and Build All Projects", and then the build status will appear on lower right side of PSoC Creator.
- Page 38 O P E R A T I O N M A N U A L Select the "Menu>Debug>Program". If the Select Debug Target window appears as shown below, then perform the following. Click the "Port Setting" button, and then the following window will appear. The setting should be as below.
- Page 39 O P E R A T I O N M A N U A L Click the "Port Acquire" button, and then "PRoC BLE CYBLE-022001-00" will appear. Click the "Connect" button, and then push OK button. August 24, 2015, S6SAE101A00SA1002_SS901-00041-1v0-E CONFIDENTIAL...
- Page 40 O P E R A T I O N M A N U A L 10. A "Programming - XXX of 1024 blocks" message will appear on lower left side of PSoC Creator, and then "Ready" appears once programming has completed. S6SAE101A00SA1002_SS901-00041-1v0-E, August 24, 2015 CONFIDENTIAL...
-
Page 41: Debug
"Attach to running target" option for debugging, while the bootloadable project is running. In this case, you can debug the bootloadable project only from the point where debugger is attached to the device. Refer to AN68272 (http://www.cypress.com/?rID=50230) for detailed information. 7.2.2.1 Convert the Application Type to Normal Open the "TopDesign.cysch". - Page 42 O P E R A T I O N M A N U A L Right click on the Bootloadable component and disable it. The Bootloadable component will be disabled. Right Click. Select "Disable" Disable Select the "Menu>Build>Build All Projects" to rebulid the projects. S6SAE101A00SA1002_SS901-00041-1v0-E, August 24, 2015 CONFIDENTIAL...
- Page 43 O P E R A T I O N M A N U A L Select the "Menu>Debug>Debug". Use "Help->PSoC Creator Help Topics->Using the Debugger" for information on using the debugger. Once done with debugging you need to: a. Right click on the bootloadable component and re-enable it. b.
- Page 44 O P E R A T I O N M A N U A L 7.2.2.2 Attach to Running Target Option Open the "EH_Motherboard.cydwr", then click the system tab. Change the Debug Select to the SWD (serial wire debug). The consumption current will be increased when set to the SWD.
- Page 45 O P E R A T I O N M A N U A L Select "Menu>Debug>Attach to Running Target..". Attached to Target window will appear, and the click OK button. August 24, 2015, S6SAE101A00SA1002_SS901-00041-1v0-E CONFIDENTIAL...
- Page 46 O P E R A T I O N M A N U A L The window of PSoC Creator is changed to Debug mode automatically. Use "Help->PSoC Creator Help Topics->Using the Debugger" for information on using the debugger. Once done with debugging you need to: a.
-
Page 47: Example Project
O P E R A T I O N M A N U A L 8. Example Project This chapter introduces you to the initial provided firmware of the Solar-Powered IoT Device Kit. We will discuss features such as the BLE Beacon Process and WSN with BLE Beacon Process. Refer to "Getting Started with EZ-BLE PRoC Module"... -
Page 48: Function List
O P E R A T I O N M A N U A L Function List Following is the function list for the example project of the kit firmware. Function Name Description Blocks for milliseconds CyDelay Blocks for microseconds CyDelayUs Read the current value on the pins (P3.5) of the Digital Port in USB_Detect_Read... -
Page 49: Ble Beacon Process
O P E R A T I O N M A N U A L Function Name Description Handles I C events according to current state and update the ProcessI2CEvents state value Handles Beacon events according to current state and update ProcessBeaconEvents the state value Init Temperature and Humidity sensor Si7020... - Page 50 O P E R A T I O N M A N U A L 1. Power Up and Bootloader Start The code starts executing from the bootloader which can be found in the "UART_Bootloader" project. The code is optimized to read the USB detect line (P3.5 of EZ-BLE) and immediately switch to Bootloadable code if it was not detected.
- Page 51 O P E R A T I O N M A N U A L 2. System Initialization and Low Power Startup Once the bootloader lanuches the bootloadable application, the code from the "EH_Motherboard" PSoC Creator project is started. This code begins with low power startup functions. This allows the system to conserve power during clock startup, especially the WCO which takes 2 seconds for startup.
- Page 52 O P E R A T I O N M A N U A L CyGlobalIntEnable; /* Set the divider for ECO, ECO will be used as source when IMO is switched off to save power, to drive the HFCLK */ CySysClkWriteEcoDiv(CY_SYS_CLK_ECO_DIV8);...
- Page 53 O P E R A T I O N M A N U A L 5. WDT Configuration and BLE Beacon Starting WDT counter is configured for startup waiting. Then ProcessBeaconEvents() is called to process BLE Beacon events. S6AE101A Output Voltage BLE Advertisement EZ-BLE current August 24, 2015, S6SAE101A00SA1002_SS901-00041-1v0-E...
- Page 54 O P E R A T I O N M A N U A L void ProcessBeaconEvents(void) {/* If I2C_COUNTER triggers a new interrupt after another 3 seconds. */ if(wdt_trigger_on_flag) CYBLE_API_RESULT_T apiResult; switch(beacon_state) case BEACON_WAIT: /* Wait two secounds to earn enough power to start advertising */ beacon_state = BEACON_START;...
-
Page 55: Wsn With Ble Beacon Process
O P E R A T I O N M A N U A L WSN with BLE Beacon Process Following is the detail information of WSN with BLE Beacon Process. 0. Complete WSN with BLE Beacon Process The complete WSN with Beacon process involves running the I C state machine on each WDT interrupt and to send new data as part of ADV packet. - Page 56 O P E R A T I O N M A N U A L CySysWdtUnlock(); CySysWdtDisable(CY_SYS_WDT_COUNTER0_MASK); CySysWdtWriteMode(I2C_COUNTER, CY_SYS_WDT_MODE_INT); CySysWdtWriteClearOnMatch(I2C_COUNTER, COUNTER_ENABLE); I2C_SENSOR_ENABLE /* If I2C sensor is enabled and sensor setting is on. */ if(Sensor_Flag) CySysWdtWriteMatch(I2C_COUNTER, I2C_COUNT_PERIOD); else #endif /* If I2C sensor is disabled or sensor setting is off. */ CySysWdtWriteMatch(I2C_COUNTER, ((uint32)32767*3));...
- Page 57 O P E R A T I O N M A N U A L case I2C_READ_HUMIDITY: /* Read RH data from I2C Sensor */ I2C_buffer[0] = SI7020_MEASURE_RH; Si7020_WriteRead(I2C_buffer, 1, 2); /* Update RH index of ADV packet with new value */ cyBle_discoveryData.advData[ADDR_TEM_OFFSET]= I2C_buffer[0];...
- Page 58 O P E R A T I O N M A N U A L case I2C_READ_TEMP: /* Read Temperature data from I2C Sensor */ I2C_buffer[2] = SI7020_READ_TEMP; Si7020_WriteRead(&I2C_buffer[2], 1, 2); /* Update Temperature index of ADV packet with new value */ cyBle_discoveryData.advData[ADDR_TEM_OFFSET]= I2C_buffer[2];...
-
Page 59: Ble Beacon Format
O P E R A T I O N M A N U A L BLE Beacon Format BLE Beacon is a one-way communication method that broadcast at a regular interval. It consists small packets of data (30byte) of "Advertisements". Beacons that want to be "discovered"... - Page 60 0x02 − AD type1 0x01 − AD data 0x04 − Length2 0x1A − AD type2 0xFF − Company ID 0x0131 [Cypress Semiconductor Corporation] − Device type 0x02 − Length3 0x15 − UUID 00050001-0000-1000-8000-00805F9B0131 [hex] − Major 0x0001 − Minor 0x0001 −...
-
Page 61: Sensor Transmitter Specification Of Wsn
O P E R A T I O N M A N U A L Sensor Transmitter Specification of WSN When the “SENSOR” command is ON, the kit transmits the sensor data in the Beacon protocol packet where temperature and humidity sensor information are stored in the Minor region (2 bytes). Humidity data is stored in the upper byte and temperature data is stored in the lower byte. -
Page 62: Energy Harvesting Pmic (S6Ae101A)
O P E R A T I O N M A N U A L 9. Energy Harvesting PMIC (S6AE101A) The following is the specification of the Energy Harvesting Power Management IC (S6AE101A) on the Energy Harvesting Motherboard. Refer to the datasheet of S6AE101A (DS405-00026) for the latest information. -
Page 63: Block Diagram
O P E R A T I O N M A N U A L Block Diagram Figure 9-1 Block Diagram Power supply block Primary to system Load Battery VBAT VOUT1 Discharge Solar Cell VSTORE1 OVP block Control VINT Power supply for internal circuit VINT VSTORE1... -
Page 64: Hardware
O P E R A T I O N M A N U A L 10. Hardware 10.1 Energy Harvesting Motherboard 10.1.1 Board Detail The Energy Harvesting Motherboard consists of the blocks shown in Figure 9-1. - Energy Harvesting Power Management IC (S6AE101A) - EZ-BLE PRoC Module (CYBLE-022001-00) - USB Serial Converter IC (CY7C65213) - LDO for USB bus power (MB39C022G) -
Page 65: Input/Output Pin Description
O P E R A T I O N M A N U A L 10.1.2 Input/Output Pin Description Table 10-1 Input/Output Pin Description Circuit Pin No. Silk-Printed Name Description Expansion pins for S6AE101A Energy Harvesting PMIC (J1) J1-1 GND pin J1-2 VBAT Primary battery input pin for Hybrid operation... -
Page 66: Debug Connector Description
O P E R A T I O N M A N U A L 10.1.3 Debug Connector Description Table 10-2 Debug Connector Description Circuit Pin No. Silk-Printed Name Description J5-1 Power pin J5-2 SWDIO SWD data pin J5-3 GND pin J5-4 SWDCLK SWD clock pin... -
Page 67: Switch Description
O P E R A T I O N M A N U A L 10.1.5 Switch Description Table 10-4 Switch Description Circuit Pin No. Silk-Printed Name Description DIP switch connection to GPIO P4.1 of EZ-BLE PRoC (Not mounted) Module for future expansion XRES SW2 Reset Button for BLE module DIP switch (Not mounted) -
Page 68: Circuit
O P E R A T I O N M A N U A L 10.1.7 Circuit S6SAE101A00SA1002_SS901-00041-1v0-E, August 24, 2015 CONFIDENTIAL... - Page 69 O P E R A T I O N M A N U A L August 24, 2015, S6SAE101A00SA1002_SS901-00041-1v0-E CONFIDENTIAL...
-
Page 70: Bom List
Littelfuse Murata Manufacturing Co., 330 Ω @ 100MHz L1, L2 BLM21PG331SN1D Ltd. LED1, LED2 LTST-C191KGKT GREEN Lite-On Inc USB-UART LP Bridge Cypress Semiconductor CY7C65213-32LTXI Controller Corporation Energy Harvesting Cypress Semiconductor S6AE101A Power Management IC Corporation Cypress Semiconductor MB39C022G 1ch DCDC, 1ch LDO... -
Page 71: Ble-Usb Bridge
O P E R A T I O N M A N U A L 10.2 BLE-USB Bridge 10.2.1 Board Detail The BLE-USB Bridge consists of the blocks shown in Figure 9-2. The initial firmware programmed into the BLE-USB Bridge does not support the CySmartTM Software Utility. Instead, the firmware is a custom version used for demonstrating the features of this kit. -
Page 72: Test Pin Description
O P E R A T I O N M A N U A L 10.2.2 Test Pin Description Table 10-6 Test Pin Description Circuit Pin No. Circuit Name Description BLE_TEST1 GPIO P3.0 of PRoC BLE BLE_TEST2 GPIO P0.4 of PRoC BLE VDDA Power Pin of PRoC BLE VDDR... -
Page 73: Led Description
O P E R A T I O N M A N U A L 10.2.4 LED Description Table 10-8 LED Description Circuit Pin No. Silk-Printed Name Description LED1 USER LED1 GPIO P3.3 of PRoC BLE LED2 STATUS LED2 GPIO P3_1 of PSoC 5LP LED3 POWER LED3 Power LED of PSoC 5LP... -
Page 74: Circuit
O P E R A T I O N M A N U A L 10.2.5 Circuit S6SAE101A00SA1002_SS901-00041-1v0-E, August 24, 2015 CONFIDENTIAL... - Page 75 O P E R A T I O N M A N U A L August 24, 2015, S6SAE101A00SA1002_SS901-00041-1v0-E CONFIDENTIAL...
- Page 76 O P E R A T I O N M A N U A L S6SAE101A00SA1002_SS901-00041-1v0-E, August 24, 2015 CONFIDENTIAL...
- Page 77 O P E R A T I O N M A N U A L August 24, 2015, S6SAE101A00SA1002_SS901-00041-1v0-E CONFIDENTIAL...
-
Page 78: Bom List
R23,R24 ERJ-3GEYJ303V 30 kΩ/0603 Panasonic Corporation SW1,SW2 EVQ-P3401P Push Switch Panasonic Corporation TVS1 SD05-7 5V 350W Diodes Inc. PRoC BLE, Cypress Semiconductor CYBL10162-56LQXI Programmable Corporation Radio on Chip NTZD3152PT1G DUAL PMOS ON Semiconductor PSoC 5LP Cypress Semiconductor CY8C5868LTI-LP039 Programmable Corporation System on Chip ECS-.327-12.5-34B... - Page 79 O P E R A T I O N M A N U A L Reference Parts Number Description Manufacture Note (C21) C0603C101K5RACTU 100 pF/0603 Kemet Corporation Non mount 0.1 μF/0402 (C37) C1005X5R1A104K050BA TDK Corporation Non mount TAIYO YUDEN CO., 1 μF/0603 (C27) TMK107BJ105KA-T...
-
Page 80: Appendix
O P E R A T I O N M A N U A L 11. Appendix 11.1 Other Sample Project 11.1.1 LED ONOFF Project This project demonstrates the simple LED control. (<Install directory>/Solar-Powered IoT Device Kit/1.0/Firmware//Other/LED_ONOFF/LED_ONOFF.cydsn/ LED_ONOFF.cyprj) This sample firmware only supports LED blinking control using USB bus power, therefore please reprogram the "EH_Motherboard"... - Page 81 O P E R A T I O N M A N U A L Flow Diagram Following is the flow diagram for the LED ONOFF project. Power up Enter Bootloader Start UART Bootloader and wait Command Is USB Bootload over for Bootload received before...
- Page 82 O P E R A T I O N M A N U A L Demonstration steps Open the sample project (LED_ONOFF.cypj) for this kit. (<Install directory>/Solar-Powered IoT Device Kit/1.0/Firmware//Other/LED_ONOFF/LED_ONOFF.cydsn/ LED_ONOFF.cyprj) Select the "Menu>Build>Clean and Build All Projects", and then the build status will appear on lower right side of PSoC Creator.
-
Page 83: Simple Ble Project
O P E R A T I O N M A N U A L 11.1.2 Simple BLE Project This project demonstrates the simple BLE Beacon transmitter. (<Install directory>/Solar-Powered IoT Device Kit/1.0/Firmware//Other/Simple_BLE/Simple_BLE.cydsn/ Simple_BLE.cyprj) This sample firmware only supports the BLE Beacon and Bootloader with no other frills (no I C, no flash read/write, no UART serial configuration). - Page 84 O P E R A T I O N M A N U A L /* If BLESS is in Active state, * and if BLESS Tx/Rx Event is not complete, stop IMO and put CPU * to Sleep */ else if (blessState != CYBLE_BLESS_STATE_EVENT_CLOSE) /* Change HF clock source from IMO to ECO, as IMO can be stopped...
- Page 85 O P E R A T I O N M A N U A L Flow Diagram Following is the flow diagram for the Simple BLE project. Power up Enter Bootloader Start UART Is USB Bootloader and wait Command Bootload over for Bootload received before...
- Page 86 O P E R A T I O N M A N U A L TopDesign.cysch Following is the top design for Simple_BLE project. The BLE Component is cofigured as a Beacon with fixed parameter. The Watch Dog Timer is used for waking up the system when the system is in low power mode. The Bootloadable component links the application to the Bootloader project's hex file.
- Page 87 O P E R A T I O N M A N U A L Run PMIC.exe, and then find ten MAJOR number (fixed value by firmware) of the Motherboard on the PMIC Software (Refer to "6.1.4 Establishing BLE Connection" for detail). Then move the Motherboard further away from your computer.
- Page 88 O P E R A T I O N M A N U A L 11.2 How to Use Extra Components 11.2.1 10Ω Resistor for Current Measurement This chapter uses the Solar Module, 10Ω Resistor and a Multimeter (MASTECH: MS8268, Not included in this kit.) to measure the voltage and current for the solar module using 10Ω...
-
Page 89: How To Use Extra Components
O P E R A T I O N M A N U A L Put your hand about 2 cm above the Solar Module to block most of the light and observe the DC voltage (V2). Now, you will measure the current produced by the Solar Module. Connect a 10Ω resistor to the black wire on the Solar Module as shown in the picture. - Page 90 O P E R A T I O N M A N U A L Put your hand about 2 cm above the Solar Module to block most of the light and observe the DC voltage (I2). Calculate the energy produced by the Solar Module. Calculate the Maximum Power Point (MPP energy of the Solar Module as shown below.
- Page 91 O P E R A T I O N M A N U A L 220 μF capacitor for additional 11.2.2 An Energy Harvesting System (EHS) is made of an Energy Harvesting Device (EHD) such as a solar module, an Energy Harvesting PMIC, and a Storage Device (such as a capacitor). Its purpose is to supply power to the EHS Load.
-
Page 92: 220 Μf Capacitor For Additional
O P E R A T I O N M A N U A L The waveform for EHS is completed to add the extra capacitor to VSTORE1 pin. Note that value of capacitor depends on the consumption energy. You can calculate the energy of capacitor using following formula. ... -
Page 93: Table 12-1 Ordering Information
O P E R A T I O N M A N U A L 12. Ordering Information Table 12-1 Ordering Information Part Number Version Note S6SAE101A00SA1002 Rev 1.0 August 24, 2015, S6SAE101A00SA1002_SS901-00041-1v0-E CONFIDENTIAL... -
Page 94: Ordering Information
O P E R A T I O N M A N U A L 13. Major Changes Page Section Change Results Revision 1.0 Initial release S6SAE101A00SA1002_SS901-00041-1v0-E, August 24, 2015 CONFIDENTIAL... -
Page 95: Major Changes
O P E R A T I O N M A N U A L SS901-00041-1v0-E Spansion・Support Tool Manual S6SAE101A00SA1002 Solar-Powered Internet of Things (IoT) Device Kit Operation Manual August 2015 Rev. 1.0 Published: Cypress Semiconductor Corp. Edited: Communications August 24, 2015, S6SAE101A00SA1002_SS901-00041-1v0-E CONFIDENTIAL... - Page 96 (2) for any use where chance of failure is intolerable (i.e., submersible repeater and artificial satellite). Please note that Cypress will not be liable to you and/or any third party for any claims or damages arising in connection with above-mentioned uses of the products.
Need help?
Do you have a question about the S6SAE101A00SA1002 and is the answer not in the manual?
Questions and answers