Advertisement
Sequence 8 - Testing Procedures
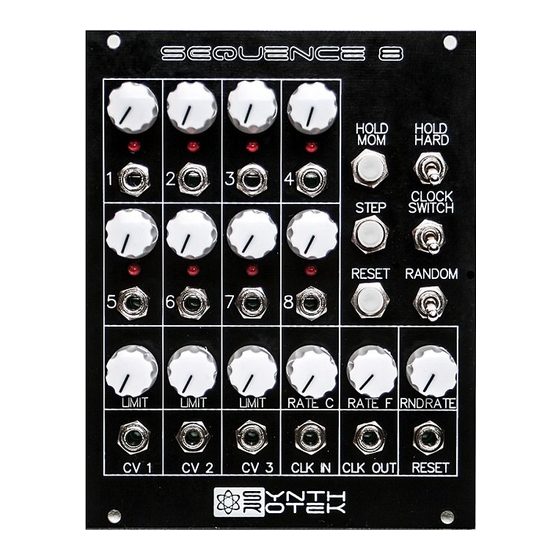
Before you start this test, make sure that all knobs on the Sequence 8
have been rotated fully counter clockwise and that all 3 toggle
switches (Hold Hard, Clock Switch, Random) are in the down position.
—TESTING CV OUTPUTS—
When you first turn on the Sequence 8 it should be running on its
internal clock. Let's make sure that all 3 CV Outputs are working
correctly. Begin by plugging in a cable into the Sequence 8's CV 1
Output and plug the other end of the cable into the 1V/Oct Input on an
Oscillator, and make sure to monitor the output of the oscillator.
Since all 8 of the sequence knobs are rotated fully counter clockwise
and the CV 1 input is set fully counter clockwise, you should get a
stable tone out of your Oscillator.
Rotate Step 1's knob fully clockwise and leave the CV 1 attenuator set
fully counter clockwise. You should still get a stable tone out of your
Oscillator when it passes the voltage for Stage 1. If the Oscillator
changes pitch even though the CV 1 Attenuator is turned down all the
Advertisement
Table of Contents

Summary of Contents for Synthrotek Sequence 8
- Page 1 Sequence 8 - Testing Procedures Before you start this test, make sure that all knobs on the Sequence 8 have been rotated fully counter clockwise and that all 3 toggle switches (Hold Hard, Clock Switch, Random) are in the down position.
- Page 2 CV 1 Attenuator from fully counter clockwise to fully clockwise. Repeat these same steps for the Sequence 8’s CV 2 and CV 3 Outputs. While you are plugged into the CV 3 Output, press the STEP button to advance to Step 2.
- Page 3 NOTE: This does not effect the CLOCK OUT. Now flip the RANDOM switch to the “DOWN” position. TESTING RESET: While the Sequence 8 is running on its internal clock, press the red RESET switch and you should notice the sequence resetting back to Step 1 Now plug in a cable into the RESET output and plug the other end into Step 2’s Reset input.
- Page 4 At this point you should be able to confirm that the Sequence 8 is working correctly. If not, go back through your soldering and double check your connections. If you need more assistance, utilize Synthroteks troubleshooting guide or reach out to us via our contact...


Need help?
Do you have a question about the Sequence 8 and is the answer not in the manual?
Questions and answers