
Related Manuals for Benchmark HCM400


Summary of Contents for Benchmark HCM400
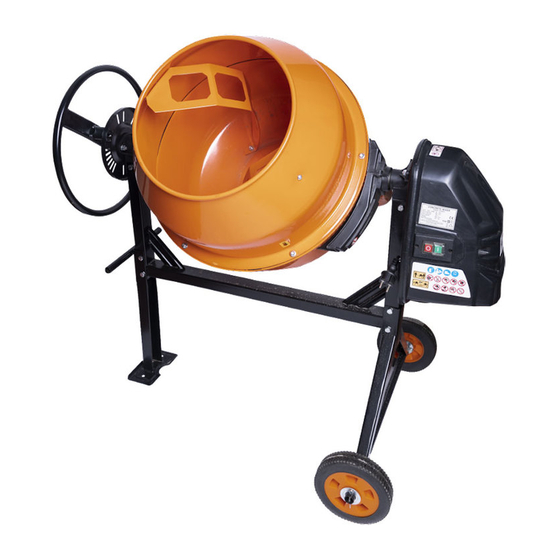
- Page 1 2620-176 CEMENT MIXER OWNER'S MANUAL 5AMP • 25HP READ ALL INSTRUCTIONS BEFORE FIRST USE. KEEP THIS MANUAL FOR FUTURE REFERENCE. KEEP AWAY FROM CHILDREN.
-
Page 2: Product Specifications
CEMENT MIXER - OWNER'S MANUAL PRODUCT SPECIFICATIONS Model Number HCM400 Motor: 120V~60Hz, 5A Drum Capacity 115 Liters / 25 gallons Drum Mouth 385 mm Drum Speed 26.7 / min Overall Sizes Length 1200 mm / 47" Width 710 mm / 28"... -
Page 3: Table Of Contents
2620-176 TABLE OF CONTENTS Product specifications ..……………………………………….1 Electrical Connection ………………………………………….1 Table of contents ……………………………………………….2 Safety Warnings & Instructions ………...……………….3 - 5 Contents of Shipping Container ...………………………….6 Assembly Instructions .………………………….……….7 - 10 Operating Instructions ………………………………….10 - 11 Maintenance Instructions …...………………………...…….11 Wiring Diagram ………..…………………………………..….12 Parts Schematic ………………...…………………………..….13... -
Page 4: Safety Warnings & Instructions
CEMENT MIXER - OWNER'S MANUAL SAFETY WARNINGS & INSTRUCTIONS UNDERSTAND YOUR MIXER Read and understand the owner’s manual and labels affixed to the mixer. Learn its application and limitations as well as the specific potential hazards peculiar to it. Become familiar with the controls before operating this mixer. - Page 5 2620-176 DO NOT ABUSE CORD Never carry mixer by cord or yank it to disconnect it from socket. Keep cord from heat, oil and sharp edges. EXTENSION CORDS Extension cords must be no longer than 50 m/164' in length. The wire section must be 1.5mm "...
- Page 6 CEMENT MIXER - OWNER'S MANUAL Do not turn mixer off while full of concrete. Do not use the mixer for a purpose for which it was not intended. The mixer is not to be towed by any vehicle. NEVER LEAVE MIXER RUNNING UNATTENDED Do not leave mixer until it has come to a complete stop.
-
Page 7: Contents Of Shipping Container
2620-176 CONTENTS OF THE SHIPPING CONTAINER... -
Page 8: Assembly Instructions
CEMENT MIXER - OWNER'S MANUAL ASSEMBLY INSTRUCTIONS It is recommended that two people assist in the assembly. THE STAND With a split pin inserted into the in- ner holes in each stub axle, place a flat washer, then a wheel followed by another flat washer. - Page 9 2620-176 THE BOTTOM DRUM Mount the mixing blades inside the bot- tom drum loosely as shown - Two holes are provided at the base of the drum into which a M8X20 bolt may be inserted from the outside. A leather washer, flat washer, lock washer and a nut should be threaded on loosely on the inside.
- Page 10 CEMENT MIXER - OWNER'S MANUAL Insert a M8X20 cross headed screw Slide the locking plate over the into each mounting hole in the rim. large diameter shaft at the leg end Secure each bolt from below with of the frame with the rim facing in- a flat washer, lock washer and nut.
-
Page 11: Operating Instructions
2620-176 THE TRANSMISSION CASE LOADING/MIXING POSITION For Mortar For Concrete EMPTYING STORAGE Lining up the keyways, slide the transmis- POSITION POSITION sion case over the pinion shaft. Secure the case to the frame with four M8 lock nuts. OPERATING INSTRUCTIONS DRUM TILTING The spring-loaded tipping bar with locking lugs provides an easy posi-... -
Page 12: Maintenance Instructions
CEMENT MIXER - OWNER'S MANUAL LOADING to clean it out. Do not beat on the drum with a shovel, a hammer or other tools to break up accumulations of dried ce- Completely unwind the extension ment mix, as damage to the mixer may cord. -
Page 13: Wiring Diagram
2620-176 carried out, to any of the electric components must be undertaken by a qualified electrician. Parts in a circle should only be fitted by a qualified electrician. WIRING DIAGRAM... -
Page 14: Parts Schematic
CEMENT MIXER - OWNER'S MANUAL PARTS SCHEMATIC... -
Page 15: Parts List
2620-176 PARTS LIST WARNING: When servicing, use only original equipment replacement parts. The use of any other parts may create a safety hazard or cause damage to the log splitter. Any attempt to repair or replace electrical parts on this log splitter may create a safety hazard unless repairs are performed by a qualified technician. - Page 16 CEMENT MIXER - OWNER'S MANUAL Description Qty. Strain Relief Nut Gasket, Switch Switch Motor Cover Motor Idle Pulley Belt Bearing 6906 Snap Washer – Hole 47 Self Tapping Screw ST4.2X16 Circlip 30 End Plate Bolt M8X25 Motor Mount Bracket, 1 End Plate Gasket Self Tapping Screw...
-
Page 17: Warranty
WARRANTY BENCHMARK CEMENT MIXER WARRANTY If this Benchmark tool fails due to a defect in material or workmanship within five years from the date of purchase, return it to any Home Hardware store with the original bill of sale for exchange. This warranty does not include expendable parts including but not limited to blades, brushes, belts, light bulbs and/or bat- teries. - Page 18 CEMENT MIXER - OWNER'S MANUAL...
- Page 19 CEMENT MIXER OWNER'S MANUAL 5AMP • 25HP EXCLUSIVE TO HOME HARDWARE For information on the entire lineup of Benchmark power tools visit homehardware.ca or your local Home Hardware retail store. 2620-176...
Need help?
Do you have a question about the HCM400 and is the answer not in the manual?
Questions and answers
where can i buy parts