Table of Contents
Advertisement
Quick Links
Advertisement
Table of Contents

Related Manuals for BREDA LUDWT30155


Summary of Contents for BREDA LUDWT30155
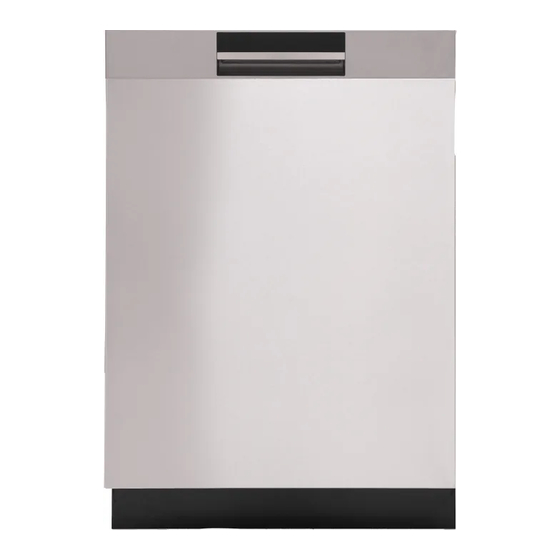
- Page 1 Operating instructions Dishwasher LUDWT30155...
-
Page 2: Table Of Contents
Contents Your dishwasher ........................Important safety instructions ....................General ............................Child safety ..........................Installation ..........................Winter storage/transport ......................Overflow guard function ......................Packing material ........................Disposal ............................ Before washing for the first time ................... Water hardness ......................... Set the Rinse aid ........................Top up with rinse aid ........................ - Page 3 Troubleshooting ........................Installation instructions ......................Important safety instructions ....................Tools ............................Transport protection for the door ..................... Placing the dishwasher ......................Fit the protective film ........................ Adjust the height and slide the dishwasher into place ............. Drain connection ........................Connection to water supply ...................... Electrical connection .........................
-
Page 4: Your Dishwasher
Your dishwasher Display Main power switch Install the dishwasher, see the chapter Installation instructions. Following this, open the door and press the main power switch to start using the machine. The first time the dishwasher is switched on, it is important that you choose the right settings to ensure good dishwashing results. -
Page 5: Important Safety Instructions
Important safety instructions SAVE THESE INSTRUCTIONS FOR FUTURE REFERENCE WARNING! When using your dishwasher, follow basic precautions, including the following: Read all instructions before using the dishwasher. Use the dishwasher only for its intended function. Use only detergents or wetting agents recommended for use in a dishwasher and keep them out of the reach of children. -
Page 6: Child Safety
Child safety Always keep small children away from the machine when it is open. There may be some detergent residue left inside the machine. Always close the door and start the dishwasher as soon as you put in the detergent. If dishwasher detergent gets in someone’s eyes, rinse them with plenty of water for at least 15 minutes. -
Page 7: Before Washing For The First Time
Before washing for the first time Water hardness In order to achieve good dishwashing results, the dishwasher needs soft water (water with low mineral content). Hard water leaves a white coating on dishes and the dishwasher. Checking water hardness Contact the local water utility to check the water hardness in your area. This is important to determine how much detergent and rinse aid to use. -
Page 8: Greener Dishwashing
Greener dishwashing The dishwasher saves energy and water When using a dishwasher in a residential setting, less energy and water are generally used compared to washing the dishes by hand. Do not rinse under running water Do not rinse the dishes under running water as this will lead to increased energy and water consumption. Simply scrape off large food particles before loading the dishwasher. -
Page 9: Loading The Dishwasher
Loading the dishwasher Fragile dishes Some cookware is not dishwasher safe. This can be for several reasons. Some materials cannot withstand high temperatures, others can be damaged by dishwasher detergent. Use caution with, for example, handmade items, fragile decoration, crystal/glassware, silver, copper, tin, aluminum, wood, and plastic. -
Page 10: Lower Basket
Raising and lowering the upper basket 1. Pull out the upper basket. 2. Grab the sides of the upper basket with both hands and lift it up. 3. Repeatedly lift the basket with both hands to change its position. (The upper basket can be set in three positions.) When the upper basket is in the highest position, lifting it will return it to the lowest position. -
Page 11: Typical Load
Flexible cutlery basket The cutlery basket is flexible and can be separated into two parts, which can then be attached to the side of the lower basket. Typical load Recommended for daily, regular, or typical use. Upper basket NOTE! Ensure the upper basket is set to its lowest position. Lower basket... -
Page 12: Using The Dishwasher
Using the dishwasher Add detergent 1. Prewash detergent compartment Press to open 2. Main wash detergent compartment Detergent is added according to water hardness. Follow the instructions on the detergent packaging. Too much detergent can result in less effective dishwashing and also entails greater environmental impact. -
Page 13: Program - Select Program
PROGRAM - Select program Press the Program selector one or more times until the desired program symbol is activated. Auto Wash The dishwasher can measure how dirty the dishes are and adjust water consumption and temperature accordingly. When newly installed, the program needs to be run five times before it is fully adapted and can provide the best results. -
Page 14: Select Option
- Select option To select an option, press one of the option buttons until the option is activated. The available options vary between programs and some options cannot be combined (available options glow dimly). SpeedWash This option shortens the program time, but uses more energy and water. Auto open The dishwasher door opens automatically, which improves the drying results. -
Page 15: Time Remaining
- Time remaining Once you have chosen a program and options, the time the program took when last used is displayed. Once you have started the dishwasher, the display shows the remaining program time. The remaining time is updated after the water for the final rinse has been heated. This may differ somewhat from time to time depending on the temperature of the water supply, the amount of dishes, the ambient temperature, and other factors. -
Page 16: Unloading The Dishwasher
Allow the dishes to cool before unloading the dishwasher. Unloading the dishwasher Hot porcelain is more fragile. Leave the dishes to cool in the dishwasher before unloading them. Unload the lower basket first to avoid any water drops from the upper basket falling onto the dishes in the lower basket. -
Page 18: Settings
Settings Open the settings menu: First, open the door. Turn off the machine. Press and hold the main power switch until the display lights up. Within 10 seconds: - press and hold the Program selector and the SpeedWash option button until the settings menu opens. -
Page 19: Care And Maintenance Instructions
Care and maintenance instructions Top up with rinse aid When the rinse aid needs topping up, the above symbol lights on the display. After topping up, it may take a while before the symbol goes out. Press to open 1. Open the rinse aid compartment lid. 2. -
Page 20: Cleaning The Spray Arms
1. Turn the locking ring counterclockwise and lift the fine filter straight up. 2. Clean the fine filter. 3. Refit the fine filter and turn the locking ring clockwise to its stop position. Check that the edges seal properly. Remember to refit the coarse filter! NOTE! Dishwashing results may be affected if the coarse and fine filters are incorrectly fitted. -
Page 21: Clean The Dishwasher Inside And Out
Upper spray arm 1. Pull out the upper basket. 2. Unscrew the spray arm bearings counterclockwise to remove the spray arm from the upper basket. Clean the dishwasher inside and out Door and door seal Open the door. Clean the sides of the door and the door seal regularly with a slightly damp cloth. Clean the door seal at the lower front edge of the dishwasher with a washing-up brush. - Page 22 Drain pump stop 5. Turn the pump wheel located behind the drain pump stop by hand. Carefully remove any items. 6. Reinstall the drain pump stop along with the fine and coarse filters. 7. Plug the machine in again. If the dishwasher still does not start and a humming sound is heard, the overflow protection has been triggered.
-
Page 23: Troubleshooting
Troubleshooting Type of fault on the display Action Overfilling Clear the drain pump. See the chapter Care and maintenance in- structions. If the problem persists, call the Customer Care Center. Water outlet fault See “Water remains in the dishwasher above the filters” in the table “Problem”... - Page 24 Problem Possible causes Action The dishwasher does not start. The door is not closed properly Close the door within four sec- or was not closed immediately onds, otherwise the dishwasher after starting the program. will not start. See Starting the dishwasher in the chapter Using the dishwasher.
- Page 25 Problem Possible causes Action Detergent is too old. Detergent Avoid large packages. is a perishable product. Dishes loaded incorrectly. Do not cover dishes with large bowls or lids. Avoid placing very tall glasses in the corners of the baskets. Glasses and cups have toppled Load the dishes securely.
- Page 26 Problem Possible causes Action 1 minute appears on the dis- The program is taking longer No action. The program time is play. than estimated. stored. The next time the pro- gram is run the corrected time will be displayed. "STR" is shown on the display. The dishwasher door has been If you want the dishwashing opened while a program is in...
- Page 27 Problem Possible causes Action Blocked drain hose. Loosen the drain hose from where it terminates. Check that no debris has clogged the hose. Is the cone-shaped part of the drain boot cut to the maximum size of the fitting where it attach- Bad odor in dishwasher.
-
Page 28: Installation Instructions
Installation instructions Inches (mm) Nominal dimensions. Actual measurements may vary. Important safety instructions Connections to electricity, water, and drainage must be performed by a qualified professional. Always follow applicable regulations for water, drainage, and electricity. Take care during installation! Wear protective gloves! There must always be two people! Place a drip tray on the floor beneath the dishwasher to prevent damage from any water leaks. -
Page 29: Transport Protection For The Door
Transport protection for the door Do not forget to remove the transport protection for the door when unpacking the dishwasher. Placing the dishwasher The dishwasher is intended for installation under a countertop. The recess dimensions are illustrated. Make sure the area on which the dishwasher is to be installed is firm. Inches (mm) The electrical and water supplies... -
Page 30: Fit The Protective Film
Fit the protective film Affix the protective film (packed in the document bag). The protective film is to protect the countertop from moisture. NOTE! The surface to which the protective film is fitted must be clean and dry. Adjust the height and slide the dishwasher into place 1. -
Page 31: Drain Connection
Drain connection This dishwasher is suitable for installing in a raised recess (to attain an ergonomic working height). This means that the dishwasher can be placed so that the drain hose runs to a lower level than the bottom of the dishwasher, such as by routing it directly to a floor drain. The dishwasher is fitted with an integrated anti-siphon device to prevent the machine from being emptied of water during the wash cycle. -
Page 32: Electrical Connection
Connection to cold water supply Connect the dishwasher to the cold water supply if the building is heated using oil, electricity, or gas. Connection to hot water supply Connect the dishwasher to the hot water supply (max. 160 °F (70 °C)) if the building is heated using an energy-efficient means such as district heating, solar power, or geothermal power. -
Page 33: Screwing The Dishwasher Into Place
Screwing the dishwasher into place After fastening the machine, check that the front feet still touch the floor. Dishwasher toe kick The dishwasher is supplied with a low toe kick and a high toe kick. Which toe kick you should use depends on the recess height and pedestal depth. - Page 34 Fit the toe kick...
-
Page 35: Service
Service Read the chapter Troubleshooting before contacting the Customer Care Center. If you have encountered a problem that you cannot resolve, please contact your nearest Customer Care Center for professional help. When making contact, provide the details on the serial number plate. Include the article number (1) and the serial number (2). -
Page 36: Technical Information
Technical information Technical data Model designation: LUDWT30155 Height: 33.74-36.61″ (857-930 mm) Width: 23.94″ (608 mm) Depth: 22.62″ (574.6 mm) Weight: 80 lb (36 kg) Water pressure: 4.2-140 psi (0.03-1.0 MPa) Electrical connection: See serial number plate Rated power: See serial number plate... - Page 37 862216-a4 We reserve the right to make changes.
Need help?
Do you have a question about the LUDWT30155 and is the answer not in the manual?
Questions and answers