Table of Contents
Advertisement
Quick Links
Advertisement
Table of Contents

Related Manuals for Powerx Electric

Summary of Contents for Powerx Electric
- Page 1 Water Heater Electric...
- Page 2 WELCOME TO THE POWERX FAMILY Join us on our mission to save energy, water and the planet. community.powerx.co...
-
Page 3: Table Of Contents
Table of Contents What’s included Installation guide 1. Download the PowerX App & connect Hub 2. Connect to Wifi & add PowerX Water Heater 3. Prepare installation of PowerX Water Heater 4. Mount PowerX Water Heater - Electric 5. Attach sensors 6. - Page 4 PowerX Water Heater - Electric. Using or installing PowerX Water Heater - Electric in an unspecified manner can impair protective equipment. 3. Do not open the PowerX unit or attempt to repair it. If there is an issue please contact our customer service team.
-
Page 5: What's Included
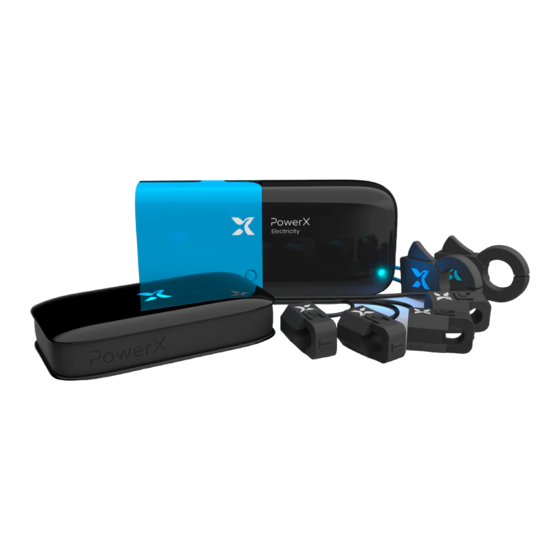
What’s included Water Heater PowerX Water Heater - Electric USB wall adapter Ground washer and power cable and screw 2 Washers 3 Zip Ties PowerX Hub Optional Set of temperature sensors Water leak (Black, Blue, and Red) detection cable... -
Page 6: Download The Powerx App & Connect Hub
Download the PowerX App & connect Hub 1.1 Plug in the PowerX Hub Connect the PowerX Hub to the wall adapter and cable, and plug it in an electrical outlet. The Hub’s LED light will start to blink. PowerX Water Get the PowerX App 1.2 Download the PowerX App... -
Page 7: Connect To Wifi & Add Powerx Water Heater
Then scan the QR code on the bottom of the PowerX Water Heater - Electric ADD DEVICE sensor or type in the sensor’s SCAN QR CODE ID manually. CALIBRATION COMPLETE Enter code Validate If you need further help please go to help.powerx.co... - Page 8 Step by step guide to installing PowerX Water Heater - Electric...
-
Page 9: Prepare Installation Of Powerx Water Heater
Prepare installation of PowerX Water Heater - Electric 3.1 Breaker OFF Turn the main breaker in your electric panel OFF, this will turn off all electric circuits in your home. - Page 10 Prepare installation of PowerX Water Heater - Electric 3.2 Open junction box of electric heater WARNING: Always treat Remove the junction box cover. This line wires as if they were box is usually on the top of the live and use appropriate water heater, and normally requires protective equipment.
- Page 11 Prepare installation of PowerX Water Heater - Electric 3.4 Open PowerX Water Heater - Electric cover Open the front cover of the PowerX Water Heater - Electric to access the wires and contacts.
-
Page 12: Mount Powerx Water Heater - Electric
Mount PowerX Water Heater - Electric 4.1 Attach the unit to the box cover WARNING: Always treat Screw the box cover to the line wires as if they were bottom of the PowerX unit using live and use appropriate the conduit nipple and conduit protective equipment. - Page 13 Insert the wires from the water heater into the wires in all the way and screw contacts marked “HEATER” on the PowerX unit as on tight. Check if they are shown. Make sure they are fully in and screw them firmly connected by pulling...
- Page 14 Mount PowerX Water Heater - Electric 4.4 Close the lids Replace the junction box cover and close the PowerX unit cover as well.
-
Page 15: Attach Sensors
Attach sensors 5.1 Insert temperature sensor Gently insert the black temperature sensor into the small opening between the tank and the temperature and pressure relief valve (T&P Valve). Be sure to insert the sensor by a distance of 1 inch or more if possible. - Page 16 Attach sensors 5.2 Secure hot/cold temperature sensors Secure the blue temperature sensor to the cold water pipe using a zip tie. Likewise, secure the red temperature sensor to the hot water pipe. NOTE: Use caution when working near the hot water pipe.
-
Page 17: Turn Circuit Breaker Back On
Turn circuit breaker back on Turn the main breaker in your electric panel back ON. All done! PowerX App will notify you of successful connection. Your PowerX Water Heater - Electric is ready to use. PowerX Water Connection PowerX Water Heater... -
Page 18: Add Water Leak Detection Cable (Optional)
Add water leak detection cable (optional) If your kit includes the water leak detection cable, attach it to the PowerX Water Heater - Electric unit and place the blue section in a location where any potential leak points exist. water leak detection cable... -
Page 19: Connectors
Connectors PowerX Water Heater - Electric (Do not use this micro USB port for charging) Set of temperature sensors (Black, Blue, and Red) Water leak detection cable User button (optional) PowerX Hub Micro USB connector LAN connection User button (optional) -
Page 20: Product Specifications
PowerX Water Heater - Electric LoRa PowerX Hub 802.1/b/g/n - 2.4GHz Indoor/Outdoor use Indoor only Device requirements Requires iOS 9.0 and up, or Android 6.0 and up. PowerX interface PowerX App: Requires PowerX account and acceptance of the terms of service found at www.powerx.co... - Page 21 Product Specifications Operating temperature 32 - 154°F Operating Relative Humidity (RH) <90% Operating elevation <6560 Feet Waterproof No (IPX0) Warranty 1-year limited warranty...
-
Page 22: Disclaimer
Disclaimer PowerX Water Heater - Electric falls under the definition of permitted power monitoring equipment given that: (i) it’s identified as a field-installable accessory, and (ii) the total area of conductors and equipment at any cross-section of the wiring space does not exceed 75 percent of the cross-sectional area of that space, as per section 312.8(B) of the 2017 National Electrical Code... -
Page 23: Powerx Suite
Suite PowerX is most effective as a Suite, including Water, Electricity and Water Heating measurement. We strongly recommend installing the full Suite for highest efficiency and optimization. - Page 24 powerx.co...
Need help?
Do you have a question about the Electric and is the answer not in the manual?
Questions and answers