
Related Manuals for POCO Line 5957809/00


Summary of Contents for POCO Line 5957809/00
- Page 1 B E D I E N U N G S A N L E I T U N G – D E Side-by-Side K-/G-KOMBI 5 9 5 7 8 0 9 / 0 0 5 9 5 7 8 0 9 / 0 1 5 9 5 7 8 0 9 / 0 2...
- Page 2 Sicherheitshinweise - 1 - Übersicht -15- Montage -16- Bedienung -21- Aufbewahrung von Nahrungsmitteln -24- Täglicher Gebrauch -28-...
- Page 3 Sicherheitshinweise...
- Page 4 Sicherheitshinweise...
- Page 5 Sicherheitshinweise...
- Page 6 Sicherheitshinweise...
- Page 7 Sicherheitshinweise...
- Page 8 Sicherheitshinweise...
- Page 9 Sicherheitshinweise...
- Page 10 Sicherheitshinweise...
- Page 11 Sicherheitshinweise...
- Page 12 Sicherheitshinweise...
- Page 13 Sicherheitshinweise...
- Page 14 Sicherheitshinweise...
- Page 15 Sicherheitshinweise...
- Page 16 Sicherheitshinweise...
- Page 17 Übersicht Regalböden im Regalböden im Tiefkühlbereich Kühlbereich Türfächer im Türfächer im Kühlbereich Tiefkühlbereich Wassertank Abdeckplatten für Einschübe Abdeckplatten Kühlfach Einschübe Kühlfächer Verstellbare Füße...
- Page 18 Montage Wenn die Breite der Küchentür für das Kühlgerät nicht ausreicht, können der Griff und die Türen wie folgt abmontiert werden. Griffe abmontieren Benötigte Werkzeuge: Sechskantschlüssel aus dem Zubehörbeutel. • Stellen Sie sicher, dass das Gerät leer und der Stecker aus der Steckdose gezogen ist.
- Page 19 Montage Türen abmontieren Benötigte Werkzeuge: Kreuzschlitzschraubendreher, Flachkopfschraubendreher. Stellen Sie sicher, dass das Gerät leer und der Stecker aus der Steckdose gezogen ist. • Um die Tür entfernen zu können, müssen Sie das Gerät nach hinten neigen. Lehnen Sie das Gerät an einen stabilen Gegenstand, damit es beim Abmontieren der Tür nicht wegrutschen kann.
- Page 20 Montage 4.Nehmen Sie die Tür und legen Sie sie auf eine weiche Unterlage. Montieren Sie danach die andere Tür auf dieselbe Weise ab. 5.Schrauben Sie die unteren Scharniere ab. 6.Schrauben Sie die Türen nach dem Aufstellen des Geräts wieder an.
- Page 21 Montage Platzbedarf · Lassen Sie genug Platz zum Öffnen der Tür. · Lassen Sie auf beiden Seiten sowie hinten eine Lücke von mindestens 50 mm frei. 1770 min=50 min=50 1800 1560 135° Nivellieren des Kühlgeräts Door - Drehen Sie die Füße von Hand im Uhrzeigersinn, um sie höher zu stellen.
- Page 22 Montage Standort Das Gerät sollte weit von Wärmequellen, wie z. B. Heizkörpern, Heizkesseln, direktem Sonnenlicht u. ä., entfernt aufgestellt werden. Die Luft muss hinten am Gehäuse frei zirkulieren können. Falls das Gerät unterhalb eines überstehenden Wandabschnitts aufgestellt wird, funktioniert das Gerät am besten, wenn der Mindestabstand zwischen der Oberkante des Gehäuses und dem Wandabschnitt mindestens 50 mm beträgt.
- Page 23 Bedienung Fernbedienung Tasten Zum Einstellen der Temperatur im Tiefkühlbereich (linke Seite) zwischen 14 °C und 22 °C. Zum Einstellen der Temperatur im Kühlbereich (rechte Seite) zwischen 2 °C und 8 °C und zum Ausschalten. Bei Auswahl von “OFF” wird der Kühlbereich abgeschaltet. Zur Auswahl der Betriebsart: SMART, ECO, SUPER COOLING, SUPER FREEZING und benutzerdefinierte Einstellung (keine Symbolanzeige im Display).
- Page 24 Bedienung Das Schloss-Symbol wird bei Sperrung der Tasten angezeigt. Solltemperatur des Tiefkühlbereichs anzeigen. Solltemperatur des Kühlbereichs anzeigen. Warnung bei geöffneter Tür Falls eine Tür 90 Sekunden lang geöffnet bleibt, ertönt solange ein Warnton, bis die Tür geschlossen wird. Betrie Anzeige Anzeige der Gefriertemperatur Anzeige der Kühltemperatur bsart...
- Page 25 Bedienung Kindersicherung Diese Funktion soll verhindern, dass Kinder das Gerät bedienen. Zum Aktivieren dieser Funktion dr IT..cken Sie auf und halten Sie die Sperrtaste (“LOCK 3S“) etwa 3 Sekunden lang gedrückt. Die Schloss-Anzeige leuchtet, wenn die Kindersicherung aktiviert ist. Zum Deaktivieren der Funktion halten Sie die Taste (LOCK 3S) etwa 1 Sekunde gedrückt.
- Page 30 Täglicher Gebrauch Vor dem ersten Gebrauch des Wasserspenders muss der Wassertank entnommen und gereinigt werden, der sich im Kühlbereich befindet. 1. Heben Sie zuerst das Fach mit dem Wassertank an und nehmen Sie es dann mit dem Deckel aus dem Gerät. Nehmen Sie den Deckel ab, um den Tank und den Deckel abzuwaschen.
- Page 31 Täglicher Gebrauch Erster Gebrauch Reinigen des Innenraums Waschen Sie den Innenraum und das Zubehör im Innenraum vor dem ersten Gebrauch des Geräts mit lauwarmem Wasser und etwas Neutralseife ab, um den typischen fabrikneuen Geruch zu beseitigen. Trocken Sie dann alles gründlich ab. Wichtig! Benutzen Sie keine Reinigungsmittel oder Scheuermittel, da sie die Oberflächen angreifen.
- Page 32 Täglicher Gebrauch Auftauen Gefrorene oder tiefgefrorene Lebensmittel können vor dem Verzehr im Kühlfach oder bei Raumtemperatur aufgetaut werden. Das hängt von der jeweils zur Verfügung stehenden Zeit ab. Kleinteile lassen sich sogar noch im gefrorenen Zustand direkt nach dem Entnehmen aus dem Tiefkühlfach zubereiten.
- Page 33 Täglicher Gebrauch TEmpfohlene Solltemperaturen Empfohlene Solltemperaturen Environment Temperature Temperature Setting Kühlfach eingestellt auf 4. Summer Tiefkühlfach eingestellt auf -18. Kühlfach eingestellt auf 4. Normal Tiefkühlfach eingestellt auf -18. Kühlfach eingestellt auf 4. Winter Tiefkühlfach eingestellt auf -18. • Die obigen Angaben dienen als Richtwerte für das Einstellen von Temperaturen.
- Page 34 Täglicher Gebrauch Reinigung Aus hygienischen Gründen muss das Innere des Geräts sowie das Innenzubehör regelmäßig gereinigt werden. Vorsicht! Während der Reinigung darf das Gerät nicht an eine Steckdose angeschlossen sein. Stromschlaggefahr! Schalten Sie vor dem Reinigen das Gerät ab und ziehen Sie den Netzstecker. Alternativ können Sie auch den Stromkreis am Automaten abschalten oder die Sicherung herausdrehen.
- Page 35 Täglicher Gebrauch Art des Kühlgeräts:...
- Page 36 Täglicher Gebrauch...
- Page 37 Täglicher Gebrauch TECHNISCHE ANGABEN 5 9 5 7 8 0 9 / 0 0 Referenz: 5 9 5 7 8 0 9 / 0 1 5 9 5 7 8 0 9 / 0 2 Nennspannung: 220 - 240V~ Strom: 1.3 A Nennfrequenz: 50 Hz...
- Page 38 Täglicher Gebrauch...
- Page 39 Täglicher Gebrauch...
- Page 40 Täglicher Gebrauch Gerat steht nicht ebenerdig Die FOBe neu einstellen Das Gerat beruhrt die Wand oder Das Gerat etwas versetzen Ungewi:ihnliche Gerausche andere Gegenstande. Ein Bauteil (z B. eine Rohrleitung) auf Das Bauteil ggf. vorsichtig der Ruckseite des Gerats beruhrt ein wegbiegen anderes Teil am Ger社oder an der Wand...
- Page 42 Side by Side Refrigerator 5 9 5 7 8 0 9 / 0 0 5 9 5 7 8 0 9 / 0 1 5 9 5 7 8 0 9 / 0 2...
-
Page 43: Table Of Contents
Content - 1 - Safety Information -10- Overview -11- Installation -16- User Interface -19- Storage food -22- Daily Use... -
Page 44: Safety Information
This product is for household use only ! Please read these instructions carefully beforethe first use of this product and save thismanual for your future reference Safety information In the interest of your safety and to ensure the correctuse , before installing and first using the applianceread this user manual carefully , including its hints andwarnings . - Page 45 Safety information • Cleaning and user maintenance shall not be madeby children unless they are aged from 8 years andabove and supervised. • Keep all packaging well away from children. Theres risk of suffocation. • If you are discarding the appliance pull the plugout of the socket , cut the connection cable ( asclose to the appliance as you can ) and removethe door to prevent playing children to sufferelectric shock or to close...
- Page 46 Safety information WARNING! Do not locate multiple portable socketoutlets or portable power suppliers at the rear of theappllance. • Do not store explosive substances such as aerosolcans with a flammable propellant in this appliance. • The refrigerant isobutane ( r-600a ) is contained withinthe refrigerant circuit of the appliance , a natural gasith a high level of environmental compatibility ,which is nevertheless flammable.
- Page 47 Safety information WARNING ! Any electrical components ( plug , powercord , compressor and etc . must be replaced by acertified service agent or qualified service personnel. • Power cord must not be lengthened. • Make sure that the power plug is not squashed ordamaged by the back of the appliance .
- Page 48 Safety information • Frozen food must not be re-frozen once it has beenhawed out. • Store pre-packed frozen food in accordance with thefrozen food manufacture s instructions • Appliance's manufactures storage recommendations should be strictly adhered to . Refer to relevant instructions.
- Page 49 Safety information • If the appliance is left empty for long periods , switchoff , defrost , clean , dry and leave the door open to prevent. Care and cleaning • Before maintenance , switch off the appliance and disconnect the mains plug from the mains socket. •...
- Page 50 Safety information • The appliance must not be located close to radiatorsor cookers. • Make sure that the mains plug is accessible after theinstallation of the appliance Service Any electrical work required to do the servicing of the appliance should be carried out by a qualified electrician or competent person.
- Page 51 Safety information Environment Protection This appliance does not contain gases which could damage the ozone layer, in either its refrigerant circuit or insulation materials . The appliance shall not be discarded together with the urban refuse and rubbish. The insulation foam contains flammable gases : the appliance shall be disposed according to the appliance regulations to obtain from your local authorities .
- Page 52 Safety information Packaging materials The materials with the symbol are recyclable. Disposethe packaging in a suitable collection containers to recycle it . Disposal of the appliance 1 . Disconnect the mains plug from the mains socket . 2 . Cut off the mains cable and discard it. WARNING! During using , service and disposal the appliance , please pay attention to symbols left side , which is located on rear of appliance...
-
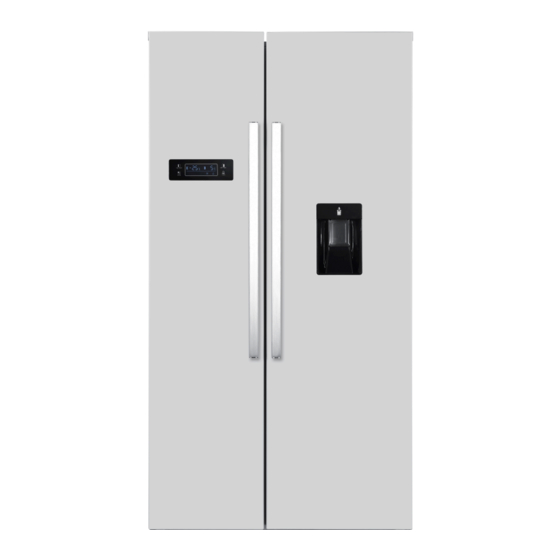
Page 53: Overview -10
Overview Freezer shelves Fridge shelves Freezer door Fridge door shelves shelves Water tank Drawer covers Crisper covers Drawers Crispers Adjustable feet... -
Page 54: Installation -11
Installation If kitchen door is not wide enough to pass the refrigerator, handle and doors can be removed according to bellow process. Remove the handles Tool required: Hex wrench in accessary bag. • Ensure the unit is unplugged and empty. •... - Page 55 Installation Remove the doors Tool required: Philips screwdriver, Flat bladed screwdriver. • Ensure the unit is unplugged and empty. • To take the door off, it is necessary to tilt the unit backwards. You should rest the unit on something solid so that it will not slip during the door removing process.
- Page 56 Installation 4. Lift t he d oor and p lace i t o n a softpad. Then remove an other door as same process. 5. Unscrew bottom hinges. 6. After the appliance is positioned! install the doors as reversed process.
- Page 57 Installation Space Requirement · Keep enough space of door open. · Keep at least 50mm gap at two sides and back. 1770 min=50 min=50 1800 1560 135° Levelling the refrigerator Door - Clockwise rotate feet to heighten them by hand. - Anticlockwise rotate feet to lower them by hand.
- Page 58 Installation Location The appliance should be installed well away from sources of heat such as radiators, boilers, direct sunlight etc. Ensure that air can circulate freely around the back of the cabinet. To ensure best performance, if the appliance is positioned below an overhanging wall unit, the minimum distance between the top of the cabi- net and the wall unit must be at least 100 mm.
-
Page 59: User Interface
User Interface Using the Control Panel Buttons Press to adjust temperature of freezer compartment (left side) from 14 C to 22 Press to adjust temperature of fridge compartment (right side) from C to 8 C and “OFF”. If select “OFF”, fridge compartment will be turned off. - Page 60 User Interface LOCK, the symbol will light on if buttons are locked. Display the setting temperature of freezer compartment. Display the setting temperature of fridge compartment. Door Open Alarm If one door keeps open for 90 seconds, periodical alarm will be arisen until the door is closed.
- Page 61 User Interface Child safety lock This function is designed to prevent children from operating the appliance. To activate the function, press and hold LOCK 3S for about 3 seconds. The lock indicator light will illuminate indicating the safety lock function is activated. To deactivate the function, press and hold LOCK 3S for about 1 second.
-
Page 62: Storage Food
Storage food Fridge food Storage time of different food in different compartments according to be below table. Storage Refridgeratar comportments Type of food time • Food with natural preservatives, such jams, Door or balconies of fridge juices, drinks, condiments. 3 days compartment •... - Page 63 Storage food Food Storage time Bacon, casseroles, milk 1 month Bread, ice cream, sausages, pies, prepared shellfish, oily fish 2 month Non-oily fish, shellfish, pizza, scones and muffins 3 month Ham, cakes, biscuits, beef and lamb chops, poultry pieces 4 month Butter, vegetables (blanched), eggs whale and yolks, cooked crayfish, minced 6 month meat (raw), pork (raw)
- Page 64 Storage food Hints for storage of frozen food To obtain the best performance from this appliance, you should • Make sure that the commercially frozen foodstuffs were adequately stored by the retailer, • Be sure that frozen foodstuffs are transferred from the food store to the freezer in the shortest possible time ;...
-
Page 65: Daily Use
Daily Use Before using the water dispenser for the first time, remove and clean the water tank located inside the fridge compartment. Lift and take off tank balcony first, then take off water tank with cover. Detach the cover to wash and clean the tank and cover. 2. - Page 66 Daily Use First use Cleaning the interior Before using the appliance for the first time, wash the interior and all internal accessories with lukewarm water and some neutral soap so as to remove the typical smell of a brand new product, then dry thoroughly. Important! Do not use detergents or abrasive powders, as these will damage the finish.
- Page 67 Daily Use Thawing Deep-frozen or frozen food, prior to be used, can be thawed in the freezer compartment or at room temperature, depending on the time available for this operation. Small pieces may even be cooked still frozen, directly from the freezer. In this case, cooking will take longer.
- Page 68 Daily Use Temperature setting recommendation Temperature Setting Recommendation Environment Temperature Temperature Setting Fridge set on 4 ℃ Summer Freezer set on -18 ℃ Fridge set on 4 ℃ Normal Freezer set on -18 ℃ Fridge set on 4 ℃ Winter Freezer set on -18 ℃...
- Page 69 Daily Use Cleaning For hygienic reasons the appliance interior, including interior accessories, should be cleaned regularly. Caution! The appliance may not be connected to the mains during cleaning. Danger of electrical shock! Before cleaning switch the appliance off and remove the plug from the mains, or switch off or turn out the circuit breaker or fuse.
- Page 70 Daily Use Product Information Sheet POCO Supplier's address: POCO Einrichtungsmärkte GmbH Industriestraße 39 59192 Bergkamen Germany Design type: freestanding Other refrigerating appliance: Parameter Parameter Height Overal Total volume (dm or |) dimensions (millimetre) Depth Energy efficiency class Airborne acoustical noise emissions Airborne acoustical noise emission (dB(A) re 1 pW) class...
- Page 71 Daily Use Compartment parameters and values Compartment Freezing Comportment type volume capacity or |) (kg/24h) 0-star or ice 1-star 2-star 3-star 4-star 2-star section Variable temperature compartment For 4-star compartments Fast freeze facility Light source parameters: Type of light source Energy efficiency class Minimum duration of the guarantee offered by the manufacturer: 24 months Additional information:N/A...
- Page 72 Reference: 5957809/00 5957809/01 5957809/02 220V-240V~ Rated voltage: Ampere: 1.3A Rated frequency 50Hz 240W Defrost power input: SN,N,ST Climate class: R 600a(75g) Refrigerant: Protection against electrical shock: CYCLOPENTANE Insulation foam: Climate class: - Extended temperate(SN):'this refrigerating appliance is intended to be used at ambient temperatures ranging from 10 °C to 32 °C';...
- Page 73 Daily Use Troubleshooting Caution! Before troubleshooting, disconnect the power supply. Only a qualified electrician of competent person must do the troubleshooting that is not in this manual. Important! There are some sounds during normal use (compressor, refrigerant circulation). Problem Possible cause Solution Mains plug is not plugged in or Insert mains plug.
- Page 74 CORRECT D1SPOSAL OF TH1S PRODUCT This marking indicates that this product should not be disposed with other household wastes throughout the EU. To prevent possible harm to 宜 the environment or human health from uncontrolled waste disposal, recycle it responsibly to promote the sustainable reuse of material resources.
- Page 75 CKPOC-J01-A...
Need help?
Do you have a question about the 5957809/00 and is the answer not in the manual?
Questions and answers