Advertisement
Quick Links
Advertisement

Related Manuals for WATTECO Ventil'O 50-70-166


Summary of Contents for WATTECO Ventil'O 50-70-166
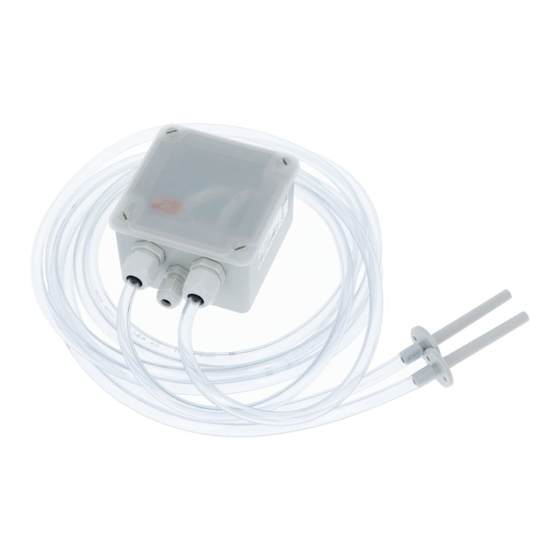
- Page 1 Ventil’O 50-70-166 50-70-101...
- Page 2 Association Attendre / Wait Attendre / Wait OFF : >5 sec 3 sec 3 sec Vidéo / Video : LED rouge LED rouge : Extinction ON - OFF Red LED Red LED : Switching off Attendre / Wait https://www.watteco.fr/ assistance/tutoriels-video/...
- Page 3 Connectiques Entrée / Input S0 Connectors 50-70-166 Caractéristiques : Câblage sur sortie contact sec isolé Characteristics: Wiring to isolated dry contact output Impédance / Impedance: 1MΩ F<100Hz Tension : 0-30Vcc Courant délivré / Delivered current: 3.5 µA Fréquence signal max / Signal frequency max: 0-100 Hz Câblage sur sortie collecteur ouvert Wiring to open collector output...
- Page 4 Connectiques 50-70-166 Connectors Report d’état ou comptage d’impulsion (si prévu) Status report or pulse count (if provided) Utiliser un câble souple avec une gaine avec un Ø compris entre 2.5mm à 6.5mm et des fils monobrin (ou multibrins avec embouti serti) 20-26AWG. Use a flexible cable with a sheath with a diameter between 2.5mm and 6.5mm and single- stranded (or multi-stranded with crimp) 20-26AWG wires.
- Page 5 Connectiques 50-70-166 Connectors Dénuder chaque brin sur une longueur de 5 à 6mm puis raccorder comme ci-dessous : Strip each strand to a length of 5-6mm and connect as below: LEDS...
-
Page 6: Installation
Installation Setting up Ouverture / Fermeture Opening / Closure Dévissez les 4 vis un ¼ de tour Unscrew the 4 screws by ¼ turn Montage mural Wall mounting Placer les chevilles et visser le boîtier au mur Place the dowels and screw the housing to the wall... - Page 7 Installation Raccordement / Connection Setting up Percer le conduit au diamètre 8mm / Drill the duct to 8mm diameter Insérer la prise d’air dans le conduit, côté piquage dans le flux d’air / Insert the air intake into the duct on the airflow side Fixer la prise d’air sur le conduit avec les 2 vis auto-taraudeuses fournies / Fix the air intake to the duct with the 2 self-tapping screws provided Raccorder le tube souple sur la prise d’air en emmanchant au maximum / Connect the...
- Page 8 Installation Orientation des tubes Setting up Tube orientation ✓ ✓ Pour que le capteur fonctionne correctement, il faut éviter la formation de buée dans les tuyaux. / For the sensor to work properly, it is necessary to avoid fogging of the pipes.
- Page 9 Propagation radioélectrique Radio propagation Vérifier la couverture radio avec par exemple le Netw’O. Check the radio coverage with the Netw’O. Pour que le capteur fonctionne correctement, le nombre d’obstacles doit être limité afin d’éviter une atténuation excessive des ondes radio. For the sensor communicates correctly, the number of obstacles should be limited to avoid excessive radio attenuation.
- Page 10 Caractéristiques Characteritics Référence / Reference 50-70-101 50-70-166 Classe / Class Niveau de puissance / +14 dBm +14 dBm Power Level Mesures / Measure : Différence de pression en 2 points / ✓ ✓ The pressure difference at 2 points ✓ Entrée S0 / Input S0 Interne Interne...
- Page 11 Watteco represented by JC LE BLEIS, declares that the radio equipment type 50-70-166 / 50-70-101 is in conformity with Directive 2014/53/EU (RED). The full text of the EU Declaration of Conformity is available at the following web...
- Page 12 IoT device manufacturer Thanks for choosing Merci d’avoir choisi WATTECO devices les produits WATTECO...
Need help?
Do you have a question about the Ventil'O 50-70-166 and is the answer not in the manual?
Questions and answers