Table of Contents
Advertisement
Advertisement
Table of Contents

Related Manuals for Skycruiser TX-650

Summary of Contents for Skycruiser TX-650
-
Page 2: Table Of Contents
Contents Thank you for choosing our Metal Detector TX-650. Please read this manual carefully and know the function of TX-650 before use. And please keep it for future reference. Preparation ------------------------------------------------------------------------------------------ Tips: 1. Set-up -------------------------------------------------------------------------------------------- It is recommended to use the TX-650 outdoors, because of too much 2. -
Page 3: Preparation
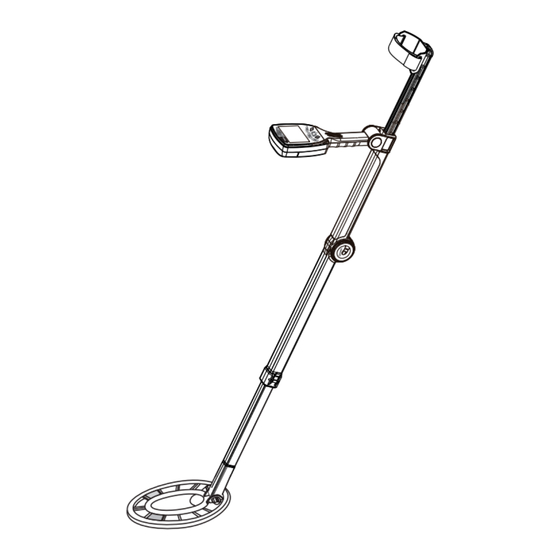
Preparation Step 2. Press down the UNLOCK button to release the handle. 1. Set-up ① Press the UNLOCK button. Search Coil Lock Knob Connecting Rod 2 Connecting Rod Lock Control Panel ② Unfold the detector. Control Box Adjustable Shaft Step 3. Slide out the armrest to the desired length (typically just under your Armrest Strap elbow). -
Page 4: Quick Start Guide
8. Sensitivity Indicator 2. Quick Start Guide 9. Mode Indicator 10. MODE Button: Select a detection mode (i.e. discrimination mode) 11. Power Button: Press to power the detector on or off 12. SENSITIVITY Button: Increase or decrease the sensitivity 13. P-P/PINPOINT Button: Press to precisely locate a target 14. -
Page 5: Basic Operation
Basic Operation Target Metal Value—Work with the Target Metal Cursor to indicate the target metal, with ferrous (iron) targets at the left, non-ferrous targets that are thin or with low conductivity in the middle, and thick or targets with high conductivi- ty (e.g., thick silver) at the right. -
Page 6: Audio Features
JEWELRY Mode—Designed to find jewelry such as rings, bracelets, watch- 2. Audio Features es, and necklaces, while ignoring most iron trash. Tone ID—The Metal detector produces three distinct tones based on a CUSTOM Mode—It can be programmed by the user and the metal detec- target’... -
Page 7: Notch Discrimination Pattern
Press the (↑) or (↓) DISCRIM buttons to position the target metal cursor on 5. Notch Discrimination Pattern the upper line above the one you want to eliminate (see the figure above). Notch Discrimination—Use the (↑) or (↓) DISCRIM buttons with the Press the ENTER button to eliminate this cursor from the lower line (see the ENTER button to eliminate trash objects from detection such as foil or figure below). -
Page 8: Bench Tests
The center of the search coil is directly above the target with the depth of a coin-sized target shown on the depth indicator. The symbol "P-P" for PINPOINT displays on the LCD screen while the detector is operated with the PINPOINT mode. Upper Line: Indicate the signal strength Once you get familiar with the detector and know how it responses to metals... -
Page 9: Battery Replacement
To fully search an area, overlap the sweeping of your search coil by half the length of the coil (about 5.51 inches). Sweep the search coil in a straight line or with a slight arc at a sweeping speed of about 2.23 mph. 2.23 mph 2.23 mph Battery Replacement... -
Page 10: Troubleshooting
Troubleshooting Care and Maintenance The metal detector is durable and designed for outdoor use. However, as with Problems Solutions all electronic equipment, there are some simple ways you can care for your detector to maintain its best performance. 1. Ensure batteries are installed correctly. No Power 2. -
Page 11: Contact Us
Contact Us We provide a one-year warranty for our products. If you have any problems or need any help when using the product, please don’ t hesitate to contact us and we will help you solve the problems as soon as possible. - 18 -...
Need help?
Do you have a question about the TX-650 and is the answer not in the manual?
Questions and answers