Table of Contents
Advertisement
Quick Links
Advertisement
Table of Contents

Related Manuals for Eert C304

Summary of Contents for Eert C304
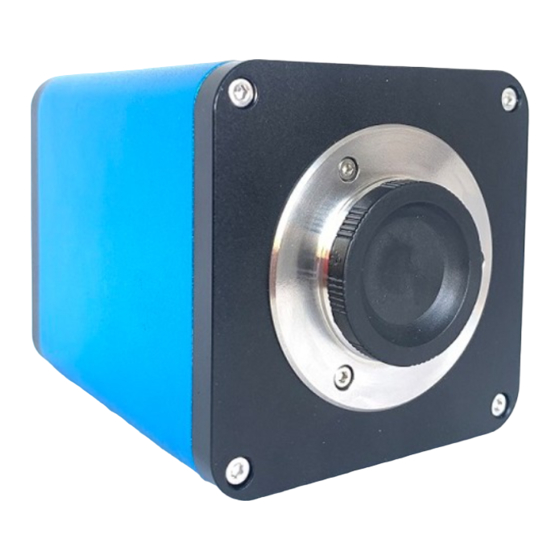
- Page 1 Eert C304 User Manual V1.0 Company website : w ww.eertvision.nl...
-
Page 2: Table Of Contents
Contents Introduction ..............................4 1 Preparation ............................... 4 1.1 Mode Switch ............................4 1.2 PC Mode Matching Device ....................... 4 1.3 HDMI Mode Matching Device ......................5 2 PC Mode Operation ..........................5 2.1 Installation and Connection ......................5 2.1.1 Installation ............................ 5 2.1.2 Connect Camera ........................... - Page 3 3.1.9 Photograph ..........................31 3.1.10 Recording ..........................32 3.1.11 Open Picture ..........................33 3.1.12 Compare Pictures ........................34 3.1.13 System Settings ........................36 3.1.14 Freeze ............................36 3.1.15 Flip/ Mirror ..........................36 3.1.16 HDR ............................37 3.1.17 FBL ............................37 3.1.18 Anti-screen flicker ........................
-
Page 4: Introduction
Introduction Our C304 cameras has global patented autofocus technology, 12M pixel or 4K ultra-high-definition image quality, as well as high-speed and stable USB and HDMI dual output image transmission. Different operations can be carried out at the same time without interfering with each other, super high work efficiency. -
Page 5: Hdmi Mode Matching Device
3.Computer configuration requirements: Processor: Intel(R) Core(TM) i3-3220 CPU @3.30GHz 3.30GHz, and above. Installed memory (RAM): 2.00GB and above. 1.3 HDMI Mode Matching Device Front end matching: C-mount microscope or C-mount lens. Back-end matching: With HDMI, it can support 1080P@50Hz or 1080P@60Hz displays. 2 PC Mode Operation 2.1 Installation and Connection 2.1.1 Installation... -
Page 6: Connect Camera
2.1.2 Connect Camera Open "Device" click "UVC_Camera" to connect the device. After the device is successfully connected, it prompts "Connected " and you can start operation. Company website : w ww.eertvision.nl... -
Page 7: Functional Area
2.2 Functional Area Measurement tool Camera control area Menu toolbar Measurement data list area Connection status Image display area Frame rate, resolution status 2.3 Operation 2.3.1 Config 2.3.1.1 Focus Mode Focus mode: automatic\manual\OneKey Company website : w ww.eertvision.nl... - Page 8 Check “Auto”, the program judges that the image is blurred and re-focuses automatically. Check manual focus and pull the focus progress bar to adjust the focus value. In manual mode, scroll the mouse wheel to adjust the focus position. One-key focusing mode, can realize one-time auto-focusing by clicking the mouse.
- Page 9 When the "Auto" exposure is checked, the "Brightness" progress bar can be pulled to adjust the brightness. When you check the "Hand" exposure, you can pull the "Gain" progress bar to adjust the gain, or pull the "Shutter" progress bar to adjust the shutter; Default:The default is automatic exposure.
- Page 10 2.3.1.5 Function 1.Chroma\Saturation\Contrast\Sharpness\Zoom Chroma: 1-100 value can be adjusted. The default value is 50; Saturation: 1-100 value can be adjusted. The default value is 50; Contrast: 1-100 value can be adjusted. The default value is 50; Sharpness: 0-15 adjustable. The default value is 4. 2.Resolution: There are three groups of resolutions that can be switched in the resolution options.
-
Page 11: Extended Depth Of Focus
The whole movement of the sensor in the camera is 16mm. Click "Center", the sensor will move to the middle position, and the focus mode will automatically switch to manual mode. After setting the parameters, click "Save" to save all the parameters. Click "Reset" to restore all parameters to factory settings. - Page 12 snapshots; 3. Set the grab waiting interval, the unit is ms; 4. Click Start, and when the current progress value is consistent with the number of snapshots, the interface will display a picture. There is a hint when the synthesis is completed, and the depth of field synthesis is completed.
-
Page 13: Video Stitch
2.3.3 Video Stitch 1. First set the white balance and exposure to manual exposure mode. Then adjust the brightness of the light source to adjust the exposure to an appropriate value to avoid overexposure during the splicing process. 2. Select stitching and adjust stitching speed. There are "fast, middle, slow" options for speed. Click ‘start’... - Page 14 Click the “Set” icon in the menu and select "Custom" as the naming method. There are two ways to customize a photo: Method 1: Click the "Caputer" icon in the menu toolbar, the picture will be displayed on the screen, then click the "Save" icon in the menu, specify the path and name, and click Method 2: Directly click the "Save"...
-
Page 15: Recording
Modify the photo format: Click the “Set” icon in the menu and select the desired photo format. Modify the default naming method for pictures: click the “Set” icon in the menu, select the quick save method, and name it by date by default. If you need to name the scanner, you need to use the scanner. - Page 16 calibration unit selection tool angle measuring tool calibration tool rectangle select focus area measuring arc tracing tool circle select measurement object tool concentric circles automatic edge finding tool polygon straight line Measuring line-circle horizontal line double-circle vertical line text parallel lines crosshair 2.3.6.2 Calibration 1.
- Page 17 deleted, and click the red circle to delete the calibration group. Click the red circle to delete the calibration. 2.3.6.3 Measurement Setup Before measurement, you can click “Set” to set the measurement tool. Company website : w ww.eertvision.nl...
- Page 18 You can set the point thickness, color, line width, line color, font size and font color of the measured line. You can set the line width and color of the crosshair. Set the saving path, mode and format of a photo Set the decimal point accuracy of measurement data After checking, reduce line drawing...
- Page 19 2.3.6.4 Measurement Operation The measurement tool includes various stitch measurements. First select the appropriate calibration and unit according to the specific application. Pull down the calibration list and select calibration. 2.Then choose the appropriate tool to measure. When measuring, just click the anchor point of the measurement with the mouse.
- Page 20 Delete measurement data: In the measurement data list, select the data to be deleted and click the right mouse button, and it will prompt to delete a group of data, or delete all data, select according to your needs. 2.3.6.5 Select Focus Area Tool After operating the measurement, the focus mode is automatically switched to manual mode.
- Page 21 3. Select multiple primitives: you can select multiple measurement data in the image display area with the mouse, the color of the selected multiple primitives becomes the inverse of the set color, and the corresponding primitive data is displayed in gray shade in the data list. Select multiple measurement data by mouse.
- Page 22 Multiple selection of data in the measurement data list. 2.3.6.7 Tracing Tool When the image display area is a picture, click the "Tracking" tool, you can hold down the left mouse button and drag the picture in the image display area to check the incomplete display area of the picture.
- Page 23 Show crosshairs: In the measurement mode, press and hold the left button to drag the crosshairs. Note: Do not hold and drag at the intersection In the measurement mode, double-click any line with the left mouse button to pop up a property window to set it. 2.3.6.9 Marking Tool Click the "Mark"...
- Page 24 2.3.7 Connection Status Display the connection status of the camera, "connection successful" or "connection failed". 2.3.8 Resolution status After switching the resolution each time, the resolution status bar in the lower right corner of the software displays the current camera resolution. Switch resolution Display the current camera resolution Company website...
-
Page 25: Detailed Hdmi Mode Operation
3 Detailed HDMI Mode Operation 3.1 Control Company website : w ww.eertvision.nl... - Page 26 Company website : w ww.eertvision.nl...
-
Page 27: Language
3.1.1 Language The language mode can be selected by clicking the upper left corner of the menu with the mouse. Simplified Chinese, English, Traditional, and Japanese are available. 3.1.2 Menu Lock When "locked", the menu is always displayed. When "open", move the mouse to the upper left area to display the menu, move out of the upper left area to hide the menu. -
Page 28: Exposure
After checking the "ROI", the area size can choose the size of the focus frame. Pull the progress bar to adjust the horizontal or vertical position of the focus frame. Focus Frame: In auto focus mode, check the "ROI", the image display area will display the focus frame. -
Page 29: Function
AWB: Realize automatic white balance under different color temperature conditions. MWB: Pull the "red, green and blue" progress bar to adjust the color value of "red, green and blue". 3.1.7 Function Function: Contrast\Sharp\Saturation\Ezoom Contrast: 1-15 value can be adjusted. The default value is 0; Sharp: 0-15 adjustable. - Page 30 image display area, and select "delete" to not display crosshairs. Set the number of horizontal and vertical lines. Display crosshairs: In the measurement mode, press and hold the left button to drag the crosshairs. Note: Do not press and hold at In the measurement mode, double-click a single cross line to set its color and position, and it can be centered and...
-
Page 31: Photograph
, Select “ hide” , All cross lines or cross tick marks will be hidden in 3.Click Crosshair tool the image area. ,Pull down to set the crosshair color. After the 4.Click on the set crosshair color tool color is set, draw the crosshair again to take effect, the color of the crosshair drawn before does not change 3.1.9 Photograph 3.1.9.1 Photograph Operation... -
Page 32: Recording
3.1.9.3 Photo Format Click on the photo format drop-down to select the photo format.. There are two formats: .bmp or .jpg. 3.1.9.4 Photo Naming Rules Select "Auto" to name the photo according to the time, select "Custom" to enter a name to save. -
Page 33: Open Picture
Note: The recorded video is named by date and automatically saved in the TF card in .H264 format. The maximum length of a single recording is about 2 hour, and the size is about 4G. More than 2 hours will automatically stop recording. 3.1.11 Open Picture Click on “open”... -
Page 34: Compare Pictures
1.Clickthe“ scaling” tool,you can zoom in and out of pictures. 2.Click the“Full Screen” tool,the picture interface displays the entire picture. 3.Click“1:1” tool.The picture interface displays part of the picture. Press and hold the left mouse button to move the picture position. 4.Click“Browse”... - Page 35 Select the picture you want to compare, pop up the comparison picture interface, the left side of the screen is the real-time video interface, and the right side is the selected picture. Realtime picture Compare picture Click“compare picture” icon again,closed Compare picture function.. Note:Compare pictures, only pictures in .bmp format are supported.
-
Page 36: System Settings
3.1.13 System Settings Click“Time Set” icon,Pop-up time setting interface. Click“Edit Time”, you can click the date drop-down box to set the date; select the hour, minute, and second to modify the time. After each time is set, you need to click“Save Time”to save successfully.Click the "Close"... -
Page 37: Hdr
3.1.16 HDR HDR: : : : 0-3 value adjustable. The default value is 1. 3.1.17 FBL ,sensor The sensor in the camera moves up and down for 16mm,Click“FBL” moves to the middle position. 3.1.18 Anti-screen flicker Anti-screen flicker effect is achieved after ticking. 3.1.19 Black and White Mode Checked for black and white mode. -
Page 38: Version
3.1.21 Version You can view the current software version number. 3.2 Measurement Click the measurement tool to perform measurement operations. After the measurement operation is completed, if the menu needs to be displayed, when the menu lock is "locked" , click the right mouse button in the image area to display the menu. When the menu lock is "on"... -
Page 39: Assist Tools
3.2.1 Assist Tools 3.2.1.1 Color Setting Click“Color Setting” icon and pop-up setting interface. Company website : w ww.eertvision.nl... -
Page 40: Measurement Tool
Set line width and color. Set the size and color of the text. 3.2.1.2Measurement Mode After operating the measurement, the measurement mode automatically becomes selected, and the program automatically enters the measurement mode, The focus mode and focus area can no longer be operated,You must click the measurement mode again with the left mouse button to operate the focus mode and focus area. -
Page 41: Custom Template
displays the scanned data. A folder named after this data is automatically saved in the USB flash drive, and the picture is saved in this folder. 3.2.4 Custom Template After drawing the primitives in the image area, Click“New” icon, and the window "whether Convert primitives to a template"... - Page 42 2.Drag the marking line to align with the engraved line of the scale, input name and length , select the unit, and complete the calibration. Delete calibration: Click the drop-down calibration list, select the calibration group to be deleted, and click the delete icon to delete this group of calibrations. Click the delete icon to delete this group of calibrations.
- Page 43 Then select the appropriate tool for measurement; when measuring, you only need to click the anchor point of the measurement. After you click and release the mouse, the measurement data is displayed in the measurement data list area. List of measurement data. After the measurement is completed, you can export the data in the measurement data list.
- Page 44 When the data in the measurement data list is selected, the image color becomes the inverse color of the set color. 2. Double-click the data in the measurement data list with the left mouse button, and the selected image metadata will pop up a dialog box. You can modify the line color and line width, and lock the selected primitives.
- Page 45 3.2.5.5 Detailed Data Double-click the“list Show” icon with the left mouse button to pop up the detailed data dialog box to view all the current detailed measurement data. 3.2.5.6 Mark Tool Click“Text” icon,Draw the position to be marked in the image area, enter the comment content in the pop-up window, and click "OK"...
Need help?
Do you have a question about the C304 and is the answer not in the manual?
Questions and answers