Table of Contents
Advertisement
Quick Links
Advertisement
Table of Contents

Related Manuals for MAEVING RM1

Summary of Contents for MAEVING RM1
- Page 2 This publication, or any part thereof, may not be reproduced, copied or translated without the sole permission of Maeving. Published: April 2022. For the latest version of this handbook, please visit: www.maeving.com. Produced by Illston Authoring Limited. For more information visit www.illstonauthoring.co.uk.
-
Page 3: Table Of Contents
Malfunction indicator ....19 Your Maeving RM1 ..... . 7 12-volt battery indicator . - Page 4 Charging the battery ....32 Opening the battery storage compartments if the 12-volt battery is flat ....34 Maeving RM1 Owner’s Handbook...
- Page 5 Introduction ..... . . 77 Wheel bearings inspection ..51 Maeving warranty ....77 FRONT HEADLIGHT Suspension .
-
Page 6: Introduction
The information contained within this handbook is correct at the • Motor serial number. time of writing. It is designed to apply to all Maeving RM1 motorcycle • Battery serial number (if the query is relating to the battery). variants, therefore, the descriptions and images may vary slightly to the model you have purchased. -
Page 7: General Safety
L3 variant. This needs to the warranty, and/or cause injury to yourself and other road users. be done by the Maeving Workshop Team or a Maeving Workshop Therefore, Maeving cannot be held liable for any consequences as the Partner and will come at an additional cost. -
Page 8: Symbols Used In This Handbook
Electronic Equipment (WEEE) recycling legislation. your motorcycle. Maeving will take back all batteries and dispose of them in an environmentally responsible manner. For further Labels on the motorcycle information, please visit: www.maeving.com. -
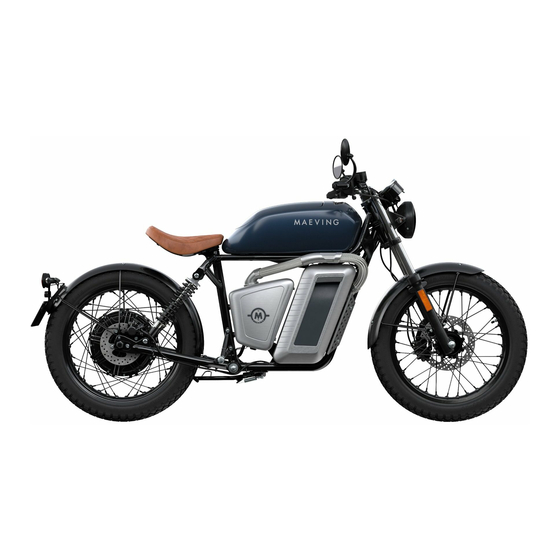
Page 9: Parts Identification
INTRODUCTION Parts identification 1. Front brake lever and reservoir. 2. Rear brake lever and reservoir. 3. Instrument panel. 4. Secondary battery storage compartment. 5. Rear wheel motor. 6. Front indicator. 7. Front headlight. 8. Front fork. 9. Mirror. 10. Left-hand handlebar controls. 11. -
Page 10: Owner Information
INTRODUCTION Owner information Serial number locations When you take ownership of your RM1, Please locate and enter the serial numbers for your motorcycle. please enter your details in the VIN number Electric motor serial number following boxes: The Vehicle Identification Number (VIN) -
Page 11: Battery Serial Number
INTRODUCTION Battery serial number Key serial number The battery serial number for each battery is The key serial number is stamped onto the printed on the sticker on the battery. tag attached to the master key (red). Primary battery Secondary battery... -
Page 12: Quick Start Guide
Note: Before the first ride on your motorcycle, make sure the key clockwise to the ON position. battery is fully charged. For further information, see Ignition switch on page 22. CHARGE % km/h Maeving RM1 Owner’s Handbook... -
Page 13: Removing And Installing The Primary Battery
QUICK START GUIDE Removing and installing the To install the primary battery, open the primary battery storage compartment, and primary battery carefully lift the battery and lower it into position. If the battery needs to be charged before your journey, it must be removed from the Note: Make sure the ignition key is in motorcycle. -
Page 14: Charging The Battery
The battery has an LED charge indicator (2). The charge indicator displays the battery’s current State of Charge (SoC). For further information, see Braking on page 41. For further information, see Charging the battery on page 32. Maeving RM1 Owner’s Handbook... -
Page 15: Checking Throttle Operation
QUICK START GUIDE Checking throttle operation Releasing the side stand With the ignition key in the OFF position, open A safety cut-out sensor on the side stand the throttle and release it to confirm that it is prohibits drive from being engaged while operating smoothly and that it returns to its the side stand is in the down position. -
Page 16: Choosing A Driving Mode
3. The instrument panel displays the current driving mode selection. Note: The L3 version of the RM1 has three driving modes. Driving mode 1 gives the best performance, but consumes battery power more quickly and driving mode 3 is the most economical. -
Page 17: General Information
Using the driving modes 1, 2 or 3 will also affect the overall range that your motorcycle can travel. Note: The motorcycle is not designed for commercial use. Incorrect use will invalidate the warranty, For further information, see Maeving warranty terms and conditions on page 77. -
Page 18: Instrument Panel Layout
2. Malfunction indicator. 3. Neutral indicator. 4. Direction indicator. 5. Headlight high beam indicator. 6. General warning indicator. 7. Speedometer. 8. Traction battery indicator. 9. Battery charge percentage. 10. Odometer, trip and time. 11. Driving mode indicator. Maeving RM1 Owner’s Handbook... -
Page 19: Warning Lights
The warning indicator is normally accompanied by an error code, which is displayed on the instrument panel. Please stop riding the motorcycle as soon as it is safe to do so. Once your motorcycle is safely stored, please contact the Maeving General warning indicator Support Team. -
Page 20: Information Lights
The display identifies the current percentage of available traction battery charge as a percentage digital percentage. The driving mode indicator light displays the currently selected driving mode. For Driving mode indicator further information, see Engaging drive and neutral on page 40. Maeving RM1 Owner’s Handbook... -
Page 21: Odometer
GENERAL INFORMATION Instrument panel display Continued The odometer displays the total distance that the motorcycle has travelled in oooo49 oooo49 Odometer miles or kilometres. The trip computer records the total distance covered for a particular journey. There are two separate trip meters: A and B. Using the i button (left-hand handlebar control), scroll to the trip setting and select either trip A or trip B. -
Page 22: Ignition Switch
12-volt battery and/or motorcycle is parked, to reduce the chance the primary and secondary batteries. of theft. The ignition key can be removed from the ignition barrel when the key is set to either LOCK or OFF. Maeving RM1 Owner’s Handbook... -
Page 23: Ignition Key
Do not have more than one key near the ignition switch at any one time, as this can interfere with the immobiliser and prevent the motorcycle from starting. You can order new ignition keys directly from Maeving. Please contact the Maeving Support Team. For further information, see Contacts on page 6. -
Page 24: Adding New Or Replacement Keys
(new or old) that you want registered Octo telematics device with the immobiliser system. Various models of the Maeving RM1 are fitted with a telematics Please complete the following steps: device. For more information, please visit: www.maeving.com. -
Page 25: Right-Hand Handlebar Controls
RIGHT-HAND HANDLEBAR CONTROLS RIGHT-HAND HANDLEBAR CONTROLS Drive mode buttons The right-hand handlebar switch is used to select a drive mode. Press the driving mode button (D) to select the required driving mode. To select neutral, press the Neutral (N) button. Note: If the side stand is in the down position, the driving modes cannot be selected. -
Page 26: Left-Hand Handlebar Controls
B and a third time to select the clock. A fourth press reverts back to the odometer setting. Battery compartment unlock button The battery compartment unlock button opens the primary and secondary battery storage compartments. Maeving RM1 Owner’s Handbook... -
Page 27: Battery
BATTERY BATTERY Single and twin battery usage The motorcycle can be ridden with either one or two batteries. Riding with two batteries will increase the range of the motorcycle. When using a single battery, it must be installed in the primary battery compartment (the motorcycle will not allow drive mode to be selected if the only battery is installed in the storage compartment). -
Page 28: Caring For Your Battery
To get the best possible lifespan from your battery, try to keep the State of Charge (SoC) between 20% and 80%. Maeving recommends you charge your battery when it reaches 30% and that you store your battery indoors overnight. For further information, see Charging the battery on page 32. -
Page 29: Removing The Primary Battery
BATTERY Removing the primary battery Warning: Make sure to have a firm grip of the battery handle before attempting to remove or refit the battery to the motorcycle. Failure to do so may result in personal injury. Caution: Make sure to have a firm grip of the battery handle before removing the battery from the motorcycle. -
Page 30: Installing The Primary Battery
Note: The LED indicator on the primary battery must be facing the front wheel, as shown. Carefully lower the battery and fully push into position (1), making sure that the battery fully engages with the connector. Close the primary battery storage compartment (2). Maeving RM1 Owner’s Handbook... -
Page 31: Removing And Installing The Secondary Battery
BATTERY Removing and installing the secondary battery Accessing the secondary battery Make sure the motorcycle is resting on the side stand. Turn the ignition key to the ON position and then turn to the OFF position. The instrument panel displays OPEN and a 5 second countdown begins. -
Page 32: Installing The Secondary Battery
Make sure that the charging base unit sits flat and the electrical cables are fully extended and free of knots. Caution: Only use the official charger supplied by Maeving to charge your battery. Using an incorrect charger may damage the battery and may result in a fire. - Page 33 Note: Additional battery chargers and charging base units can (SoC) and each LED will flash until the next charge increment has be purchased on the Maeving website. A charging base dock been achieved. is available. The charging base locates into the dock, making The definition of the LED state is as follows: charging your battery easier.
-
Page 34: Opening The Battery Storage Compartments If The 12-Volt Battery Is Flat
When the primary battery has sufficient charge, it will charge the 12-volt battery when the ignition is turned to the ON position. Note: The 12-volt battery indicator light illuminates if there is a potential problem with the 12-volt system. Maeving RM1 Owner’s Handbook... -
Page 35: Side Stand
SIDE STAND SIDE STAND The motorcycle is equipped with a side stand for parking. Always make sure that the side stand is fully up before riding the motorcycle. When parking the motorcycle using the side stand, always turn the handlebars fully to the left to provide maximum stability for the motorcycle. -
Page 36: Storage Compartment
(short press). Note: If the motorcycle has a secondary battery installed in the storage compartment, see Removing and installing the secondary battery on page 31. Maeving RM1 Owner’s Handbook... -
Page 37: Electrical Accessory Socket
ELECTRICAL ACCESSORY SOCKET ELECTRICAL ACCESSORY SOCKET - USB C When your electronic device is fully charged, open the secondary battery storage compartment and disconnect the electronic device and USB cable. Refit the waterproof cap and close the secondary Caution: Make sure that the USB C socket’s waterproof cap battery storage compartment lid. -
Page 38: Safe Operation
If you find any irregularities during these checks, refer to Maintenance Investigate if lever travel is excessive before meeting resistance or if and adjustment or contact the Maeving Workshop Team to return either brake lever feels spongy in operation. For further information, your motorcycle to a safe operating condition. -
Page 39: Rear Shock Absorbers
SAFE OPERATION Rear shock absorbers Check for smooth action and no leaks from the seals. For further information, see Rear shock absorber inspection on page 52. Throttle Make sure that the throttle grip returns smoothly to the return position without sticking. For further information, see Throttle control on page 44. -
Page 40: How To Ride The Motorcycle
N is displayed on the instrument panel when stand is in the down (parked) position. RM1 has two driving modes and the the motorcycle is in neutral (no driving mode The side stand must be in the up position in L3 variant has three driving modes. -
Page 41: Moving Off
Maeving strongly Braking recommends that all riders take a riding instruction course that includes advice... -
Page 42: Parking Your Motorcycle
Always park on firm, level surfaces to prevent the motorcycle from falling, particularly when parking off road. • When parking on a hill, always park facing uphill to prevent the motorcycle from rolling off the side stand. • Never park facing downhill. Maeving RM1 Owner’s Handbook... -
Page 43: Accessories And Loading
The following information is a guide to the potential hazards of adding hazard. accessories and additional weight to the motorcycle. Maeving does not accept any liability whatsoever for any defects Warning: Do NOT install or attach accessories or carry caused by the fitting of non Maeving-approved parts or accessories, excessive luggage that has the potential to impair the control or conversions by non-approved technicians. -
Page 44: Maintenance And Adjustment
Maeving Workshop Team. For further information, see Contacts on page 6. Scheduled maintenance Warning: Changes in throttle action may be due to wear, dust or dirt and could lead to a sticking throttle. -
Page 45: Braking System
MAINTENANCE AND ADJUSTMENT Braking system Operate the front and rear brakes, paying particular attention to the Make sure all hydraulic brake hoses and pipes are in good condition: amount of travel in each brake lever before the brake being operated free of cracks, chafing, corrosion or damage. -
Page 46: Brake Pad And Brake Disc Wear Inspection
3.5mm, the brake discs should be replaced. If the brake pads and/or brake discs need to be replaced, please contact the Maeving Workshop Team or a Maeving Workshop Partner. For further information, see Contacts on page 6. -
Page 47: Bedding In New Brake Pads And Brake Discs
Try to avoid harsh braking during this period and make sure you ride Make sure that the brake fluid is replaced in accordance to Maeving’s with caution and allow for greater braking distances. scheduled maintenance requirements by the Maeving Workshop Team or a Maeving Workshop Partner. -
Page 48: Brake Fluid Level Inspection And Adjustment
Thoroughly clean around the top of the the caliper seals, and consult the Only use brake fluid recommended by brake master cylinder reservoir cover. Maeving Workshop Team or a Maeving. For further information, see Remove the screws securing the Maeving Workshop Partner. -
Page 49: Brake Light Switches
MAINTENANCE AND ADJUSTMENT Brake light switches your checks, please contact the Maeving Steering inspection Workshop Team or a Maeving Workshop To inspect the steering: Warning: It is illegal and dangerous Partner. For further information, see to ride your motorcycle with a Sit astride the motorcycle and lift the Contacts on page 6. -
Page 50: Inspecting The Steering Headstock Bearings For Free Play
If any free play is present, you should feel a slight knock from the headstock or movement from the top yoke (where the handlebars are connected). If you detect free play, please contact the Maeving Workshop Team or a Maeving Workshop Partner. For further information, see Contacts on page 6. -
Page 51: Wheel Bearings Inspection
Turn the wheel 90° and rock the wheel from side to side. If you detect free play, please contact the Maeving Workshop Should you find any cause for concern when completing the following Team or a Maeving Workshop Partner. For further information, inspections, please contact the Maeving Workshop Team or a Maeving see Contacts on page 6. -
Page 52: Front Fork Inspection
Check there are no oil leakages from the fork oil seals. If any damage Turn the adjuster anti-clockwise to decrease and clockwise to is found, please contact the Maeving Workshop Team or a Maeving increase spring preload. Workshop Partner. For further information, see Contacts on page 6. -
Page 53: Tyres
Tyre wear need to request your motorcycle be inspected. Please contact the Maeving Workshop Team or a Maeving Workshop Partner. For further The tyres are fitted with Tread Wear Indicators (TWIs) around the information, see Contacts on page 6. -
Page 54: Tyre Replacement
Support the motorcycle on a suitable Note: Fit new retaining straps when rigorous testing by Maeving, to provide paddock stand(s). reattaching the rear light wiring maximum comfort, tyre wear and stability. Note: The motorcycle is shown not harness to the motorcycle. - Page 55 TYRES Remove the 2 bolts and washers Carefully displace the rear mudguard securing the rear mudguard supports to and light assembly from around the the swinging arm and detach the rear rear wheel and swinging arm and mudguard and light assembly. reposition to one side.
- Page 56 Caution: Make sure the rear brake caliper and brake hose are not trapped or damaged while the rear wheel and motor assembly is being removed. Caution: Do not let the rear brake caliper hang by its hose. Maeving RM1 Owner’s Handbook...
- Page 57 TYRES 13. Remove the 2 bolts securing the brake caliper and detach the 15. Undo, but do not remove, both axle nuts on the rear wheel axle. rear brake caliper from the swinging arm. Note: Left-hand shown, right-hand similar. Note: When refitting, tighten to 18 Nm. Note: When refitting, tighten to 100 Nm.
- Page 58 17. Carefully remove the rear wheel and motor assembly from the motorcycle. Note: The installation procedure is the reverse of the removal procedure. Note: Clean the mating faces of all components when installing the rear wheel and motor assembly. Maeving RM1 Owner’s Handbook...
-
Page 59: 12-Volt Battery
Remove the 2 screws securing the battery terminals do not come into Maeving badge to the battery access contact with any metal objects or vehicle panel and remove the badge. components. Note: When refitting, tighten to 2 Nm. -
Page 60: 12-Volt Battery Removal And Installation
Remove the battery access panel. For further information, see 12-volt battery access panel on page 59. Disconnect the negative (-) and positive (+) battery connectors. Release the retaining strap and remove the 12-volt battery. Note: The installation procedure is the reverse of removal. Maeving RM1 Owner’s Handbook... -
Page 61: Battery Disposal
12-VOLT BATTERY Battery disposal Battery discharge and storing the motorcycle If the 12-volt battery, primary battery and/or secondary battery To maximise the 12-volt battery life, it is recommended to maintain need to be replaced, the original battery must be recycled in the charge level in the battery. -
Page 62: 12-Volt Battery Charging
Do not expose the battery charger to rain or water, and never immerse the charger or cables in water. Caution: Maeving do not recommend the use of a battery quick charger on the motorcycle, as it could overcharge and permanently damage the 12-volt battery. -
Page 63: Fuses
FUSES FUSES The fuse box is located inside the 12-volt battery access panel. Warning: Always replace blown fuses with a specified rated new fuse. Fuse ratings can also be found on top of the fuse box. For further information, see Fuse identification on page 64. -
Page 64: Accessing The Fuse Box
The motorcycle uses mini fuses. Fuse No. Value Description Immobiliser and accessory GPS tracker Diagnostic tool connector USB-C charger Instruments Ignition power Storage tank and battery compartment actuators Spare fuses (in fuse box lid): 5A and 15A. Maeving RM1 Owner’s Handbook... -
Page 65: Front Headlight
The headlight is manufactured as a sealed unit and can only be Warning: Make sure that you ride your motorcycle to suit adjusted by a Maeving Service Representative. current visibility and weather conditions. To adjust the headlight beam height, loosen the 2 screws securing the... -
Page 66: Cleaning
Storage tank lid. Preparing to wash your motorcycle Maeving do not recommend the use of highly alkaline soaps, as these Before washing your motorcycle, take every precaution to try to keep can cause water spotting and leave residues on painted surfaces. -
Page 67: Seat Care
To help preserve and maintain the appearance of your seat, cover it with a plastic bag before washing, to keep it dry. Only use a vinyl cleaner recommended by Maeving. Caution: Do not place anything on the seat which may cause damage or staining to the seat material. -
Page 68: Storage
You should store your motorcycle in a cool, dry area, out of direct sunlight, and with a low variation in daily temperature. To avoid dust and dirt collecting on your motorcycle, use a suitable porous motorcycle cover. Maeving RM1 Owner’s Handbook... -
Page 69: Specifications
SPECIFICATIONS SPECIFICATIONS Motor Input Universal 110 - 240 VAC 12 V / 7 Ah, external 2 pin SAE Type Bosch hub motor Secondary battery charge socket Rated capacity 3.0 kW (4 hp) DC/DC converter with 500 W Alternator L1e-B variant: 4.0 kW (5.4 hp) integrated into battery control unit restricted Maximum power... - Page 70 Bias 40% front, 60% rear Securing bolts, front brake caliper to Tighten to 25 Nm Brake fluid DOT4 suspension mounting Securing bolts, rear brake caliper to Tighten to 18 Nm swinging arm Rear mudguard stay fixings Tighten to 8 Nm Maeving RM1 Owner’s Handbook...
-
Page 71: Service And Maintenance
The actions for each service interval are listed on a maintenance check sheet used by the Maeving Workshop Team or a Maeving Workshop Partner. -
Page 72: Service History
Distance: Distance: Distance: Serviced by: Serviced by: Serviced by: Service registered online? Yes No Service registered online? Yes No Service registered online? Yes No Stamp: Stamp: Stamp: Notes: Notes: Notes: Maeving RM1 Owner’s Handbook... - Page 73 SERVICE AND MAINTENANCE 12 months or 3,000 miles 12 months or 3,000 miles 12 months or 3,000 miles from previous service from previous service from previous service Date: Date: Date: Distance: Distance: Distance: Serviced by: Serviced by: Serviced by: Service registered online? Yes No Service registered online? Yes ...
- Page 74 Distance: Distance: Distance: Serviced by: Serviced by: Serviced by: Service registered online? Yes No Service registered online? Yes No Service registered online? Yes No Stamp: Stamp: Stamp: Notes: Notes: Notes: Maeving RM1 Owner’s Handbook...
- Page 75 SERVICE AND MAINTENANCE 12 months or 3,000 miles 12 months or 3,000 miles 12 months or 3,000 miles from previous service from previous service from previous service Date: Date: Date: Distance: Distance: Distance: Serviced by: Serviced by: Serviced by: Service registered online? Yes No Service registered online? Yes ...
-
Page 76: General Repair Notes
SERVICE AND MAINTENANCE General repair notes Maeving RM1 Owner’s Handbook... -
Page 77: Warranty
It is vital your motorcycle is repaired by the Maeving Workshop owners of the covered Maeving RM1. The warranty begins from the Team or a Maeving Workshop Partner as soon as a defect has been date of delivery. detected. Your swift action will help to minimise the effect the defect... -
Page 78: Maeving Vehicle Warranty
Maeving or a Maeving-approved partner. result of a manufacturing defect. This will require Maeving or one of its partners to take the battery for For the avoidance of doubt, the warranty does not cover damage a test period. -
Page 79: Parts And Accessories Warranty
Maeving motorcycles, please contact our support team. All parts or vehicle accessories fitted by Maeving or one of its approved partners during warranty repairs are covered for the •... -
Page 80: Exclusions
WARRANTY Exclusions it was not manufactured for, unless authorised by Maeving Limited. The warranty does not cover: • Misuse of the vehicle, including racing/competition, commercial • The cost of parts and labour involved in any routine servicing, activities, and overloading. -
Page 81: Damages
Motorcycles reassembled from or repaired with parts obtained engineers and technicians within the mainland UK. We also have from another used motorcycle. authorised partners who are equipped to work on your Maeving; see below for more information. • Using and/or storing the vehicle or battery outside the range of -20°C to 60°C. -
Page 82: Change Of Ownership
Maeving website. This must be performed to allow Maeving the ability to contact the new owner in the unlikely event of a safety-related issue. The original registered owner, or subsequent registered owner, is responsible for conveying the contents of the Owner’s Handbook and...
Need help?
Do you have a question about the RM1 and is the answer not in the manual?
Questions and answers