Table of Contents
Advertisement
Quick Links
Advertisement
Table of Contents

Related Manuals for techtron Ultra 5000


Summary of Contents for techtron Ultra 5000
- Page 1 Ultra 5000 Instruction Manual...
- Page 2 Ethos Welcome to techtron®. By combining passion, drive and intellect with market leading research and cutting-edge technology, we innovate and deliver premium quality products that excite, inspire and challenge the sector. Striving for perfection, embracing new ideas and investing in the future is our ethos.
-
Page 3: Table Of Contents
Contents Product and Accessories Assembly Features Charging Display Panel Function techtron® Smart App Maintenance and Warranty Rider Guidance, Safety and Specifications Troubleshooting... -
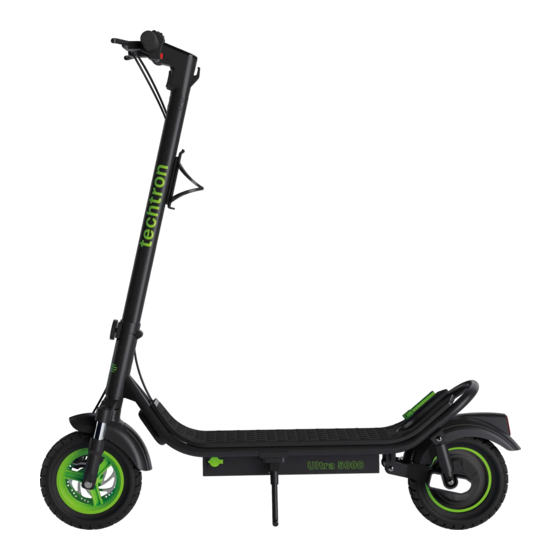
Page 4: Product And Accessories
Product and Accessories Accelerator Main display panel Front and rear brake levers Folding mechanism and lock Folding clasp Battery compartment Motor wheel Charger port Front and rear lights Front and rear brake discs Kickstand Front and rear suspension... - Page 5 Product and Accessories M5 hex screws x6 Hex key set 8pc Charging adaptor x1...
-
Page 6: Assembly
Assembly Install the crossbar onto the standpipe. Using the M5 hex key, fasten the crossbar onto the standpipe with the six M5 hex screws. Fold the scooter standpipe to its upright position. - Page 7 Assembly Insert and screw the locking mechanism tightly into place. Make sure the brake levers are installed in the correct positions. Use the M5 hex key to loosen and tighten the fixings.
-
Page 8: Features
Features Folding mechanism The Ultra 5000 can be easily folded for transporting. First unscrew the locking bolt in figure 1, then collapse the standpipe and hook onto the folding clasp as shown in figure 2. - Page 9 Features Mechanical bell A traditional sounding bicycle bell. Electronic bell A much louder sound comparable to a standard car horn. To use the electronic bell please ensure the selector switch is first moved to the ON position.
-
Page 10: Charging
To charge simply open the rubber stopper on the side of the base and plug into the power supply. Replace the stopper after charging to prevent water damage. USB device charging The Ultra 5000 has a USB 2.0 port for charging mobile devices. -
Page 11: Display Panel Function
Please consult the troubleshooting stop and must then be re-charged. guide (page 19) for further detail. *Speed is adjustable by the techtron® smart app at individuals’ own liability. techtron® or Multibrands International Ltd ™ will not be held responsible for accidents, injuries to any party, through misuse or illegal operation in anyway. -
Page 12: Techtron® Smart App
Smart App Your eScooter can be configured using the techtron® smart app. Use it to set up your desired settings such as riding mode and speed limiter. You can even lock the scooter to prevent unauthorised access. Please note - the eScooter will remember all settings applied in the techtron®... - Page 13 Smart App Home screen View the remaining range of your eScooter, so you can plan your journey. Light - Turn the main light On/Off. Settings - Access further controls. Lock - Secure your eScooter against unauthorised access. Connection - Discover and pair your Trip Info eScooter to your smart device.
-
Page 14: Maintenance And Warranty
Maintenance and Warranty Fine tuning loose or tight brakes The brakes can also be fine tuned by hand, as shown in figure 1. Turn the screw counterclockwise to tighten the brakes and clockwise to loosen. Manually adjusting the brakes To tighten the brakes, simply insert the M5 hex key into the slot shown in figure 2 and turn counterclockwise to release the... - Page 15 100-120kg 50psi (3.5bar) in figure 3 and top up to the appropriate level. The Ultra 5000 tyres are rated for a maximum of 50psi. However, the optimum pressure will ultimately depend on the weight of the rider. Please consult the table for further details.
- Page 16 Terms & Conditions/Exclusions apply, please see website for further details. Product registration For exclusive offers, product support and information on the latest techtron® innovations, register your product by completing the form on the website with your serial number and details - www.techtron.co Battery maintenance and disposal Do not touch the battery contacts, and do not open or expose the shell.
-
Page 17: Rider Guidance, Safety And Specifications
For the latest up-to-date safety, licensing guidance and rules of the road for UK eScooter users, please consult the UK Government website: www.gov.uk/guidance/e-scooter-trials-guidance-for-users *Speed is adjustable by the techtron® smart app at individuals’ own liability. techtron® or Multibrands International Ltd ™... -
Page 18: Troubleshooting
Spanner: Indicates an electrical fault, which also displays a fault code. Product registration For exclusive offers, product support and information on the latest techtron® innovations, register your product by completing the form on the website with your serial number and details -... - Page 19 Troubleshooting Error code Description Solution Short circuit Check for a short circuit in the wiring/installation or replace the controller to eliminate the fault. Sub-motor Check the connection line between the sub- communication failure controller and the main controller. (dual drive models only) Dashboard First check whether the connection line between communication failure...
- Page 20 Unit 2, Jowett Street, Bradford, BD1 2JX. UK. e: info@techtron.co 01274 307310 w: techtron.co Research & Development 2100 Geng Road, Suite 210, Palo Alto, California, 94303 USA . e: info@techtroncalifornia.com w: techtroncalifornia.com techtron® is a division of Multibrands International Ltd. V001 10.11.2021...
Need help?
Do you have a question about the Ultra 5000 and is the answer not in the manual?
Questions and answers