Advertisement
Table of Contents
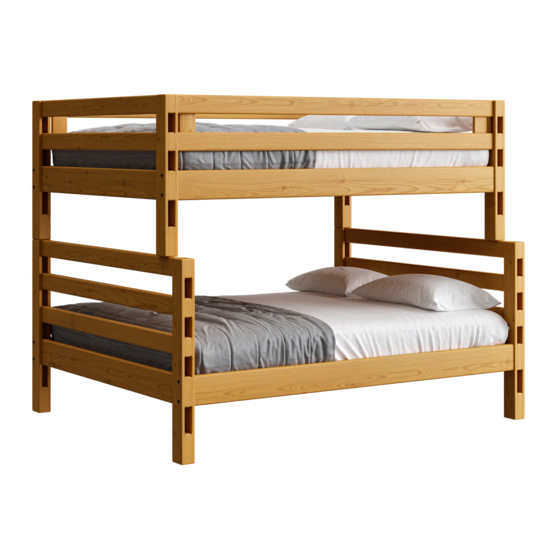
Classic Ladder End Single-Queen Bunk
Each Bed Consists of:
- 2 Bottom Bed Ends: 2 Pre-Drilled Holes on
each side and one Pre-Drilled hole at the top of
each side.
- 2 Top Bed Ends: 2 Pre-drilled Holes on each
side and one Pre-Drilled hole at the bottom of
each side and a groove carved from the top of
each side.
- 8 Bed Slats
- 4 Bed Rails
- 2 Safety Rails
-There will be a bottom left end and a bottom
right end. (They are mirror images of each
other.)
Hardware:
- 16 Headlock Spider Head Fasteners 4 ½"
- 24 Square Head Fasteners 1 ¼"
- 4 Metal Connector Pins
- 1 Headlock Spider Drive Bit
2. Insert the 4 Metal Connector Pins in the pre-drilled
holes at the top of each Bed End Panel.
3. On the floor, connect Top Bed End Panels with 2 Bed
Rails using 8 Headlock Spider Head Fasteners with a
cordless drill and the Spider Drive Bit. DO NOT over
tighten.
1
FURNITURECONCEPTS
FURNITURE CONCEPTS
Assembly and Parts
Assembly:
1. Connect Bottom End Panels with 2 Bed Rails using
8 Headlock Spider Head Fasteners with a cordless
drill and the Spider Drive Bit. DO NOT over tighten.
Please note there is a left and right bottom bed end.
800 969 4100 info@furnitureconcepts.com www.furnitureconcepts.com
®
®
Advertisement
Table of Contents

Related Manuals for FURNITURE CONCEPTS Classic Ladder End Single-Queen Bunk


Summary of Contents for FURNITURE CONCEPTS Classic Ladder End Single-Queen Bunk
- Page 1 FURNITURE CONCEPTS ® Classic Ladder End Single-Queen Bunk Assembly and Parts Each Bed Consists of: - 2 Bottom Bed Ends: 2 Pre-Drilled Holes on each side and one Pre-Drilled hole at the top of each side. - 2 Top Bed Ends: 2 Pre-drilled Holes on each...
- Page 2 FURNITURE CONCEPTS ® Classic Ladder End Single-Queen Bunk Assembly and Parts 4. Slide the Safety Rails into the grooves carved into the Top Bed End Panels with the pocket holes facing inward. 5. Secure the Safety Rails to the Top Bed Ends Panels with the 8 Square Head Fasteners.
Need help?
Do you have a question about the Classic Ladder End Single-Queen Bunk and is the answer not in the manual?
Questions and answers