Advertisement
Quick Links
Advertisement

Related Manuals for Bikonit Warthog MD 1000

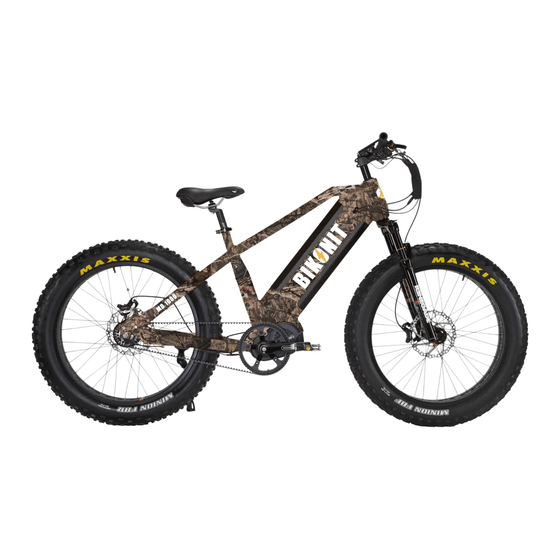
Summary of Contents for Bikonit Warthog MD 1000
- Page 1 OWNER'S MANUAL Bike on it | To Anywhere! BIKONIT WARTHOG ELECTRIC BIKES WWW.BIKONIT.COM...
- Page 4 Page 1...
- Page 5 Page 2...
- Page 6 IMPORTANT INFORMATION BEFORE YOUR FIRST RIDE BATTERY Page 3...
- Page 7 Brakes application Page 4...
- Page 8 TRANSPORTATION OF BIKONIT ELECTRIC BIKES INSPECTION BEFORE EACH RIDE Tire inflation Page 5...
- Page 9 Handlebar stem and front wheel Seat Position Seat and Seat Post Respect Local Regulations and Rules / Private Property Remember each area in which you may ride your bike may have specific regulations. Always respect private property and never trespass. Respect the rights of others who may be sharing the trail with you; i.e.: hikers, cyclists, equestrians.
- Page 10 An electric bike like any mechanical device is subject to fatigue, stress, and wear. Over time and due to use, the frame and its components can fail. The environment and type of riding the ebike could reduce its useful lifespan. If proper care and maintenance are not performed your ebike and or its components can fail to cause serious injury or death.
- Page 11 48V 15AH LG BATTERY CELLS BATTERY LEVEL INDICATOR POWER CHARGING PORT SEALED&WATER RESISTANT SMART CHARGER 110V-220V CHARGER 5AMP QUICK CHARGER Page 8...
- Page 12 48V 15AH LG BATTERY CELLS BATTERY LEVEL INDICATOR POWER CHARGING PORT SEALED&WATER RESISTANT SMART CHARGER 110V-220V CHARGER 5AMP QUICK CHARGER Page 9...
- Page 13 48V 15AH LG BATTERY CELLS BATTERY LEVEL INDICATOR POWER CHARGING PORT SEALED&WATER RESISTANT SMART CHARGER 110V-220V CHARGER 5AMP QUICK CHARGER Page 10...
- Page 14 Page 11...
-
Page 15: Installing The Handlebar
c. Tighten the silver 2 nuts (left and right) to fix the front wheel. 4. Installing the handlebar: a. Using a 6mm hex key, remove the 4 screws from the front of the stem and remove the bracket. b. Place the handlebar on the stem, then put the bracket and 4 screws back into place. -
Page 16: Attach The Pedals
5. Attach the pedals a. The pedals are left and right-side specific. The end near the threads will have an L or R on them, indicating Left and Right. b. Put a small dab of grease on the threads of each pedal before inserting it into the crank. - Page 17 Page 14...
- Page 18 Page 15...
- Page 19 Page 16...
- Page 20 General riding information Once you have inspected your bike and all components are in proper working condition, you are ready to test ride your new bike. A few important general rules for riding include but are not limited to: 1. Strap on your helmet that meets safety testing requirements. 2.
- Page 21 1. Before First Ride (After Initial Build and Inspection): a. Adjust the seat to a comfortable height. b. Adjust the saddle rails for comfort position. c. Adjust the handlebar, shifter, and brake lever position to your liking. d. Squeeze brake levers and test the braking power with the bike in a stand, or just walking alongside the bike. DO NOT attempt to ride the bike if the brakes are not adjusted properly.
- Page 22 4. Monthly Maintenance: a. Check for loose spokes. i. Squeeze the spokes together to check the spoke tension. Spokes should flex slightly and return to their original position. Visit your local bike shop for wheel truing and spoke replacements if necessary. Tighten any loose spokes with a spoke wrench.
- Page 23 5. General Safety Tips a. The user assumes the responsibility for the risk of injury or death as a result of riding or using products. It is the responsibility of the user to know and obey all local laws, rules, and regulations regarding the use of electrically assisted bicycles.
- Page 24 Faults Causes Troubleshooting Page 21...
- Page 25 (1 photo should display the top and 2 sides, the 2nd photo should display the bottom and the opposite sides). Refund Policy: Once the return terms are confirmed by Bikonit and customers, a refund process will start at once. It will take 7 business days to process and send out a refund to customers.
- Page 26 Bike on it | To Anywhere! WWW.BIKONIT.COM All Rights Reversed by Bikonit, Inc. 1150S Milliken Ave, Ontario, CA 91761 TEL: +1 (415) 629-6623...
- Page 27 For warranty purposes, send us your order number, or authorized dealer bill info to info@bikonit.com. TEL: +1 (415) 629-6623 TEL: +1 (415) 629-6623...
- Page 28 Bike on it | To Anywhere! WWW.BIKONIT.COM All Rights Reversed by Bikonit, Inc. 1150S Milliken Ave, Ontario, CA 91761 TEL: +1 (415) 629-6623...
Need help?
Do you have a question about the Warthog MD 1000 and is the answer not in the manual?
Questions and answers