Advertisement
Quick Links
Advertisement

Related Manuals for Bikonit MD 1000

Summary of Contents for Bikonit MD 1000
- Page 1 OWNER'S MANUAL 2020 BIKONIT ELECTRIC BIKES WWW.BIKONIT.COM...
- Page 2 If you have questions after reading this manual, please go to Bikonit Help Center, contact us by email, and/or give us a call on the phone.
- Page 3 Any form of crack, scratches or change of coloring in highly stressed areas indicate that the life of the component has been reached and it should be replaced. For replacement parts, technical information and warranty assistance, please contact SERVICE@BIKONIT.COM. PLEASE DO NOT DISASSEMBLE THE ELECTRONIC COMPONENTS IN ANY CASE !
- Page 4 General Warnings IMPORTANT INFORMATION BEFORE YOUR FIRST RIDE BATTERY Remove the battery before attempting to service, making adjustments or performing any maintenance on this Rambo bike. Removing the battery will help ensure the motor is not started inadvertently while service or maintenance is being performed. See Page 12 for battery removal instructions. The battery should be removed anytime the bike is stored or is left unattended to prevent unauthorized use or accidental engagement of the motor.
- Page 5 The BIKONIT Bike comes equipped with disc brakes. These brakes are different from other general types of brakes associated with bikes. Some bikes typically have rim brakes which operate by squeezing the wheel rim between two brake pads.
- Page 6 Gerneral Warnings Front Wheel and Foot Contact Contact between your foot or toe-clip and the front wheel or fender can cause you to lose control and fall. Avoid pedaling when turning at slow speed. Do not pedal when riding slowly if the handlebar is turned. It is possible for your foot to contact the front tire if the handlebar is turned while you are pedaling.
- Page 7 Gerneral Warnings TRANSPORT OF BIKE - Always remove battery from bike before transporting - Never lay your bike on the chain side INSPECTION BEFORE EVERY RIDE Before every ride, inspect the bike with the following check list. If any part of the bike fails the inspection, repair the bike by following the information provided in this manual or take the bike to your bike shop for service.
- Page 8 Gerneral Warnings Handlebar stem and front wheel alignment Make sure the front wheel and handlebar stem are aligned in the proper orientation of each other. Turn the handlebar from side to side with the front wheel locked between your knees to test the stem connection of the fork. If any movement is noted do not ride the bike until this is corrected.
- Page 9 Gerneral Warnings An electric bike like any mechanical device is subject to fatigue, stress and wear. Over time and due to use, the frame and its components can fail. The environment and type of riding the bike is subjected to can greatly reduce its useful lifespan.
- Page 10 Contents Introduction ....................1 Warnings on Safety ..................2 Gerneral Warnings ..................MD1000................4 MD750................5 HD750................6 Product Details....................Unbox and Assembly .................. Bike using Guidence................... Bike Maintance ..................Return and Refund ..................
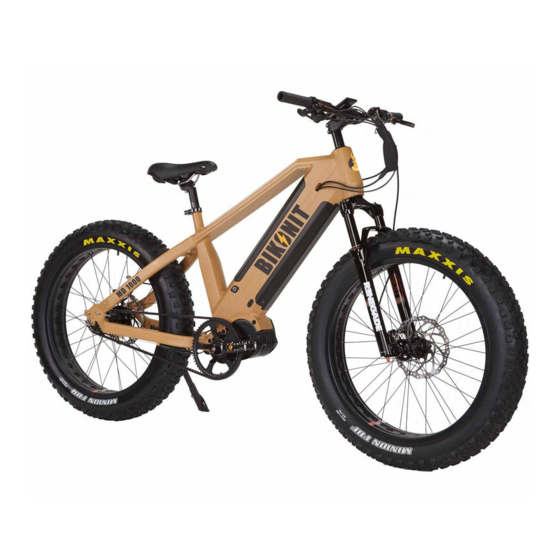
- Page 11 MD 1000...
- Page 12 MD 750...
- Page 13 HD 750...
- Page 14 Unbox and Assembly Bikonit recommends that all the ebike be assembled, inspected and adjusted by a professional ebike mechanic or ebike shop before riding. For more information on assembly, check out our assembly and maintenance videos at www.bikonit.com 1. You will need :6mm Hex key 1-Pls remove the bike from the box carefully.
- Page 15 Unbox and Assembly c. Also tighten the silver 2 nut(left and right) to fix the front wheel. 4.Installing the handlebar: a. Using a 6mm Hex key, remove the 4 screws from the front of the stem and remove the bracket. b .
- Page 16 Unbox and Assembly 5.Attach the pedals a. The pedals are left and right side specific. The end near the threads will have an L or R on them,indicating Left and Right. b. Put a small dab of grease on the t h r e a d s o f e a c h p e d a l b e f o r e inserting into the crank.
- Page 17 Bike Using Gudience 1. How To Charge And Power On 1) Battery a.The battery will be mostly charged when you receive it. It is better to use it first to drain it down and then charge it. This is also the case if you haven’t used the bike for a few months.
- Page 18 Bike Using Gudience d. The battery does not have to be installed in the bike to charge i. Remove the battery from the bike by inserting the key, turning it 90 degrees and pulling firmly on the handle. Ii:Press this button, it will show the capacity of the battery. iii.
- Page 19 Bike Using Gudience e. For long term battery storage, it is best to leave the battery at about 20% (1/4 lights). Always store the battery in a cool place (colder than 65*F). For best results, do not store for longer than 4 months without cycling the battery;...
- Page 20 Bike Using Gudience General riding information Once you have inspected your bike and all components are in proper working condition, you are ready to test ride your new bike. A few important general rules for riding include but are not limited to: 1.Strap on your helmet that meets safety testing requirements.
- Page 21 Maintenance and Inspection 1- Before First Ride (After Initial Build and Inspection): a. Adjust seat to comfortable height. b. Adjust the saddle rails fore/aft positioning for comfort. c. Adjust the handlebar, shifter and brake lever position to your liking. d. Squeeze brake levers and test the braking power with the bike in a stand, or just walking alongside the bike. DO NOT attempt to ride the bike if the brakes are not adjusted properly.
- Page 22 Maintenance and Inspection i. Squeeze the spokes together to check the spoke tension. Spokes should flex slightly and return to their original position. See your local bike shop for wheel truing and spoke replacements if necessary. Tighten any loose spokes with a spoke wrench.
- Page 23 Maintenance and Inspection d. Riders must have the physical coordination, reaction time and mental capacity to ride and manage traffic, road conditions, sudden situations, as well as respect and obey the local laws governing bicycle and electric bicycle use. e. If you have an impairment or disability, consult your physician before riding any bicycle. f.
- Page 24 Return and Refund d. Riders must have the physical coordination, reaction time and mental capacity to ride and manage traffic, road conditions, sudden situations, as well as respect and obey the local laws governing bicycle and electric bicycle use. e. If you have an impairment or disability, consult your physician before riding any bicycle. f.
Need help?
Do you have a question about the MD 1000 and is the answer not in the manual?
Questions and answers