Table of Contents
Advertisement
Quick Links
Advertisement
Table of Contents

Related Manuals for ARTE PHOENIX

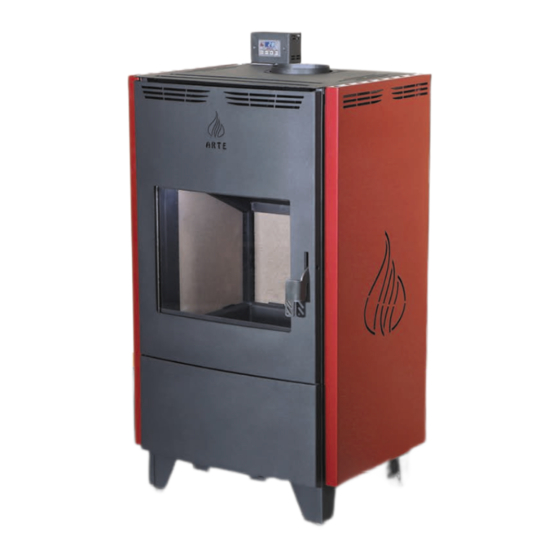
Summary of Contents for ARTE PHOENIX
-
Page 2: Table Of Contents
9.3. Cleaning the woodstove and the flue ..................................... 17 9.3.1. Chimney sweeping ........................................... 17 9.3.2. Annual maintenance ........................................17 9.3.3. How to clean the inside parts of ARTE® PHOENIX woodstove ........................... 17 9.4. Internal parts removal.......................................... 18 9.5. Inactive fireplace for prolonged periods ..................................18 10. -
Page 3: Arte® Wood Stove - A Greek Quality Product
- A G OOD STOVE REEK UALITY RODUCT Thank you for buying an ARTE ® wood stove - we believe that you will have as much pleasure from our product as we have. Your ARTE ® wood stove is made in such a way, to extract the maximum possible energy from the wood with the minimum possible emissions,... -
Page 4: Wood Types And Calorific Value
ENERGY EFFICIENT WOODSTOVE INSTALLATION & USER MANUAL | PHOENIX 2.4. Wood types and calorific value A wood’s efficiency does not depend only on its type, but also on its humidity, as well as the temperature of the combustion chamber. For more efficient and longer burning, without emission of hazardous substances, woods must be dry. Ideally, their humidity percentage must not exceed 10% to 15%. -
Page 5: Determining The Heat Output
ENERGY EFFICIENT WOODSTOVE & | PHOENIX NSTALLATION USER MANUAL Beech Hard wood is ideal for firewood but requires a high temperature to ignite. It weights a lot; it is dense and burns with a calm and long fire for a longer time. -
Page 6: Endorsements & Certifications
The ARTE® wood stove you chose has been tested according to EN13229. 3.2. Declaration of Performance CE The constructor G. Karnoutsos & Co. declares that ARTE® wood stoves meet the requirements of the standard EN 13240, also the product’s performance according to the quality specifications are monitored on a permanent basis. -
Page 7: Fire Safety
5.4. Flue security instructions Prior to installing the woodstove ARTE® the chimney sweep or a qualified technician should check the condition and operation of your chimney in accordance with the standards EN13384-1 & EN13384-2. This way you ensure the best conditions for heating without issues. -
Page 8: Chimney Placement
ENERGY EFFICIENT WOODSTOVE INSTALLATION & USER MANUAL | PHOENIX In case of an existing flue the construction material should be checked. Materials such as cement with lime, galvanized steel and rough or porous materials are contraindicated as they create issues in the correct operation of the woodstove. Also, a proper study for the flue size must be conducted because often old flues have quite large diameters. -
Page 9: Flue Pipe On The Top Or Rear Of The Stove
5.4.4. Flue pipe on the top or rear of the stove ARTE ® PHOENIX woodstove is designed so the fumes outlet can be reversed from top to rear and vice versa. The stove is produced by default with top outlet but, during installation, it can be altered as follows: Remove the sides of the stove (Pic. -
Page 10: About Arte® Phoenix Woodstove
6.3.1. When the woodstove paint dries ARTE ® products are painted in spray booth with as more environmentally friendly and ecological colors as possible. There is although a possibility that the first few times the woodstove is lighted, the paint emits an odor. Let the fire burn with intense convection until all traces of gas disappear and there is no longer a smell. -
Page 11: Heating During Seasonal Change Or In Adverse Weather Conditions
6.4. Ventilation kit (optional) ARTE® PHOENIX woodstoves can also be installed with a hot air ventilation motor o the back of the device. This feature is necessary if you want to distribute the heat of the stove to the room or even the whole house. By blowing hot air, the ventilation kit lets you increase the heat radiation output of the stove. -
Page 12: Ventilation Kit Installation (Optional)
Replace the sides of the stove. Pic. 6.4.1.2 Pic. 6.4.1.3 ARTE ® PHOENIX woodstove has an air inlet filter. Keep it clean by using the vacuum cleaner and when it’s needed use water. For replacement filters contact your supplier. 11 |... -
Page 13: Air Canals Instalation (Optional)
6.4.2. Air canals instalation (optional) If you want to distribute the heat from the stove to other areas of your house, ARTE ® PHOENIX enables you to install the air canals kit that works complementary with the ventilation kit. It gives 3, 80mm in diameter supplies In order to send hot air to other rooms. -
Page 14: Use Of The Electronic Control Panel
| PHOENIX 6.4.3. Use of the electronic control panel ARTE® PHOENIX woodstoves incorporate two ventilators with total power output of 420m /h, which are used for heating the air and redistribute it in the room, which drastically increases the heating capability of the woodstove. -
Page 15: Igniting The Stove
ENERGY EFFICIENT WOODSTOVE & | PHOENIX NSTALLATION USER MANUAL 7. I GNITING THE STOVE 7.1. Traditional method of igniting Every time you ignite the stove, it initially needs a large amount of air. If the stove is cold, leave the door slightly open or secure the handle on the first latch, in order for air to circulate around it for the first minutes of ignition. -
Page 16: Tertiary Combustion (Patented)
Thus a large part of the heat that is achieved, is discharged directly through the draft of the flue to the exterior and not in the heating area. ARTE’s® patented chamber manages to provide the maximum secondary combustion performance. An automatic air intake... -
Page 17: Cleaning & Maintaining The Woodstove
The gasket around the perimeter of the door may harden over a period of time. It should be replaced if it becomes difficult to close the door or if air starts to leak in around the perimeter of the doors, causing the fire to become a little less controllable. An ARTE ®... -
Page 18: Cleaning The Woodstove And The Flue
Components in the flame route, the gasket and the paint finish are not covered by the warranty. All of these service parts can be bought from your ARTE® dealer, and we recommend that damaged parts are replaced as soon as possible to avoid consequential damage. -
Page 19: Internal Parts Removal
Make sure to remove it before the beginning of the operating season. We hope you enjoy many years of carefree warmth with this ARTE ® PHOENIX woodstove. Some initial experimentation with loading and operating techniques will help you decide your normal routine. -
Page 20: Dimensions
ENERGY EFFICIENT WOODSTOVE INSTALLATION & USER MANUAL | PHOENIX 11. D IMENSIONS All dimensions are in centimeters (cm) 19 | Page... -
Page 21: Technical Specifications
& ENERGY EFFICIENT WOODSTOVE | PHOENIX NSTALLATION USER MANUAL 12. T ECHNICAL PECIFICATIONS PHOENIX AIR TECHNICAL SPECIFICATIONS UNITS PHOENIX PHOENIX AIR CANAL Kcal/h 13038 14706 *Total heat output 15.16 17.1 Recommended hourly consumption of firewood Kg/h 4.44 4.94 Efficiency 79.17 80.24... -
Page 22: Warranty
Wearing parts like gaskets, vermiculite panels and glass Smoke and soot damage Natural discoloration or deviating colors on the outer cladding Cracks in the combustion chamber that have no effect on the safe functioning of the ARTE PHOENIX woodstove ®... - Page 23 ENERGY EFFICIENT WOODSTOVE & | PHOENIX NSTALLATION USER MANUAL OTES S/N: 22 | Page...
Need help?
Do you have a question about the PHOENIX and is the answer not in the manual?
Questions and answers