Table of Contents
Advertisement
Quick Links
INSTRUCTIONS
GENEO
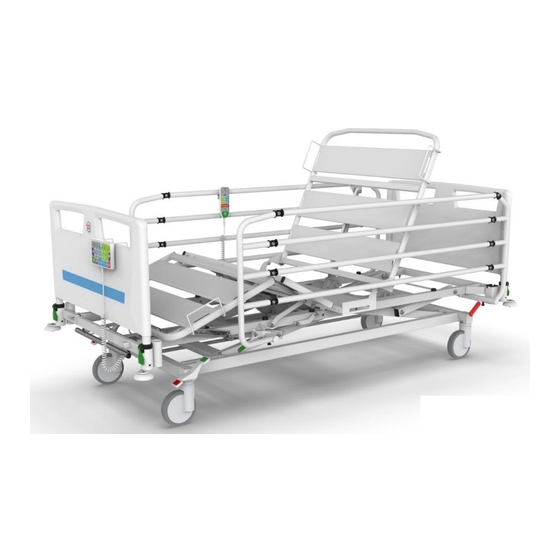
Hospital bed for standard care
GRANO
Care bed for standard care
PROMA REHA, s.r.o.,
ver. 21-1
Riegrova 342, CZ-55203
23/04/2021
Česká Skalice, tel.: +420 491 11 22 33, fax: +420 491 54 11 85,
Company ID: 63219107; Tax ID: CZ63219107,
info@promareha.cz, www.promareha.cz, registered in the
Commercial Register held with the Regional Court in Hradec
we are authorised to use the above-mentioned trademarks
Králové, section C, entry 7945
Advertisement
Table of Contents

Related Manuals for PROMA REHA GENEO

Summary of Contents for PROMA REHA GENEO
- Page 1 INSTRUCTIONS GENEO Hospital bed for standard care GRANO Care bed for standard care PROMA REHA, s.r.o., ver. 21-1 Riegrova 342, CZ-55203 23/04/2021 Česká Skalice, tel.: +420 491 11 22 33, fax: +420 491 54 11 85, Company ID: 63219107; Tax ID: CZ63219107, info@promareha.cz, www.promareha.cz, registered in the...
- Page 2 Czech and foreign markets for more than 25 years. The products of PROMA REHA, s.r.o. are known due to their modern light structures, which, despite their low weight, achieve state-of-the-art parameters, strength and utility reliability.
-
Page 3: Table Of Contents
Instructions for Use of GENEO and GRANO Beds ABLE OF ONTENTS Introduction ....................................5 Method of Delivery ..................................6 Safety Instructions ..................................6 Conditions of Use ..................................7 Technical Parameters ..................................7 Bed Placement ....................................8 Bed Description ..................................... 9 Installation and Commissioning of the Bed .......................... - Page 4 Instructions for Use of GENEO and GRANO Beds 12.1 Removable Tiltable Siderails ............................... 25 12.2 Removable Headboard and Footboard ..........................26 12.3 UNI Siderails ..................................26 12.4 Plastic Tiltable Siderails ............................... 27 Other Parts of the Bed ................................. 28 13.1 Bearing Area ..................................28 13.2 Universal Holders of Accessories ............................
-
Page 5: Introduction
Instructions for Use of GENEO and GRANO Beds NTRODUCTION These Instructions for Use are designated for the beds of GENEO and GRANO type. The user must read these Instructions before handling of the bed for the first time. The user is obligated to operate the bed according to these Instructions for Use. -
Page 6: Method Of Delivery
Instructions for Use of GENEO and GRANO Beds ETHOD OF ELIVERY The bed is delivered assembled and ready for use. The accessories are supplied separately with the necessary fastening material to be attached to the bed. Upon delivery, the entire content of the delivery must be checked according to the delivery note. -
Page 7: Conditions Of Use
Instructions for Use of GENEO and GRANO Beds ONDITIONS OF The bed may only be used in the interior with the ambient temperature ranging between +10°C and +40°C, the relative humidity between 30% and 75% and the atmospheric pressure between 700 hPa and 1060 hPa. -
Page 8: Bed Placement
Instructions for Use of GENEO and GRANO Beds Where a specific mattress intended to achieve a prophylactic or therapeutic effect is used, it is possible to use the mattresses up to the height of 26 cm. In this case, there may be an increased risk of the patient falling out of the bed. -
Page 9: Bed Description
Instructions for Use of GENEO and GRANO Beds ESCRIPTION 1) Universal accessory holder 9) Calf part 17) Board lock 2) Headboard 10) Footboard 18) Bedding rack 3) CPR 11) Impact wheel 19) Nurse panel 4) Mattress holder 12) Caster 20) UNI Siderails 5) Back part 13) Stainless ‘Eurobar’... -
Page 10: Installation And Commissioning Of The Bed
Instructions for Use of GENEO and GRANO Beds NSTALLATION AND OMMISSIONING OF THE This chapter lists the basic tasks that must be fully performed before the bed is put into operation for the first time! • Consult the Instructions for Use thoroughly. -
Page 11: Relocation And Handling
Instructions for Use of GENEO and GRANO Beds ELOCATION AND ANDLING Before moving the bed itself, always position it in the basic position (i.e. the bearing area and all the adjustable parts are in the lowest possible position). When moving and handling, the guards must always be secured in the upper position to reduce the risk of a patient falling. -
Page 12: Electrical Control Elements - General Operating Instructions
Instructions for Use of GENEO and GRANO Beds – G LECTRICAL ONTROL LEMENTS ENERAL PERATING NSTRUCTIONS The beds are equipped with reliable control units, controllers and motors that have low noise levels and do not place any demands on maintenance even after several years of operation. The bed may be equipped with multiple types of electronics based on the bed configuration. -
Page 13: Go Button
Instructions for Use of GENEO and GRANO Beds GO B UTTON The nurse panel is protected against accidental activation. In order to use the control elements, it is always necessary to wake up the nurse panel first by activating the GO button (1). An exception is the CPR emergency position, for which the activation of GO is not necessary. -
Page 14: Function Lock Using The Nurse Panel
Instructions for Use of GENEO and GRANO Beds UNCTION SING THE URSE ANEL The nurse panel is used to lock the individual functions of the patient controller in order to prevent them from being activated by the patient. After locking the function on the patient controller, this function remains available for control from the nurse panel. Lock... -
Page 15: Standard Adjustment
Instructions for Use of GENEO and GRANO Beds TANDARD DJUSTMENT Press the GO button (1) to activate the nurse panel, then the bed can be positioned. Always operate the given functions by pressing and holding the relevant button until the required position is set. After releasing the button, the part will be automatically locked in the position in which it is currently located. -
Page 16: Patient Hand Controller With Illumination
Instructions for Use of GENEO and GRANO Beds 10.3 ATIENT ONTROLLER WITH LLUMINATION Before starting the first positioning, you are obliged to fully familiarize yourself with the general operating instructions of the electrical elements in the chapter 10. The person not familiarized with the general operating instructions must not control the beds! Beds are equipped with the patient hand controllers. -
Page 17: Trendelenburg/Anti-Trendelenburg
Instructions for Use of GENEO and GRANO Beds RENDELENBURG RENDELENBURG The bed may be equipped with the function of adjusting the bearing area to the Trendelenburg position (patient’s head down) and the Anti-Trendelenburg position (patient’s head up). To use the function, press the button (10) or (11), if your controller contains it. -
Page 18: Controllers Integrated In Siderails
Instructions for Use of GENEO and GRANO Beds ONTROLLERS NTEGRATED IN IDERAILS The bed may be equipped with integrated hand controllers glued on the outside and inside of both siderails along the back part of the bearing area. • Press the GO button (1) to activate the controller - LED indication goes on (15) for 15 seconds. 15 seconds after the last use of the controller, it deactivates itself! If the nurse panel is activated, it is not possible to activate the controller. -
Page 19: Function Of Patient Mobilisation
Instructions for Use of GENEO and GRANO Beds 10.5 UNCTION OF ATIENT OBILISATION The bed may be equipped with a patient’s mobilisation function located on the head siderail in combination with the mobilisation handle on the foot siderail. Observe the following procedure to use the patient’ s mobilisation function. -
Page 20: Satellite Patient Controller
Instructions for Use of GENEO and GRANO Beds 10.6 S ATELLITE ATIENT ONTROLLER Before starting the first positioning, you are obliged to fully familiarize yourself with the general operating instructions of the electrical control elements in Chapter 10.1. The person not familiarized with the general operating instructions must not control the beds! The bed may be equipped with a patient satellite controller. -
Page 21: Lowered Position Of The Bearing Area
Instructions for Use of GENEO and GRANO Beds 10.8 L OWERED OSITION OF THE EARING GRANO beds with the bearing area elevation from 25 (27) cm are provided with the function of the bearing area lowering. The bed may be adjusted to the lowered position suitable to reduce the risk of the patient falling from the bed as follows: Using the controller (nurse panel, hand controller, satellite controller), adjust the bed to the lowest basic position –... -
Page 22: Power Supply Cable Holder
Instructions for Use of GENEO and GRANO Beds 10.11 P OWER UPPLY ABLE OLDER The bed is equipped with a power supply cable holder (1)attached to the power supply cable. Read the instructions in chapter 9 before starting any transport. RELOCATION AND HANDLING Disconnect the power supply cable from the electricity •... -
Page 23: Mechanical Positioning Of The Calf Part
Instructions for Use of GENEO and GRANO Beds 11.3 ECHANICAL OSITIONING OF THE You can set the calf part to several pre-set positions using the adjusting comb. Set the calf part as follows: Adjust the calf part position only when the thigh part is slightly elevated. -
Page 24: Bed Extension
Instructions for Use of GENEO and GRANO Beds 11.5 XTENSION The bed may be provided with a mechanism for extending the bearing area by up to 20 cm. The extension consists in extending the footboard from the bed frame. To extend the bed proceed as... -
Page 25: Headboard, Footboard And Siderails
Instructions for Use of GENEO and GRANO Beds EADBOARD OOTBOARD AND IDERAILS 12.1 R EMOVABLE ILTABLE IDERAILS The bed may be equipped with removable tiltable siderails. The tilting mechanism of the siderails is used to tilt the siderail along the bed bearing area. -
Page 26: Removable Headboard And Footboard
Instructions for Use of GENEO and GRANO Beds 12.2 EMOVABLE EADBOARD AND OOTBOARD The hospital version of the bed is equipped with removable headboard and footboard with arresting against accidental removal. When removing the headboard and footboard, observe the following... -
Page 27: Plastic Tiltable Siderails
Instructions for Use of GENEO and GRANO Beds 12.4 P LASTIC ILTABLE IDERAILS The bed is provided with four tiltable siderails. The principle of control of all types of siderails is identical. The siderails are fixed to the back and calf part of the positioning base, i.e. their position is adjusted together with individual parts of the bed. -
Page 28: Other Parts Of The Bed
Use. Overloading or improper use could result in damage! The holders are intended exclusively for use with original accessories of PROMA REHA, s.r.o. If accessories other than original ones are used, the bed manufacturer is not responsible for any damage! 13.3 I... -
Page 29: Accessories
The infusion stand for the bed is intended only for the beds manufactured by PROMA REHA, s.r.o.! It is designed for use in the interior and its maximum load is 12 kg, the maximum load per a hook is 3 kg! -
Page 30: Accessory Holders "Eurobars
Instructions for Use of GENEO and GRANO Beds 14.3 A “E ” CCESSORY OLDERS UROBARS The bed may be provided with stainless steel accessory holders, the so-called "Eurobars", located under the pelvic part on both sides of the table. Each holder contains movable hooks determined for hanging tiny accessories and urological accessories. -
Page 31: Problems And Their Troubleshooting
Instructions for Use of GENEO and GRANO Beds ROBLEMS AND HEIR ROUBLESHOOTING 15.1 T HE BUTTONS ON THE ATIENT ONTROLLER ARE LASHING If the buttons on the patient hand controller are flashing, the lock mode is activated. To use the standard control, remove the universal plastic key from the controller, see chapter 10.3.1. -
Page 32: Error Message - The Diodes Flash On The Controller
Instructions for Use of GENEO and GRANO Beds 15.4 E – RROR ESSAGE THE DIODES FLASH ON THE CONTROLLER The bed is provided with electronics with its own diagnostics. Use a light code to determine an error and use the Instructions for Use to try to remove it. -
Page 33: Position Error
Instructions for Use of GENEO and GRANO Beds OSITION RROR If the bed diagnostics signal this error message, continue with the following steps: Stop positioning Press the buttons for more than 5 seconds. Lock LEDs start flashing. Press the "Bearing area up" button. -
Page 34: Storage
Instructions for Use of GENEO and GRANO Beds Regular maintenance and cleaning work should be carried out according to the following table: Bed part Material Daily cleaning and Full cleaning and cleaning and disinfection when disinfection disinfection patients are changing... -
Page 35: Maintenance And Service
Instructions for Use of GENEO and GRANO Beds AINTENANCE AND ERVICE As a result of disinfection and cleaning, contact surfaces may become clogged mainly in the joint connections of the bed. It is therefore necessary to check and maintain the individual parts of the bed at regular intervals:... -
Page 36: Product Disposal
Instructions for Use of GENEO and GRANO Beds RODUCT ISPOSAL The product is made of materials that are environmentally friendly. It does not contain any hazardous substances and its operational noise meets all the requirements of public health regulations against adverse effects of noise and vibrations in protected interior areas of buildings. -
Page 37: Abbreviations, Signs And Symbols Used
Instructions for Use of GENEO and GRANO Beds BBREVIATIONS IGNS AND YMBOLS The beds are marked according to the risk analysis and as given in the above-mentioned safety warnings and descriptions with informative safety pictograms. These pictograms draw attention to important places on the bed or places with increased risk. -
Page 38: Bed Manufacturing Label
Instructions for Use of GENEO and GRANO Beds 21.1 B ED MANUFACTURING LABEL 1 – manufacturer's address 2 – type 3 – serial number 4 – date of manufacture 5 – electrical specification 6 – device ID identifier 7 – UDI DataMatrix... - Page 39 Instructions for Use of GENEO and GRANO Beds Page 39/40...
- Page 40 PROMA REHA, s.r.o., Riegrova 342, CZ-55203 Česká Skalice Company ID: 63219107; Tax ID: CZ63219107, registered in the Commercial Register: held with the Regional Court in Hradec Králové, section C, entry 7945 phone: +420 491 11 22 33, fax: +420 491 54 11 85 info@promareha.cz...
Need help?
Do you have a question about the GENEO and is the answer not in the manual?
Questions and answers