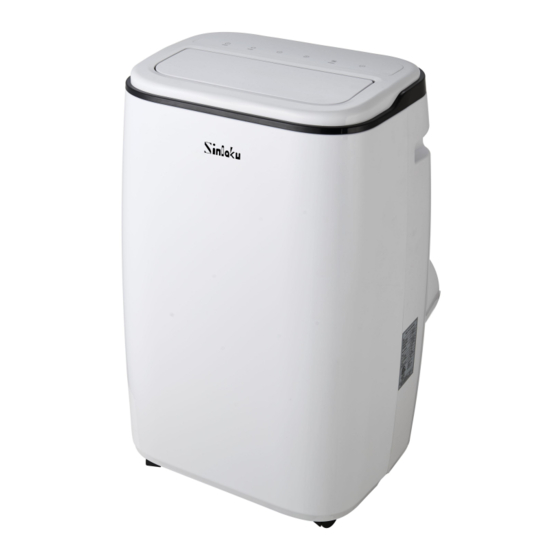
Summary of Contents for Sinlaku SLK-KY018-12KC/E
- Page 1 Portable Air-conditioner User’s Manual(R32) For Model : SLK-KY018-12KC/E SLK-KY018-14KC/E Thank you for using our product, Please read this user’s manual carefully to ensure proper use, maintenance and installation...
-
Page 2: Table Of Contents
Contents 1. Safety Awareness......................1 2. Name of Parts......................3 3. Accessories........................4 4. Appearance and Function of Control Panel............5 5. Appearance and Function of Remote Control............6 6. Operation Introduction....................7 7. Installation Explanations..................10 8. Maintenance Explanations..................15 9. Troubleshooting......................16... -
Page 3: Safety Awareness
1. Safety Awareness 1. Safety Awareness 1. The appliance is for indoor use only. 2. Do not use the unit on a socket under repairs or not installed properly 3. Do not use the unit, follow these precautions: A: Near to source of fire. B: An area where oil is likely to splash. - Page 4 13. Recycling This marking indicates that this product should not be disposed with other household wastes throughout the EU. To prevent possible harm to the environment or human health from uncontrolled waste disposal, recycle it responsibly to promote the sustainable reuse of material resources. To return your used device, please use the return and collection systems or contact the retailer where the product was purchased.
-
Page 5: Name Of Parts
2. Name of Parts 2. Name of Parts Fig.1 Louver Drainage outlet Control panel Air outlet Front panel Power cord Castor Drainage outlet Air inlet Page 3... -
Page 7: Appearance And Function Of Control Panel
4. Appearance and Function of Control Panel 4. Appearance and Function of Control Panel Cooling only model Dehumidifying Power on/off Fan speed Auto swing Temperature up Low fan speed Temperature down Medium fan speed Operation mode High fan speed Timer on/off Water full Sleep mode Cooling... -
Page 8: Appearance And Function Of Remote Control
5. Appearance and Function of Remote Control 5. Appearance and Function of Remote Control Remote Control Power on/off Timer on/off Operation MODE °C / °F selector Temperature up Temperature down LED display Auto swing Fan speed Sleep mode Receiver signal Cooling Dehumidifying Auto swing... -
Page 9: Operation Introduction
6. Operation Introduction 6. Operation Introduction Before starting operations in this section: 1) Find a place where there is power supply nearby. 2) As shown in Fig.5 and Fig.5a, install the exhaust hose, and adjust the window position well. Fig.5 Fig.5a 3) As shown in Fig. - Page 10 6.1. Before using Notice: Operation temperature range: Maximum cooling Minimum cooling DB/WB(°F) 95/75 64/54 Maximum heating Minimum heating DB/WB(°F) 80/--- 45/--- Check up whether the exhaust hose has been mounted properly. Cautions for cooling and dehumidifying operations: When using functions on cooling and dehumidifying, keep an interval of at least 3 minutes between each ON/OFF.
- Page 11 6.6 Timer operation Timer ON setting: When the air-conditioner is OFF, press the “Timer” button and select a desired ON time through the temperature and time setting buttons. “Preset ON Time” is displayed on the operation panel. ON time can be regulated at any time in 0-24 hours. Timer OFF setting When the air-conditioner ON, press “Timer”...
-
Page 12: Installation Explanations
7. Installation Explanations 7. Installation Explanations 7.1 Installation Explanations: A removal air-conditioner shall be installed in the flat and empty place all around. Don’t block the air outlet, and the required distance around should be at least 30cm. (See Fig.8) Should not be installed in wet location, such as the laundry room. - Page 13 Fig.9 Fig.10 Fig.10a Fig.11 Page 11...
- Page 14 Universal caulking kit accessory for mobile air conditioner Suitable for windows and doors Included in this kit: 1 piece of fabric 1 roll of tape gripping adhesive 1. Open the window and clean the 2. Cut large strips of adhesive doors and frame before gluing the gripping tape to the dimensions of the adhesive tape.
- Page 15 6. Your caulking kit is now installed, 5. Open the window gently and open you can now turn on and enjoy the the zipper of the fabric piece (at level coolness of your mobile air of the bottom or middle of the window) conditioner! then insert the exhaust duct into the If you no longer want to use your...
- Page 16 7.3 Water Full alarm The inner water tray inside the air-conditioner has one water level safety switches, it controls water level. When water level reaches an anticipated height, the water full indicator lamp lights up. (If water pump is damaged, when the water is full, please remove the rubber blockage at the bottom of unit, and all water will be drained outside.) Page 14...
-
Page 17: Maintenance Explanations
8. Maintenance Explanations 8. Maintenance Explanations Declaration: 1) Before cleaning, be sure to disconnect the unit from any electric supply outlet; 2) Do not use gasoline or other chemicals to clean the unit; 3) Do not wash the unit directly; 4) If the conditioner is damaged, please contact the dealer or repair shop. -
Page 18: Troubleshooting
9. Troubleshooting 9. Troubleshooting Troubles Possible Causes Suggested Remedies - Water full indicator lamp blinks, Dump the water out of the and water tank is full. water tank. - Room temperature is higher than 1.Unit does not start the setting temperature. (Electric Reset the temperature when pressing on/off heating mode)


Need help?
Do you have a question about the SLK-KY018-12KC/E and is the answer not in the manual?
Questions and answers