
Related Manuals for ARANA KAC 33


Summary of Contents for ARANA KAC 33
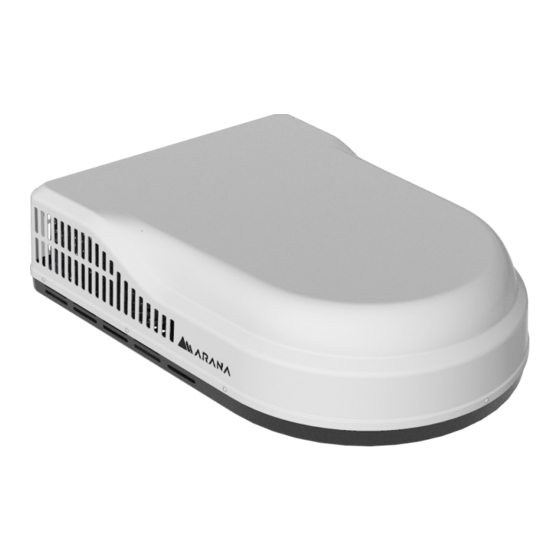
- Page 1 Make CONDITIONER Difference KAC 33/KAC 25 卓 / 尔 / 不 / 凡 顶置空调 安装和使用说明书 Roof Top Air Conditioner Installation and Operating Instructions...
-
Page 2: Table Of Contents
非常感谢您选购阿雷纳的制冷设备,在安装或使用该设备之前,请您仔细阅读此说明书。 请将说明书保存在所有用户都可以找到的地方,以便随时查阅使用。如果该设备转让或 者出售,请确保此说明书也交付给新用户,以便告知他们安装方法、使用和安全要求。 目 录 1.0 安全符号说明 2.0 安全说明 2.1 一般性安全说明 2.2 操作安全说明 3.0 预期用途 4.0 技术描述 4.1 部件名称 4.2 控制面板 4.3 遥控控制 4.4 工作模式 5.0 安装说明 5.1 选择安装位置 5.2 顶部准备工作 5.3 将顶置空调放置在车顶上 5.4 出风管和顶部安装架的安装 5.5 系统接线 6.0 初次使用 6.1 启动前的检查 6.2 检查遥控器并装入电池... -
Page 3: 安全符号说明
Make A Difference 卓 / 尔 / 不 / 凡 1.0 安全符号说明 危险! 表示潜在的危险情况,会导致死亡或重伤。 警告! 表示潜在的危险情况,会导致轻伤或重度损伤。 注意! 表示潜在的危险情况,会导致财产损害。 提示! 产品操作的补充信息。 2.0 安全说明 请遵守车辆制造商和售后服务商提到的安全说明和规定。 以下情况造成的损坏,阿雷纳不承担任何责任: 错误装配或连接。 机械影响和过电压造成产品的损坏。 未取得制造商明确许可擅自改变产品。 用于此说明书之外的用途。 2.1 一般性安全说明 警告! 该空调的安装和维修只能由熟悉风险和相关规定的专业人员进行,不当维修可能会 造成严重的危险。 该电气设备不是玩具。 请将该电气设备远离儿童或体弱者,不要让他们在没有监督的情况下使用该电气设 备。 生理、感官、精神能力受限或者缺乏知识和经验而无法安全使用该电气设备的人,... -
Page 4: 操作安全说明
在没有责任人监督或指导下不得使用该电气设备。 不要拆卸该空调的外壳,以防发生火情。如果发生火情,不要用水灭火,要使用许 可的灭火剂。 注意! 该顶置空调必须安装牢固,防止坠落。 不要在靠近易燃液体或者封闭空间内使用顶置空调。 确保通风口附近没有存放或者安装易燃物品,应至少保持 50cm 的安全距离。 切勿将手插入通风口内或者将异物塞入顶置空调内。 注意! 只能按照预期用途使用该电气设备。 该顶置空调不适合于安装在农用或者建筑车辆上。 不要对该电气设备进行任何变更或者改造。 如果制冷回路发生故障,必须由专业的公司进行正确的检查和维修。制冷剂绝对不 可以释放到空气中。 提示! 请和车辆制造商确认,在安装顶置空调后是否需要进行技术检测,以及车辆文件中 填写的车辆高度是否需要变更。 2.2 操作安全说明 警告! 必须由专业人员进行电源线的连接。 安装或维护该电气设备时,一定要切断电源。 注意! 在穿过有锋利边缘的墙壁时,请使用穿线管铺设电缆线。... -
Page 5: 预期用途
Make A Difference 卓 / 尔 / 不 / 凡 不要把松动或者弯曲的电缆放置在导电材料旁边。 只有在确定外壳和电线未损坏的情况下, 才可操作该电气设备。 3.0 预期用途 该顶置空调是专为自行式房车、拖挂式房车和其它带有生活居住空间的车辆设计。 该顶置空调不适合于安装在建筑机械、农业机械或者类似的设备上,剧烈震动会造成顶 置空调无法正常工作。 如果环境温度超过 52° C,请不要使用顶置空调,在极端温度下,顶置空调的性能会受到 影响。 提示! 可以从说明书的技术描述和操作说明中查阅到顶置空调的更多信息。 4.0 技术描述 该顶置空调向室内输送凉爽或温暖的干燥空气。 该顶置空调可以通过控制面板上的按键或者遥控器操作。 提示! 顶置空调可以将车内温度降低到一定程度。温度取决于车辆类型、环境温度以及顶 置空调的制冷能力。室外温度低于 16° C 时,顶置空调将不再制冷,只运行“送风” 模式。... -
Page 6: 部件名称
4.1 部件名称 顶置空调的制冷回路包含以下主要部件 , 详见第 25 页零部件明细表。 压缩机 压缩机将使用过的制冷剂吸入并进行压缩,这就提高了制冷剂的压力和温度。 冷凝器 内置液化器的工作原理与冷却器或热交换器类似,流经的空气吸收热量,热的制冷气 体冷却变成液体。 蒸发器 蒸发器将流经的空气进行冷凝和除湿,制冷剂吸收热量并蒸发。 风机 风机通过通风口将冷气吹入车内。 4.2 控制面板 控制面板位于顶置空调的出风口单元上。 包含以下控件和显示元素: 说明 按键 开启、关闭或者进入待机模式 按键 温度调高 温度降低 按键... -
Page 7: 遥控控制
Make A Difference 卓 / 尔 / 不 / 凡 4.3 遥控控制 通过遥控器控制顶置空调的所有设置。 遥控器可控制以下控件和显示元素: 说明 数字显示 时钟 温度设置单位(目标值)摄氏度 模式 风速等级 (* 有些功能不适用于该机型 ) 按键 将顶置空调和遥控器调至开机状态或者待机模式 按键 选择运行模式 按键 增加数值 按键 降低数值 按键 选择风量的设置... -
Page 8: 工作模式
4.4 工作模式 顶置空调包含以下工作模式: 空调模式 页面显示 说明 根据制热或者制冷的需要,顶 置空调自动将温度保持在 20℃ 自动 到 25℃之间。 指定好温度和鼓风机的设置, 制冷 顶置空调将室内温度降低至此。 指定好温度和鼓风机的设置, 制热 顶置空调将室内温度升高至此。 指定好风速等级,顶置空调将 送风 空气吹入室内。 提示 请使用符合国家规定的连接线。 在选择发电机容量时,必须考虑车辆的总用电量,以及发电机的功率会因高海拔和 缺少维护而受损这些因素。 电路保护:务必使用漏电开关。 5.0 安装说明 注意! 请在开始安装和使用该产品前,仔细阅读此安装和操作说明。 由于不遵循本说明书引起的任何损失或伤害,制造商概不承担任何责任。 安装务必遵守国家电气规程、法规或行业规范。... -
Page 9: 选择安装位置
Make A Difference 卓 / 尔 / 不 / 凡 未经阿雷纳的书面授权,该产品不得加装任何设备或附件。 该电气设备须由专业人员进行安装和维修。 5.1 选择安装位置 该顶置空调专用于安装在车顶上,在确定您的制冷需求时,应该考虑以下几点: 车辆尺寸。 车窗面积(面积越大,受热越多)。 车厢板和车顶隔热材料的厚度和保温性能。 客户使用车辆的地理位置。 通用位置:将顶置空调安装在现有车顶通风口上。 拆除通风口后,通常切割一个 362*362mm±2mm 或 400*400mm±2mm 的开口。 其他位置:当车顶没有通风口或者是有更理想的位置时,建议采取以下做法: 安装一台顶置空调时:应该安装在中心点略靠前的位置(从前头看),并处于左右 两端的中心点(见图 01.)。... - Page 10 安装两台顶置空调时:两台顶置空调应分别安装在距车辆车前端 1/3 和 2/3 的位置, 并处于两端的中心点(见图 02.)。 选择位置后: 检查该电气设备安装区是否有障碍物。 当车辆处于运动状态时,顶部须能够支撑 60Kg 的重物,通常 100Kg 的静载荷设计 可满足此要求。 检查车辆内部是否有阻碍安装顶置空调内面板的障碍物(如:门孔、隔间架、窗帘 和天花板夹具等)。空调主机及面板的外形尺寸请见图 03。 注意! 该顶置空调最好水平安装 (车辆停放在水平表面上为标准) , 最大倾斜度不可超过 5°。 设计人员应负责确保车辆结构的整体性,切勿在车顶制造会积水的低洼处,否则该 电气设备周围不流动的水可能会渗入车内,损坏电气设备和车辆。...
-
Page 11: 顶部准备工作
Make A Difference 卓 / 尔 / 不 / 凡 55mm 239mm 5.2 顶部准备工作 拆除车顶通风口: 拧开螺钉,并拆除通风口。 去除开口处的所有填隙料。 使用优质的耐候密封胶将车顶垫圈处的所有螺钉孔和接缝密封。 新开口:(非通风口的安装) 如果不打算使用现有的车顶通风口,则必须在车顶切割一个 362*362mm(±2mm) 或 400mm*400mm(±2mm)的开口,此开口必须位于车顶加强固件之间。 362*362mm(±2mm)或 400mm*400mm(±2mm)的车顶开口是安装该顶置空调所 必须的,请参考图 04 所示尺寸和位置在车顶切口。 危险! 车顶和天花板之间可能有电线,安装时请断开 220V AC 和 12V DC 电源。不遵循此 操作有触电的危险,会导致死亡或严重的人员伤害。... - Page 12 958mm 383mm 364mm 560mm...
- Page 13 Make A Difference 卓 / 尔 / 不 / 凡 开口须知: 如果开口超过 365*365mm,则有必要安装防水垫片。 如果开口小于 358*358mm,则必须扩大开口。 布线要求: 需要安装保险丝或断路器,并良好的接地。从断路器引出一条 2.5mm 的铜质电缆线到 车顶开口的前侧。 电源必须位于单独的 20Amp 延时断路器上。 确保至少有 380mm 的电线延伸到车顶开口内部,这可方便顶置空调的安装。 必须按照相关国家和地方的规定进行布线。 拆除通风口之后,如果现有电线的尺寸合适并正确安装了保险丝,则可以使用。 接入开口的电线需要加以保护避免损坏。 开口处必须有足够的支撑,并需要把车顶夹层填充满保温材料,防止夹层内有空气产 生共振。必须使用 20mm 厚或更厚的木条密封四周(见图 05.)。 362*362mm±2mm 或 400*400mm±2mm 车顶开口是回气管的组成部分,必须根据 行业标准进行抛光处理。...
-
Page 14: 将顶置空调放置在车顶上
5.3 将顶置空调放置在车顶上 注意! 该顶置空调约重 37Kg。为防止损坏顶置空调,请使用机械起重机将其吊到车顶上。 取出纸箱内的顶置空调主机。 将顶置空调放在车顶上。 以顶置空调的 EVA 方框作为基准,搬起设备,并将其放置在准备好的开口上方。冷凝 器盘管朝向房车的后方(见图 06.)。 注意! 禁止拖动顶置空调,因为会损坏底部的 EVA 衬垫,导致安装后密封不严引起漏水。 将面板组件放入车内。该组件包含顶置空调安装用的紧固件,将被用在内部(见图 07.)。... -
Page 15: 出风管和顶部安装架的安装
Make A Difference 卓 / 尔 / 不 / 凡 在安装内面板时如发现外主机位置有偏差,可在内部通过安装孔微调顶置空调主机。 5.4 出风管和顶部安装架的安装 取出纸箱内的面板和安装用的紧固件。 取出上风管,并将其固定在主机底部的冷气出口上(见图 08.)。 用 4 颗螺钉(M4 x 8mm) 将管道固定到底座的出风口处,底座底部已开有螺钉孔。 检查是否正确对齐,必要时调整顶置空调(车顶的 EVA 方框须刚好对齐 362*362mm 的方孔) 。 将顶置空调的电线从回气开口内拉下来,便于随后连接(见图 09.)。 提示! 检查车顶厚度,风管由 EPP 材料制造,上、下两件接驳,最大可以适用于 140mm 车顶厚度,可以按照需要切割。... - Page 17 Make A Difference 卓 / 尔 / 不 / 凡 用 2 颗螺钉(M5 x 12mm)将下风管固定在安装支架风口上,并将支架置于车顶开口。 将上风管插入下风管内,并轻轻往上推,使安装支架贴合在车顶开口。 用 4 根长螺栓 (M1/4 - 20 x 7.00HHW) 将支架和底盘联接起来。 通 过 紧 固 4 根 螺 栓, 压 紧 EVA 方 框, 将 EVA 压 缩 至 约 12~13mm 高 为 合 适( 见 图 10.)。...
-
Page 18: 系统接线
5.5 系统接线 危险! 请先断开主要电源,否则会产生电击危害,进而导致人员死亡或重伤! 该顶置空调有接地预留,用于防止电击危害。确保装置已连接至有可靠接地的 220V/50Hz 电路。若未能按照上述说明进行操作,则会导致人员死亡、受伤或设备 受损。 重要事项:电气安装必须由电工进行, 并遵守国家电气规程和当地的准则或规定。 6.0 初次使用 6.1 启动前的检查 在运行顶置空调之前 , 请注意以下事项 : 检查电源是否与产品上所粘贴的铭牌参数一致。 请确保进气口和送风道无堵塞。所有通风格栅必须始终保持畅通 , 以确保顶置空调能够 发挥最大的制冷性能。 注意! 请不要将手指或者物体插入送风道或进气格栅,小心受伤! 6.2 检查遥控器并装入电池 电池盒位于遥控器滑盖的下方。 轻轻向下推动滑盖,将滑盖从导向槽内滑出取下; 如电池盒中所示,装入两节 7 号电池(AAA); 将滑盖推入导向槽,向上推动并关闭。... -
Page 19: 操作说明
Make A Difference 卓 / 尔 / 不 / 凡 7.0 操作说明 7.1 基本的操作说明 顶置空调有如下三种操作模式: 操作模式 功能 关机 顶置空调处于关机状态,遥控器处于非活动状态; 顶置空调已准备好运行,可以通过控制面板 待机 或者遥控器开机; 运行 顶置空调处于工作状态。 可以通过触碰控制面板上的按键实现: 启动顶置空调或者让其进入待机状态; 调节温度的高低; 可以通过遥控器的按键实现: 启动顶置空调或者让其进入待机状态; 对设置进行调整。 7.2 遥控器的使用说明 在操作过程中,遥控器需要指向控制面板上的红外接收器。 按下按钮时,设置的数值将直接传输给顶置空调。顶置空调通过发出蜂鸣声确认收到 了数据。... - Page 20 自动运行 按电源开关键“ ”,将空调器切换为开启状 态,空调器记忆上次关机前运行模式运行; 按运行模式键“ ”,将空调器切换到自动运 行模式 , 空调器以自动运行模式运行; 通过判断室内环境温度自动选择运行模式 ( 制冷、 制热、送风 )。初次温度设定值为 25℃ , 通过温 度设定键“+”或“-”可以实现对温度设定值递 增或递减 1-2 度。 按风速选择键“ ”,调节风速,有高 / 中 / 低 / 自动四个风速可选。选择自动风“ ”时, 通过环境温度与设定温度自动调节风速; 按电源开关键 “ ” , 将空调器切换为关闭状态, 空调器停止工作,下次按电源开关键“ ”, 空调器将以本次记忆模式运行。 制冷运行 按电源开关键“...
- Page 21 Make A Difference 卓 / 尔 / 不 / 凡 制热运行 按电源开关键“ ”,将空调器切换为开启状 态,空调器记忆上次关机前运行模式运行; 按运行模式键“ ”,将空调器切换到制热 “ ” 运行模式 , 空调器以制热运行模式运行; 按温度设定键“+”或“-”,设定所需温度; 按风速选择键“ ”,调节风速,有高 / 中 / 低 / 自动四个风速可选。选择自动风“ ”时, 通过环境温度与设定温度自动调节风速; 按电源开关键 “ ” , 将空调器切换为关闭状态, 空调器停止工作,下次按电源开关键“ ”, 空调器将以本次记忆模式运行。 送风运行...
-
Page 22: 清洁与维护
8.0 清洁与维护 警告! 该处所述的任何维护工作只能由专业人员完成,因为他们了解处理制冷剂和顶置空 调以及相关规定事项时可能出现的风险。 注意!预防伤害 不要使用高压水枪清理顶置空调。用水冲洗会造成顶置空调损坏。 不要使用锋利或者坚硬的东西或者清洁剂清理,否则会造成顶置空调损坏。 清理顶置空调时,在清水中加入柔和的清洁剂,切勿使用汽油、柴油或者溶剂。 清洁顶置空调 用湿布清理顶置空调的外壳和通风口单元。 定期清除顶置空调通风网栅上的落叶和其它污物,清理过程中请注意不要损坏网栅。 定期取下回风面罩后面的空气过滤网,用温水清洗,风干后重新装好。 用微湿布擦拭遥控器,我们建议使用眼镜清洁布来清洁显示屏。 维护顶置空调 定期检查冷凝水的排放通道是否通畅,冷凝水是否能够排出。 每年检查一次顶置空调与车顶的密封处是否有裂痕和其它损坏。 9.0 故障排除 如果顶置空调不能正常运行,请做以下检查排除故障: 检查顶置空调的保险丝或车辆漏电开关是否打开。 如果使用发电机供电启动顶置空调,请先确认发电机输出功率与顶置空调是否匹配, 发电机是否正常运行并发电,以及电压输出是否稳定。... - Page 23 Make A Difference 卓 / 尔 / 不 / 凡 如果与市电相连,请确认电源线规格是否与顶置空调的运行载荷相匹配,再检查市电 电压是否达标(顶置空调运行电压 220V)。 完成上述检查后顶置空调依然无法正常运行,请联系供应商寻求进一步的帮助。该电 气设备须由专业人员进行维修。 故障代码 故障 解决办法 请检查连接是否松动;如果不是,请更换传感器。 室内温度传感器故障 请检查四个出风口是否打开(至少应打开两个)。 室内盘管温度传感器 请检查与电路板的连接是否松动;或检查传感器上 故障 的铜探头是否掉出;如果不是,请更换传感器。 1、请检查压缩机是否运行(线路连接良好的情况 制冷系统不良(制冷 下)。 剂不足、风量不足或 2、检查通风面板安装是否正确,保证通风正常。 室外出风口堵塞) 3、如有气体泄漏,请及时维修。 1、请检查压缩机是否运行(线路连接良好的情况 制热系统不良(制冷 下)。 剂不足) 2、检查通风面板安装是否正确,保证通风正常。 3、如有气体泄漏,请及时维修。 1、请检查过滤网是否干净。如有需要,请清洗。 2、 请检查空调是否在低于 18 度的室外温度下运行; 建议开窗透气,不用开启制冷模式。...
-
Page 24: 技术参数
10.0 技术参数 顶置空调型号 KAC 33 KAC 25 顶置空调类型 单冷电热型 热泵型 控制类型 无线遥控 额定制冷量 3180W 2500W 额定制冷功率 1460W 1060W 额定制热量 2000W 2500W 额定制热功率 2070W 990W (电加热) 电源 220V-240V 50Hz 运行电流 (制冷) 6.8A 4.8A 运行电流 (制热) 9.1A 4.5A 启动电源 (压缩机) 制冷剂 R410a 制冷剂数量... -
Page 25: 电路接线图
Make A Difference 卓 / 尔 / 不 / 凡 11.0 电路接线图 KAC 33 接线图... - Page 26 KAC 25 接线图...
-
Page 27: 零部件明细表
Make A Difference 卓 / 尔 / 不 / 凡 12.0 零部件明细表 外壳 上泡沫 外风机组件 内风机 外风机 内风机安装板 冷凝器固定板 风轮 冷凝器 蒸发器 外风机安装板 电控盒 压缩机 下泡沫 底板... - Page 28 底板 上风管 下风管 面板固定板 百叶 显示板 面板 回风面罩...
-
Page 29: 质量保证
Make A Difference 卓 / 尔 / 不 / 凡 13.0 质量保证 该顶置空调适用法律规定的保修条款和条件, 如果产品出现故障, 请与最近的经销商联系。 维修该顶置空调,请准备好如下文件: 注明购买日期的发票复印件。 故障的描述或索赔原因。 但是产品的保修将不覆盖如下情况: 在消费者使用产品时所发生的损坏、事故等,而这些损坏不是由于产品材料的缺陷或 制造原因导致的。 消费者未按照说明书规定进行的误操作而导致的损坏。 整机外观破损,包括磨损导致的外观损坏。 未经制造商授权的维修、更改。... - Page 30 Thanks for choosing ARANA air conditioning devices. Please read the instructions carefully before installation or first use of the device and store it in a place where all users could find it for easy reference. If the device is transferred or sold, please hand over the instructions along with it so that the new user is aware of installation methods, usage and safety requirements.
-
Page 31: Explanation Of Symbols
Please observe the prescribed safety instructions and stipulations from the vehicle manufacturer and service workshops. ARANA accepts no liability for damage in the following cases: Faulty assembly or connection Damage to the product resulting from mechanical influences and excess voltage... - Page 32 Persons whose physical, sensory or mental capabilities or whose lack of experience and knowledge prevent them from using electrical devices safely should not use it without supervision or instruction by a responsible person. Do not undo the upper cover of the roof air conditioner in the event of a fire. Use approved extinguishing agents instead.
-
Page 33: Operating The Device Safely
Make A Difference 卓 / 尔 / 不 / 凡 2.2 Operating the device safely WARNING! The electrical power supply may only be connected by a qualified electrician. Always disconnect the power supply when working on the electrical device. ATTENTION! Use cable ducts to lay cables through walls with sharp edges. -
Page 34: Technical Description
4.0 Technical description The roof air conditioner supplies the interior with cool or warm dehumidified air without dust and dirt. The roof air conditioner is operated with the button on control panel and the remote control. NOTE! The roof air conditioner can lower the temperature within the vehicle to a certain level. -
Page 35: Control Panel
Make A Difference 卓 / 尔 / 不 / 凡 4.2 Control panel The control panel is at the air outlet unit of the roof air conditioner. It contains the following control and display elements: Explanation Switches the roof air conditioner on, Button off or to stand-by mode Button... - Page 36 Explanation Digital display Timer Set temperature (target value) in ° C Mode Fan level (*Some functions are not available for this model.) Button Switches the roof air conditioner and remote control on or to stand-by mode Button Selects the mode Button Increases the value Button...
-
Page 37: Air Conditioning Modes
Make A Difference 卓 / 尔 / 不 / 凡 4.4 Air conditioning modes The roof air conditioner has the following air conditioning modes: Mode Display message Explanation The roof air conditioner automatically maintains the temperature between 20 ° C and Automatic 25 °... -
Page 38: Installation Instructions
Installation must comply with the national and local codes and/or regulations. DO NOT add any devices or accessories to the roof air conditioner except those specifically authorized in writing by ARANA. This equipment must be serviced by qualified personnel and some states require these people to be licensed. - Page 39 Make A Difference 卓 / 尔 / 不 / 凡 For two units installation: Install one roof air conditioner 1/3 and the other 2/3 from front of vehicle and centered from side to side. See FIG.02.
- Page 40 After location has been selected: Check for obstructions in the area where roof air conditioner will be installed. The roof must be designed to support 60KG when the vehicle is in motion. Normally a 100KG static load design will meet this requirement. Check inside the vehicle for air distribution box obstructions(i.e.
-
Page 41: Roof Preparation
Make A Difference 卓 / 尔 / 不 / 凡 5.2 Roof preparation Roof vent removal: Unscrew and remove the roof vent. Remove all caulking compound around opening. Seal all screw holes and seams where the roof gasket will be located. Use a good grade of all weather sealer. - Page 42 roof air conditioner attachment. Wiring methods must comply with all national and local wiring codes and/or regulations. If vent fan was removed, the existing wire may be used provided it is of proper size and correctly fused. The entry wires to the opening need more protection to avoid damage. 958mm 383mm 364mm...
-
Page 43: Placing The Roof Air Conditioner On The Roof
Make A Difference 卓 / 尔 / 不 / 凡 The opening must be framed to provide adequate support and prevent air from being drawn from the roof cavity. Framing stock 20mm or more in thickness must be used. Remember to provide an entrance hole for the power supply wire. See FIG.05. MIN 20MM FRAME OPENING PROVIDE HOLE... - Page 44 LIFT AND PLACE FRONT DO NOT SLIDE ATTENTION! Do not slide the unit. This may damage the EVA gasket attached to the bottom and create a leaky installation. Place the air distribution box kit inside the vehicle. This unit contains mounting hardware for the roof air conditioner and will be used inside the vehicle.
-
Page 45: Installing Discharge Duct And Mounting Bracket
Make A Difference 卓 / 尔 / 不 / 凡 This completes the outside work. Minor adjustments can be done from the inside of the vehicle if required. 5.4 Installing discharge duct and mounting bracket Taking out air distribution box and mounting hardware from carton. Taking out the upper air duct and locate it over blower discharge. - Page 46 CENTER UNIT FROM BELOW PCB LEAD POWER CABLE MEASURE CEILING THICKNESS Fix the lower air duct to the outlet of the mounting bracket with 2 screws (M5x 12mm) and place the bracket on the roof opening. Insert the upper air duct into the lower air duct directly and gently push it up to make the mounting bracket close to the roof opening.
-
Page 47: Wiring The System
Make A Difference 卓 / 尔 / 不 / 凡 EVA GASKET UPPER AIR DUCT LOWER AIR DUCT MOUNTING BRACKET LONG BOLTS PANEL RETURN AIR GRILLE 5.5 Wiring the system DANGER! Disconnect 220V AC. Failure to follow these instructions could create a shock hazard causing death or severe personal injury! This product is equipped with a 3 wires (grounded) system for protection against shock hazard. -
Page 48: Checking Remote Control And Insert Batteries
Ensure both the air intake opening and the air nozzles are free. All ventilation grilles must always be kept free to ensure that the roof air conditioner is able to operate at maximum capacity. ATTENTION! Do not insert your fingers or objects into the air nozzles or the intake grille. Beware of injury! 6.2 Checking remote control and insert batteries The battery compartment is located below the sliding lid of the remote control. -
Page 49: Operating Remote Control
Make A Difference 卓 / 尔 / 不 / 凡 You can touch the control panel to switch the roof air conditioner on or to stand-by mode. adjust the temperature up or down. You can use the remote control to switch the roof air conditioner on or stand-by mode. - Page 50 Cooling Operation Pressing power button " ", switching the roof air conditioner on, it remembers the operating mode before powering off last time. Pressing operating mode key " ", switching the roof air conditioner to cooling " " operating mode, it operates in cooling mode.
-
Page 51: Cleaning And Maintenance
Make A Difference 卓 / 尔 / 不 / 凡 Ventilation Operation Pressing power button " ", switching the roof air conditioner on, it remembers the operating mode before powering off last time. Pressing operating mode key " ", switching the roof air conditioner to air supplying "... -
Page 52: Troubleshooting
Cleaning the roof air conditioner Clean the housing of the roof air conditioner and the air outlet unit occasionally with a damp cloth. Regularly remove leaves and other dirt from the ventilation grilles of the roof air conditioner. Make sure you do not damage the grilles in the process. Regularly clean the filter of the air return grille with warm water, and reinstall it after drying. - Page 53 Make A Difference 卓 / 尔 / 不 / 凡 Error Code Problem Solution Check if the connection loosing; if not, replace the Room temperature sensor. Check if 4-air outlet are open(at least 2 should sensor malfunction be open). Indoor coil Check if the connection to PCB loosing;...
-
Page 54: Technical Data
10.0 Technical data Model KAC 33 KAC 25 Type Electric auxiliary heating Heat pump Control type Remote control Compressor 3180W 2500W cooling capacity Input power 1460W 1060W cooling Heating capacity 2000W 2500W Input power 2070W 990W Electric heater Rated input... -
Page 55: Wiring Diagram
Make A Difference 卓 / 尔 / 不 / 凡 11.0 Wiring diagram KAC 33... - Page 56 KAC 25...
-
Page 57: Parts List
Make A Difference 卓 / 尔 / 不 / 凡 12.0 Parts list Housing Upper foam External fan kit Internal fan External fan Installation plate of internal fan Fixing plate of condenser Wind wheel Condenser Evaporator Installation plate of external fan Electric control box Compressor Lower foam... - Page 58 Base pan Lower air duct Upper air duct Mounting bracket Louver Display board Panel Return air grille...
-
Page 59: Warranty
Make A Difference 卓 / 尔 / 不 / 凡 13.0 Warranty The statutory warranty period applies. If the product is defective, please contact the nearest supplier in your location. For repair and guarantee processing, please prepare the following documents: A copy of the invoice with purchasing date. - Page 60 All rights reserved. ARANA TECH (Shenzhen) Co., Ltd. reserves the right to modify at any time without notice, prices, materials, specifications and models or to cease production of any model. 版权所有,侵权必究 阿雷纳科技(深圳)有限公司 保留随时修改价格、材料、规格和型号的权利 或停止任何产品型号的生产 , 恕不另行通知 www.arana.com.cn 服务热线 : 400 110 1890...
Need help?
Do you have a question about the KAC 33 and is the answer not in the manual?
Questions and answers